If you want to put a border around the image in Photoshop, this step-by-step guide will be helpful for you. You do not need expert knowledge to complete this basic task in whatever version of Photoshop you are using. You are good to go as long as you have a copy of Photoshop installed on your computer.
Let’s assume that you have created a collage and want to add a white border before printing or framing it. A border makes a lot of difference as it makes things more professional and catchier. If you already have Photoshop on your computer, you do not need to search for an online tool or another desktop software.
Important note: We have included screenshots of Photoshop’s latest version. However, if you are using an older version, you can still use the same functionalities.
The second important thing is a border will make the image slightly bigger. For example, if you have an image of 600×300 pixels and add a border of 2 pixels, the final image will be 604×304 pixels. Therefore, if you want to make an image of 600×300 pixels with borders, make the original image in a resolution of 596×296 pixels.
Put border or frame around Photo in Photoshop
To add border around an image in Photoshop, follow these steps-
- Open Photoshop on your computer and open the image.
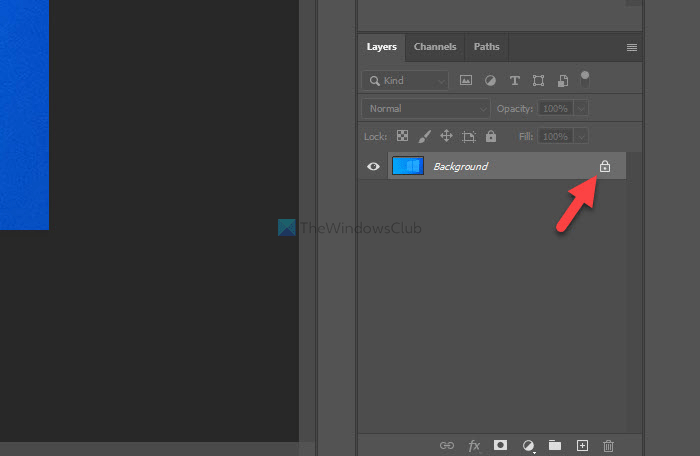
- Click the lock icon to unlock the layer.
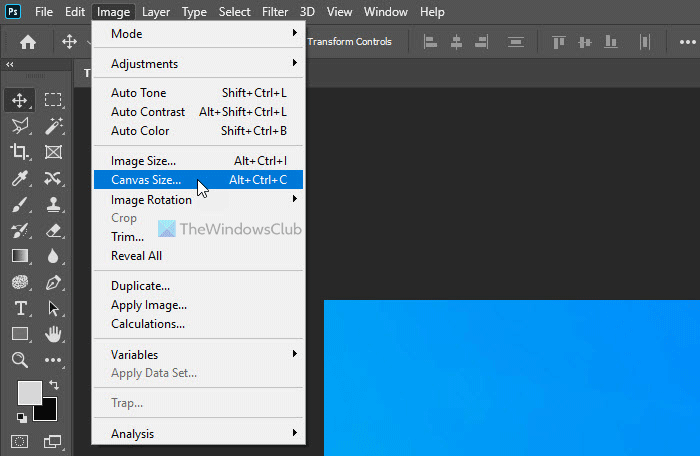
- Go to Image > Canvas Size.
- Tick the Relative checkbox.
- Enter the border height and width.
- Click the OK button.
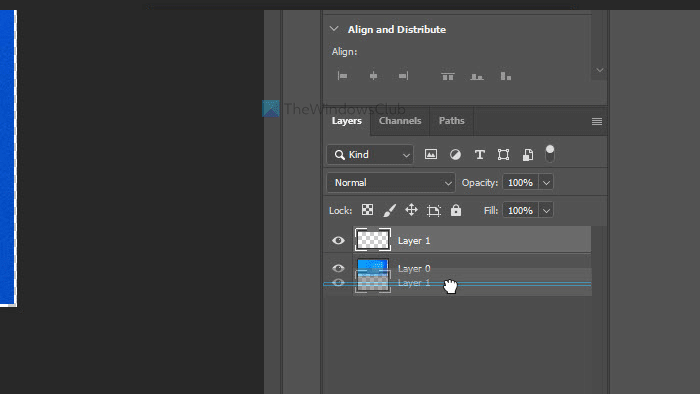
- Press Ctrl+Shift+N to create a new blank layer.
- Place it under the original image.
- Select the blank layer and press Shift+F5.
- Expand the Contents list and choose the Color option.
- Select a color and click the OK button.
- Export the image from Photoshop with a border.
Let’s check out these steps in detail.
At first, you have to open Photoshop on your computer and open the image in it. By default, the image might be locked from making a few kinds of changes. You need to click the respective lock icon to unlock it.
As we are going to use the Canvas Size option, you need to open this tool. For that, you can go to Image > Canvas Size or press Ctrl+Alt+C.
It opens a window where you need to do a few things- check the Relative checkbox, choose a measuring unit, enter border width and height.
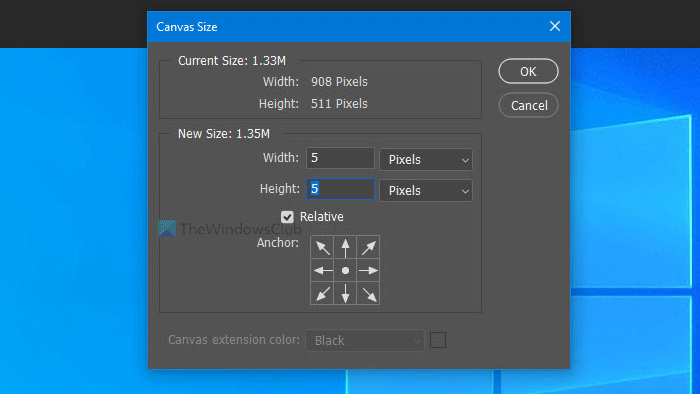
At last, click the OK button. It creates a transparent border around your image. You need to add a transparent layer in the background of the original image and paint it with a solid color, texture, or another image.
Read: How to create Carousels in Photoshop.
For that, press Ctrl+Shift+N to create a new blank layer and place it under the original image.
Now, select the new blank layer and press Shift+F5. In case you don’t know, this shortcut lets you fill the entire layer with a solid color as per your selection. After getting the Fill window, expand the Contents drop-down list, and select Color from the menu.
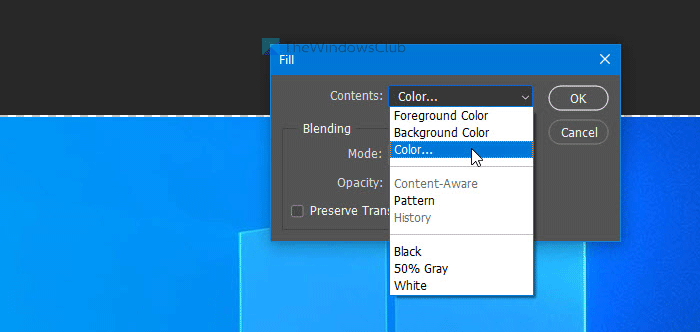
You can also select Foreground Color or Background Color option if you already have a color selected and placed as either Foreground Color or Background Color. However, if you choose the Color option, you need to select a color manually.
After selection, if you click the OK button, you can find the colored border around your image.
It is also possible to add texture or another image as a border. For that, you do not need to create the blank layer mentioned in step 7. Instead, you can directly open and place the texture image in the background of the original image.
Finally, you need to export the image using Photoshop. For that, you can use the traditional option or press Ctrl+Alt+Shift+S.
That’s all! I hope this simple guide helps.