This post explains how to add fonts to Squarespace & change fonts on your Squarespace website. Squarespace offers an extensive collection of fonts, including around 600 Google fonts and 1000 Adobe fonts. But if your existing brand fonts or other fonts you prefer are not available in Squarespace’s Style Editor, you can install a custom font.
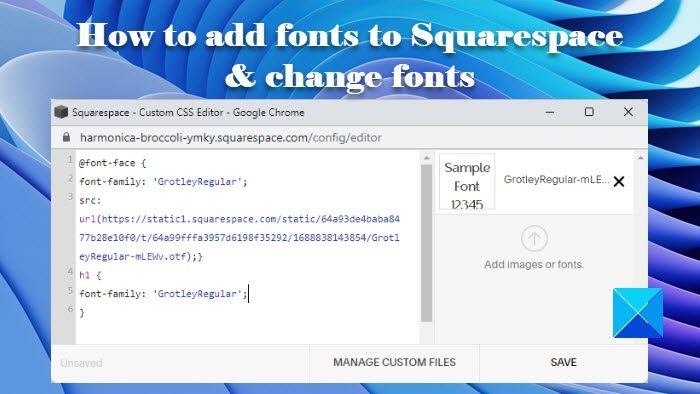
By uploading and using custom fonts in Squarespace, you can add a specific aesthetic appeal to your website and enhance its overall look and feel. In this post, we will guide you through the process of adding and changing custom fonts in Squarespace.
How to add fonts to Squarespace & change fonts
Implementing custom fonts means you can upload your own font files and apply them to specific headings or body text on your Squarespace website. You can also further stylize your custom fonts using CSS code and take your website to the next level.
To add fonts to Squarespace & change fonts, follow these steps:
- Upload your custom font
- Add the font to CSS code
- Apply the font to specific headings and body text
Let us see these in detail.
1] Upload your custom font
First of all, have your custom font file ready. You may download the desired font from a fonts download website or use an online tool to create your own true type fonts.
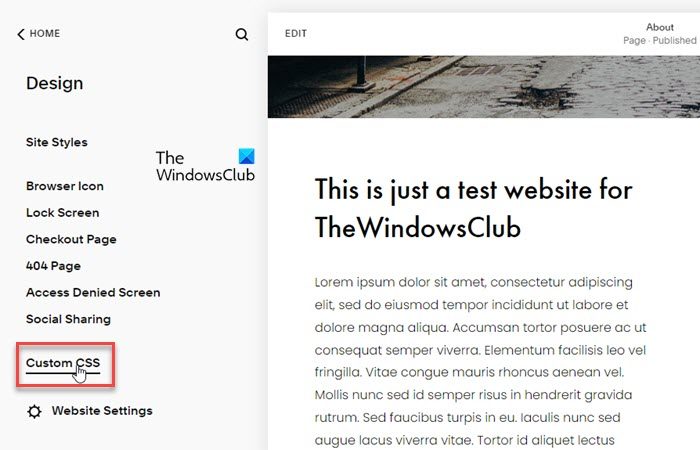
Once you have the font file ready in .ttf, .otf, or .woff format, log in to your Squarespace account and click on the Design option in your website’s dashboard. Then select Custom CSS.
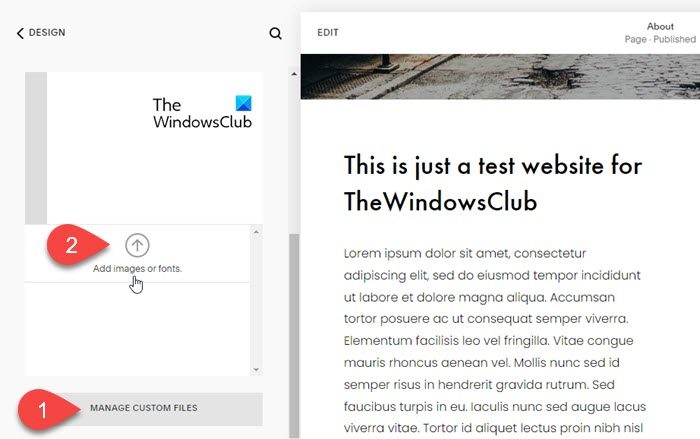
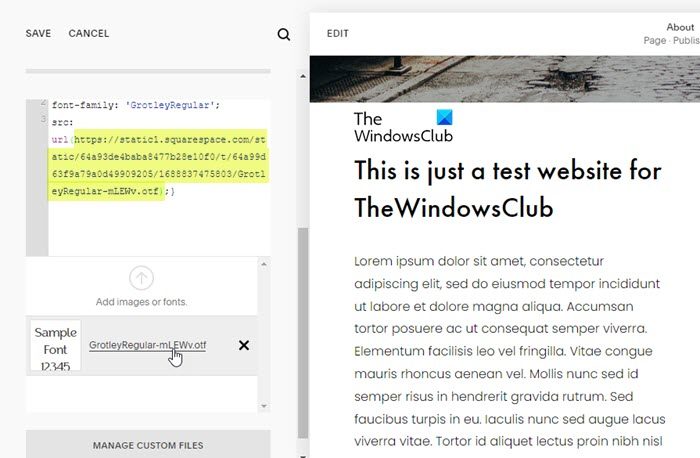
Scroll down to the bottom of the Custom CSS panel and click on the button that says Manage Custom Files. Then click on Add images or fonts option. Browse and select the font file from your system and allow Squarespace to upload the font.
2] Add the font to CSS code
To add the font to your website, you need to add it to the CSS code.
Type the following code in the code editor of the Custom CSS panel:
@font-face {
font-family: 'FontName';
src: url();}
Here, replace FontName with the name of your custom font.
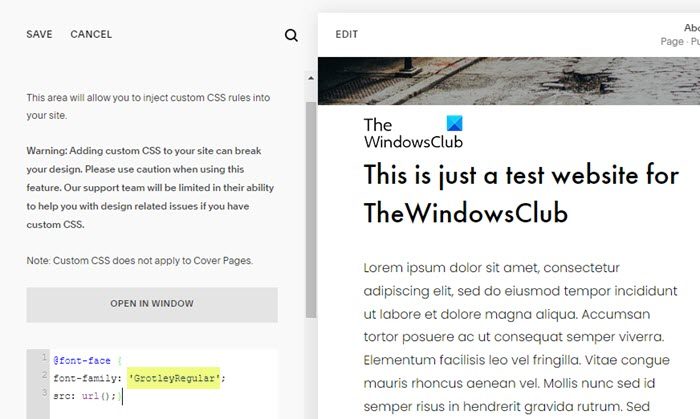
Next, place your cursor in between the parentheses () and click on the font link in the Manage Custom Files popup. The URL of the font will automatically be added between the parentheses.
3] Apply the font to specific headings and body text
Based on the Squarespace version you’re using, you may choose which headings or paragraphs you want your custom font to apply to. Squarespace 7.0 supports four different headings/paragraph styles (h1, h2, h3, p) while Squarespace 7.1 supports seven different headings/paragraph styles (h1, h2, h3, h4, .sqsrte-large (p1), p (p2), .sqsrte-small (p3)).
Once you decide where to apply your custom font, use (type) the appropriate parts from the following code snippet in the CSS code editor:
h1 {
font-family: 'FontName';
}
h2 {
font-family: 'FontName';
}
h3 {
font-family: 'FontName';
}
h4 {
font-family: 'FontName';
}
.sqsrte-large {
font-family: 'FontName';
}
p {
font-family: 'FontName';
}
.sqsrte-small {
font-family: 'FontName';
}
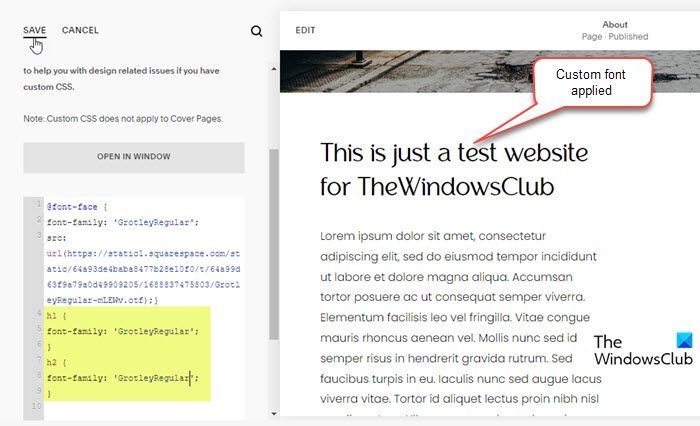
Replace FontName with the name of your custom font and click on the Save button to apply changes to your Squarespace website.
That’s all! I hope you find this useful.
Also Read: Best Website Builders that make Website Development easy.
Is Squarespace fully customizable?
Yes, Squarespace is fully customizable. While most of the design challenges can be solved using its built-in style options, you may use CSS code to further customize your Squarespace website the way you want. If you don’t have adequate coding knowledge, you can visit the Squarespace Forum, join Squarespace Circle, or hire a Squarespace Expert.
Can I use my own font on Squarespace?
You can use custom fonts, including fonts you create on your own, in Squarespace. The option to upload custom fonts is available in your Squarespace account dashboard. Once the font is uploaded, you can add it to your website using CSS code. Once added, the font can be applied to selected headings or paragraphs.
Read Next: Best free Online Logo Maker and Logo Creating services.
Leave a Reply