In this post, we will show you how to add headers or footers in Google Sheets. If you want to add some information to the top and bottom of each sheet in your Google Sheets spreadsheet, you can use headers and footers.
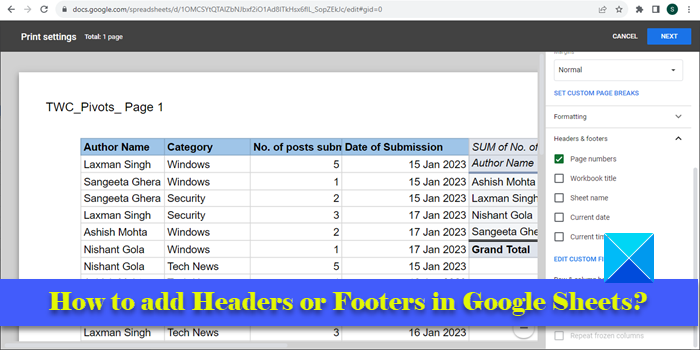
Unlike other spreadsheet software, Google Sheets doesn’t show the header/footer options in the Spreadsheets Editor window. To access these options, you need to enter the Print Settings page. In this article, we will show you how to insert headers or footers to each sheet in a Google Sheets spreadsheet. We will also show you how to repeat the row or column headers while printing a multi-page spreadsheet document.
How to add Headers or Footers in Google Sheets?
To add headers or footers in Google Sheets, you need to follow these steps:
- Open the desired spreadsheet in Google Sheets.
- Go to Print Settings.
- Insert Headers and/or Footers.
Now before we dive deep into these steps, it is important to note that headers or footers in Google Sheets are primarily for printing purposes. You should only use them when you decide to print the spreadsheet. If you’re going to share the spreadsheet with your colleagues, you can use workarounds, such as using the first and the last row to add header/footer information or using textboxes to insert header/footer in Google Sheets.
Back to how to add a header/footer via print settings, let’s take a detailed look at the above steps.
1] Open the desired spreadsheet in Google Sheets
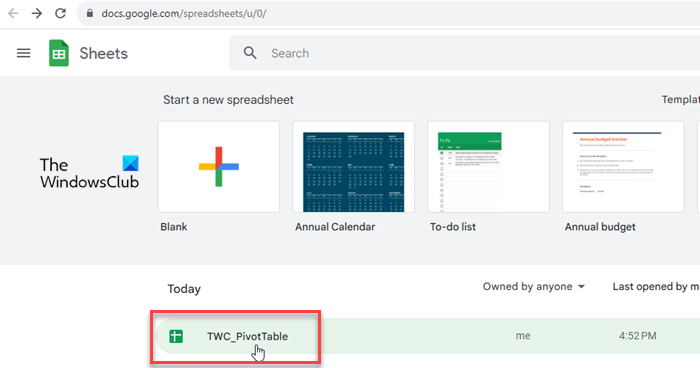
Launch your favorite web browser. Open a new tab and go to www.google.com/sheets. Select the spreadsheet that contains your data.
2] Go to Print Settings
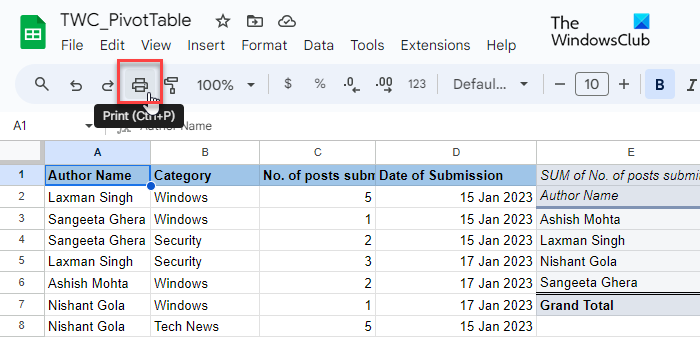
Click on the File menu at the top and select the Print option (scroll down to the last option in the menu). You can also click on the Printer icon in the tools menu or press the Ctrl+P hotkey. You will see the Print settings screen.
3] Insert Headers and/or Footers
Look for the Headers & Footers option at the bottom of the right panel. Click on the down arrow button to expand the section.
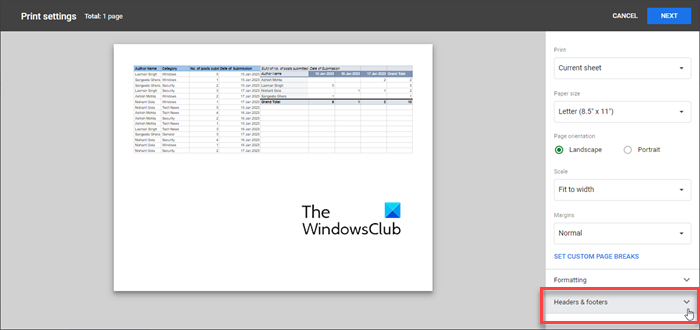
You can choose to apply a predefined header/footer (page numbers, workbook title, sheet name, current date, and current time), or use custom fields to add desired information in the header and footer sections.
A] Insert predefined Header/Footer
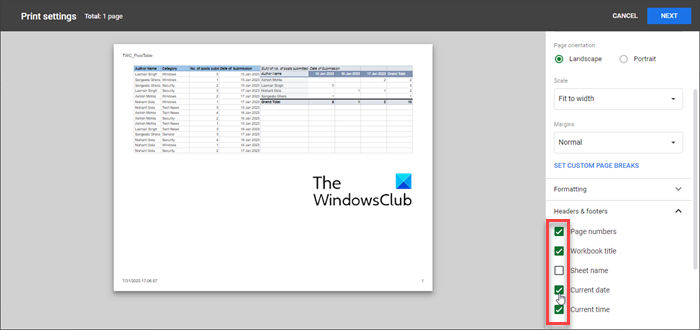
To select a predefined header or footer, simply tick the checkbox in front of its name. As you tick the checkboxes, the header/footer information will be displayed in real time in the print preview of your spreadsheet.
B] Insert custom Header/Footer
To insert additional information such as the name of your company, a confidentiality notice, or copyright text, click on the EDIT CUSTOM FIELDS option.
You will be taken to a spreadsheet template that consists of 6 different placeholders for adding document information. Click on the desired placeholder to edit its value. A toolbar will appear. This toolbar helps you use predefined header/footer text within your custom document information.
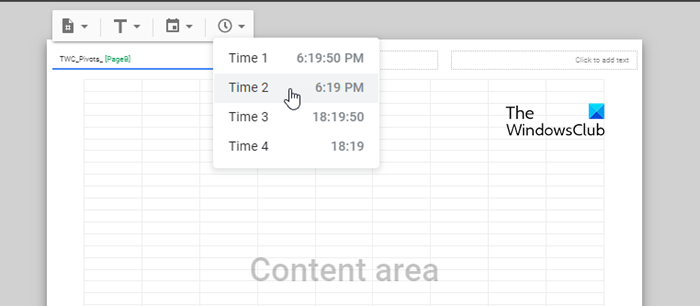
For example, you can insert page numbers in various formats (1/ Page 1/ Pg 1) in between or on either side of your document information. Once you’re done, click on the CONFIRM button in the top-right corner. The custom header/footer field will appear in the print preview of your spreadsheet. You may then click on the NEXT button (in the top-right corner) to continue printing the spreadsheet document.
c] Insert Row or Column Headers on each page of the spreadsheet
If you want to print row or column headers on each page of the spreadsheet, you can ‘Freeze, those headers from within the spreadsheet editor window and then insert them in the document preview via the Print settings page. Here’s how:
Open the spreadsheet in the Google Sheets editor window and click on View > Freeze > 1 row.
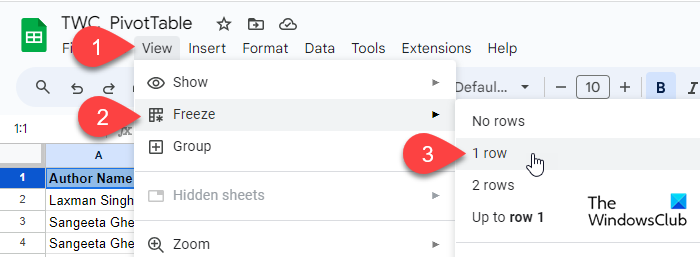
A thick grey bottom border will appear beneath the row confirming that it has been frozen. Once frozen, the row will not move from its place when you scroll down or up through the spreadsheet.
Now open the Print settings page, expand the Headers & footers section, and select the Repeat frozen rows checkbox under the Row & column headers section.
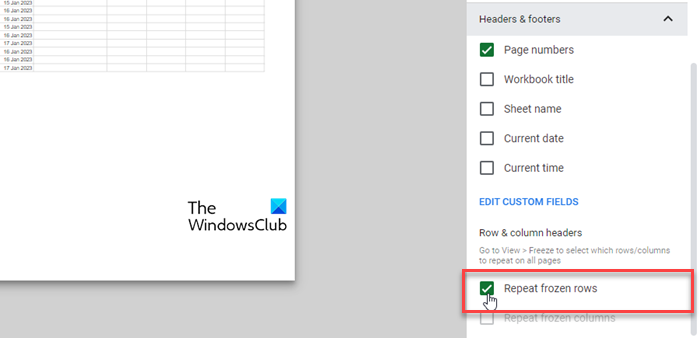
Click on the NEXT button to proceed further. Row headers will now appear on each page of the spreadsheet when you take a print of it.
That’s it! I hope you find this useful.
Also Read: How to add Header and Footer in Excel spreadsheet.
How do I put a header on Google Sheets?
Click on the Insert menu and select the Drawing option. Select the Textbox tool and draw a textbox on the drawing canvas. Add header information within the textbox and click on the ‘Save and Close’ button. The textbox will appear on the spreadsheet. Use your mouse to drag and drop the textbox at the desired header location.
Is there a footer in Google Sheets?
Yes, Google Sheets lets you add a footer to a spreadsheet document when you decide to print it. The option is available at the bottom of the Print settings options. You may choose to add a custom footer or use a predefined footer to save time and effort.
Read Next: How to insert Headers and Footers on specific pages in Word.
Leave a Reply