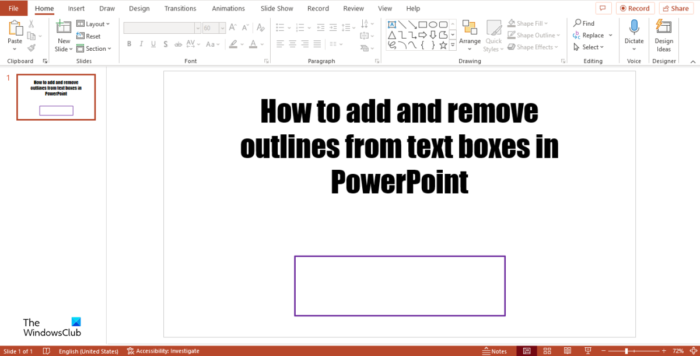
In Microsoft Office, a text box is an object that allows users to add text to their document or slide; it also moves the text anywhere in the document. Persons can also add color and outlines to their text boxes. In this tutorial, we will explain how to add and remove outlines from text boxes in Microsoft PowerPoint.

How to add or remove Border from Text Box in PowerPoint
Follow the steps below to add and remove Borders or Outlines from Text Boxes or around Paragraphs in Microsoft PowerPoint.
- Launch Microsoft PowerPoint.
- Click the Shape Format tab.
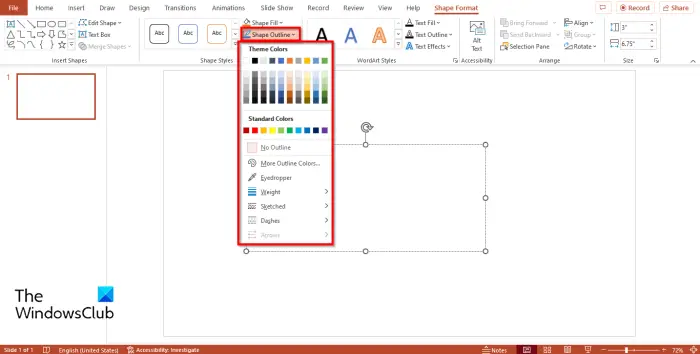
- Click the Shape Outline button.
- In the Shape Outline menu, select an Outline.
- To remove the Outline, click the Shape Outline button, then select No Fill from the menu.
- The outline for the text box is removed.
Launch Microsoft PowerPoint.
Then insert a text box into your slide.
A Shape Format tab will appear on your menu bar; click on it.

Then click the Shape Outline button in the Shape Styles group.
In the Shape Outline menu, there is various option in the menu that you can choose from:
- Add Color: You can add colors to the outline of the text box by selecting a color; if you want to see more colors, click More colors. In the More Color dialog box, you can choose either Standard colors or Custom colors, choose your options, then click OK.
- Eyedropper: You can also use Eyedropper; this feature enables users to select an outline color by clicking on the screen. This is how it works. Click the Shape Fill button and select a color. Then click the Shape Outline button and select Eyedropper. You will see an eyedropper icon. Click on the color in the textbox. Then click Shape Fill again and select No Fill. You will notice that the color of the text box outline is the same as the color you have filled the text box with previously.
- Weight: You can also make your text box outline thick by selecting the weight option in the Shape Outline menu.
- Sketched: If the Sketch option is selected, the outline of your text box will look like a drawing.
- Dashes: If the Dashes option is selected, the outline of your textbox will look like a dash. You have a variety of dashes you can choose from.
- Arrows: The Arrows option cannot work with text boxes; it only can work with arrow shapes; you will notice that it is greyed out in the Shape Outline menu.
To remove Shape Outline. Select the text box, click the Shape Format tab, select the Shape Outline button and select No Outline.
You will notice that the Shape Outline for the text box is removed.
READ: How to split a Shape into Parts in PowerPoint
Where can I find text boxes in PowerPoint?
To find the text box feature in PowerPoint, follow the steps below:
- Click Insert and select the Text box button in the Text group.
- Then draw the text box on the slide.
How do you edit a text box in PowerPoint?
To edit the text into the text box, follow these steps: Click on the text box and enter your text. You can also change the Font, Size, Color, and Alignment of the text in the text box.
How do you insert a textbox in PowerPoint 2007?
Adding text to the text box on the PowerPoint slide is similar to Microsoft PowerPoint 365. Click Insert and select the Text box button in the Text group. Then draw the textbox in the slide.
READ: How to create PowerPoint slides from an Outline
We hope this tutorial helps you understand how to add and remove text boxes in Microsoft PowerPoint.
Leave a Reply