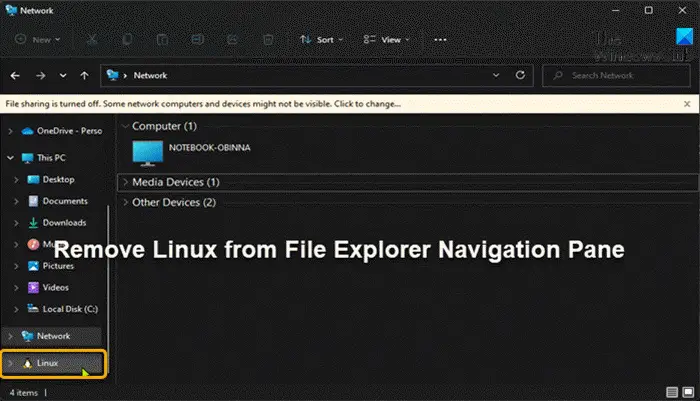
When you install WSL (Windows Subsystem for Linux) on your Windows 11 or Windows 10 computer, for easier access to the file systems of your installed distros, a Linux entry is added to the File Explorer navigation pane. In this post, we will show you how to add or remove Linux from File Explorer Navigation Pane in Windows 11/10.

The Windows Subsystem for Linux gives developers the capability to run a GNU/Linux environment directly on the Windows OS unmodified with most command-line tools, utilities, and applications – without the overhead of a traditional virtual machine or Windows and Linux dual-boot setup. PC users can set Linux Distribution version to WSL1 or WSL2 in Windows 11/10.
Add or Remove Linux from Explorer Navigation Pane
PC users can remove Linux from the navigation pane of File Explorer without having to uninstall WSL. Since this is a registry operation, it is recommended that you back up the registry or create a system restore point as necessary precautionary measures.
To add Linux to File Explorer Navigation Pane in Windows 11/10, do the following:
- Press Windows key + R to invoke the Run dialog.
- In the Run dialog box, type notepad and hit Enter to open Notepad.
- Copy and paste the code below into the text editor.
Windows Registry Editor Version 5.00

[HKEY_CURRENT_USER\Software\Classes\CLSID\{B2B4A4D1-2754-4140-A2EB-9A76D9D7CDC6}]
"System.IsPinnedToNameSpaceTree"=-
- Now, click the File option from the menu and select Save As button.
- Choose a location (preferably desktop) where you want to save the file.
- Enter a name with .reg extension (eg; Add-Linux-FENP.reg).
- Choose All Files from the Save as type drop-down list.
- Double-click the saved .reg file to merge it.
- If prompted, click on Run > Yes (UAC) > Yes > OK to approve the merge.
- You can now delete the .reg file if you like.
To remove Linux from File Explorer Navigation Pane in Windows 11/10, do the following:
- Open Notepad.
- Copy and paste the code below into the text editor.
Windows Registry Editor Version 5.00

[HKEY_CURRENT_USER\Software\Classes\CLSID\{B2B4A4D1-2754-4140-A2EB-9A76D9D7CDC6}]
@="Linux"
"System.IsPinnedToNameSpaceTree"=dword:00000000
- Repeat all the same steps as above, but this time, you can save the reg file with .reg extension (eg; Remove-Linux-FENP.reg).
That’s it on how to add or remove Linux from File Explorer Navigation Pane in Windows 11/10!
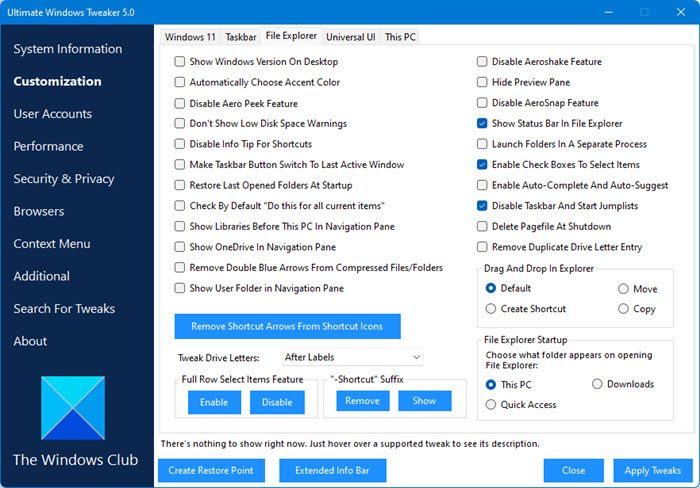
TIP: You can easily customize Explorer with a click using the Ultimate Windows Tweaker.

How can I remove icons from the File Explorer navigation pane?
The top level of the navigation pane of File Explorer in Windows 11/10 should be reserved for top level system icons and not for any folders that some program places at the location. The option to delete is unavailable but you can unpin from the navigation pane – to do this, select the folder, right-click on the file, and then select the option to unpin from Quick Access.
TIP: If you want, you can also remove the OneDrive icon from File Explorer or add Recycle Bin to File Explorer Navigation Pane.
How do I customize the navigation pane?
To customize the File Explorer navigation pane in Windows 11/10, do the following: Right-click the top of the Navigation Pane and then select Navigation Options. Under Display Options, select the Show Hidden Objects check box. Click OK. In the Navigation Pane, a dimmed icon appears for all hidden objects.
To remove an item from the File Explorer navigation pane, do the following: Right-click the desired library in the navigation pane and select Don’t show in navigation pane in the context menu. Right-click the library in the Libraries folder and select Don’t show in the navigation pane in the context menu. Uncheck the Show in navigation pane box in the library properties dialog.
Read: Remove Network from Explorer Navigation Pane in Windows 11/10
Leave a Reply