Here is a complete guide to on how to add or change the profile picture of your Outlook account on Windows 11/10. You can follow this post if your Profile picture is not showing up in Outlook.
How to add a Profile Picture on Outlook.com?
Before we talk about the steps to a profile picture in Outlook, make sure your picture meets the minimum requirements that as follows:
- The profile picture can be in one of the following formats: PNG, JPG, or GIF.
- It can be a maximum of 4 MB in size.
Now, you can use Outlook’s web app to add or set up your profile picture for your account. Here are the steps using which you can do that:
- Open Outlook.com.
- Sign in to your Outlook account.
- Click on your profile name.
- Tap on the profile picture icon.
- Select your Outlook account.
- Click on the Add a photo button.
- Browse and select the desired profile picture.
- Adjust the photo.
- Press the Save button.
First, open Outlook.com in your preferred web browser and sign into your Outlook account.
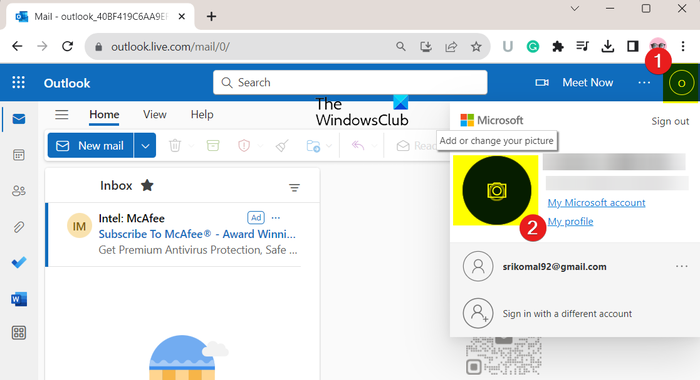
Next, from the top-right corner, you can click on your profile name icon (circle). Then, select the Add or change your profile button.
After that, it will ask you to select the desired account to which you want to add a profile picture from all your active Microsoft accounts.
TIP: Fix Profile Picture not showing up in Windows Settings.
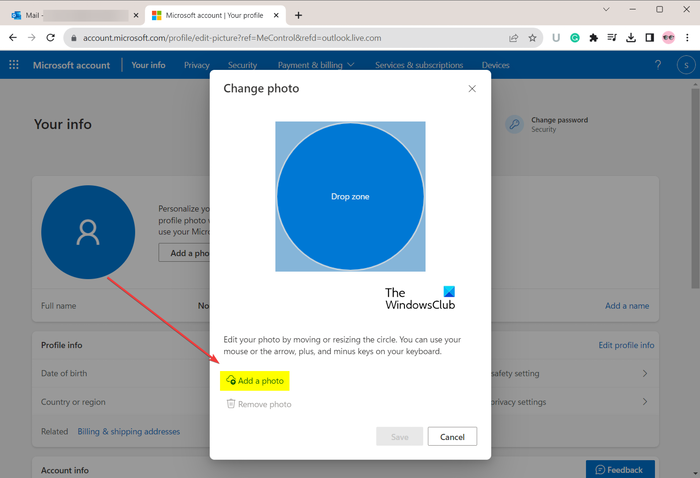
Now, click on the Add a photo button and then browse and choose the input profile picture.
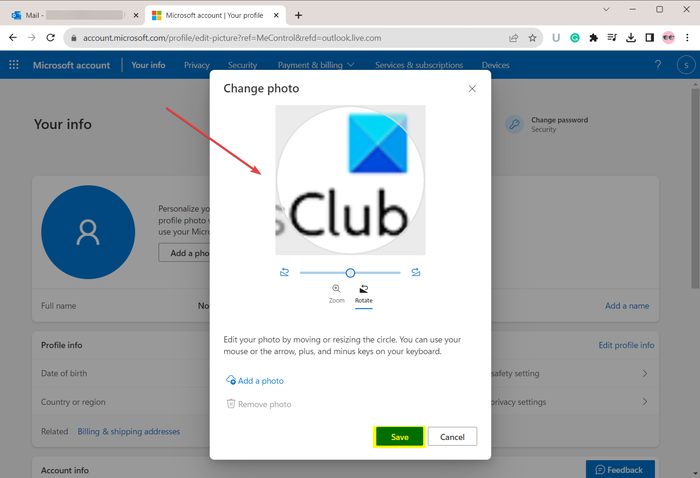
Once you have selected the source profile image, you can resize, rotate, zoom, and adjust it accordingly.
Then, press the Save button and it will add or change the profile picture of your Outlook account.
In case you want to delete a profile picture, you can use the Remove picture button.
See: Microsoft Teams cannot change Team picture.
How to add or change a Profile Picture in Outlook desktop client?
To add or change a profile picture of your Outlook account using the Microsoft Outlook desktop on Windows, here are the steps you can follow:
- Open Outlook.
- Click on File > Info.
- Click on the Change button; Microsoft webpage will open up.
- Login to your account on the web.
- Select the Upload a new photo button.
- Import the input profile picture.
- Press the Apply button to save the new profile picture.
Open the Microsoft Outlook app on your computer and make sure you are logged into your Outlook account for which you want to change the profile picture.
Now, move to the File menu, and from the Info tab, make sure you have selected the target Outlook account.
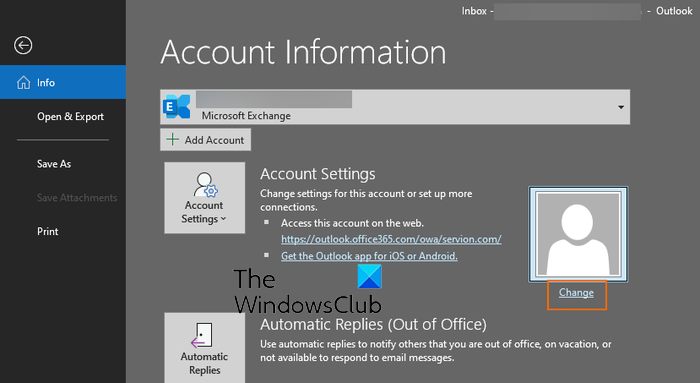
Next, you will see a profile picture section. Just tap on the Change button present under the profile picture icon.
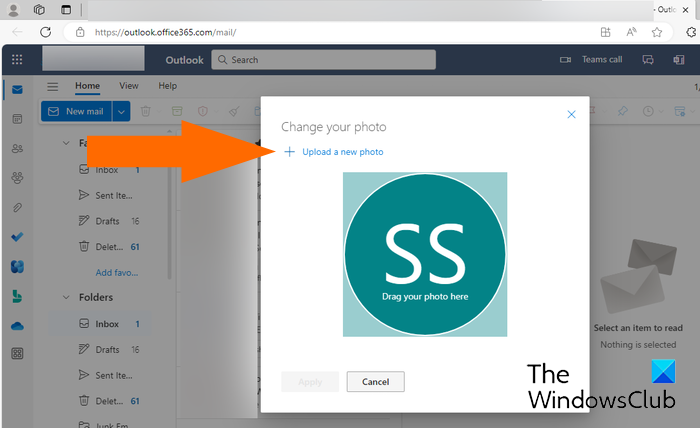
Afterward, you will be navigated to Outlook Live in your default web browser. You must now sign into your Outlook account with your email address and password. Once logged in, you will see a Change your photo prompt.
Related: How to change password in Outlook?
In case you are already logged into Outlook in your browser, and you don’t see the Change your photo prompt, you can click on the profile name in the top right corner and select the Add or change your profile button.
Next, click on the Upload a new photo button and then import the image that you want to set as your profile picture from your PC.
Once the picture is imported, you can zoom in or zoom out using the available toggle.
Now, press the Apply button to save the change and set up your Outlook profile picture.
This is how you can set up your profile picture in Outlook.
Read: Microsoft Teams Profile Picture not updating in calls.
Why isn’t my Profile picture showing up on Outlook?
If your profile picture is not visible or showing up on Outlook, it could be due to your Outlook settings, OWA settings or the GPEDIT setting. Do this to resolve the issue:
- Open Outlook Options > People > Select Show user photographs when available (requires restarting Outlook) and click OK.
- You can try uploading a new profile picture to your Outlook account on the web.
- Open Group Policy Editor > User Configuration > Administrative Templates and locate Microsoft Office. Expand Microsoft Office > Expand Contact Card, and then on the right side, double-click and disable the Do not display photograph policy.
How do I add a profile picture to my Microsoft account?
You can add or change your Microsoft account’s profile picture using the web. First, open Microsoft.com and log into your account. After that, move to the Your info tab from the top menubar and then click on the Change photo button present next to your current profile picture or avatar. You can then click on the Change photo button, select the profile pic from your computer, and press the Save button.
Now read: How to change default User Account Picture in Windows?