A Recovery Partition is a crucial partition for Windows 11/10. Windows creates this partition automatically when you perform a Clean Installation of Windows OS or Upgrade Windows OS. It contains the system image and other crucial operating system files that are required to restore the Windows OS to a working state when a problem occurs. This article shows how to add a Recovery Partition in Windows 11/10.
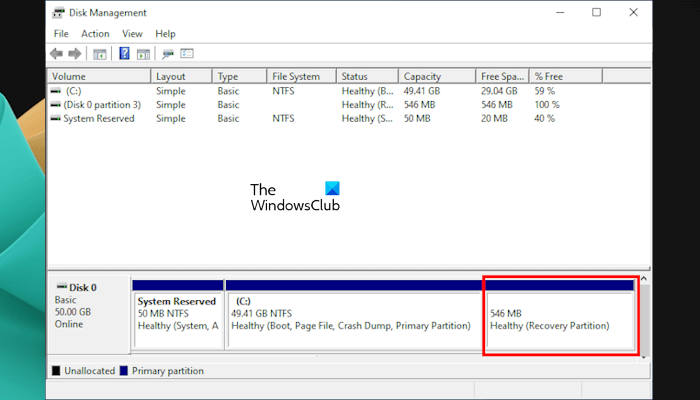
Recovery Partition in Windows 11
The Recovery Partition does not have a drive letter. Therefore, it is not visible in the File Explorer. You can view it in the Disk Management app. However, some users found the Recovery Partition missing from their computers. If this is the case with you, you can add a Recovery Partition in Windows 11/10 manually. This article shows how to do that.
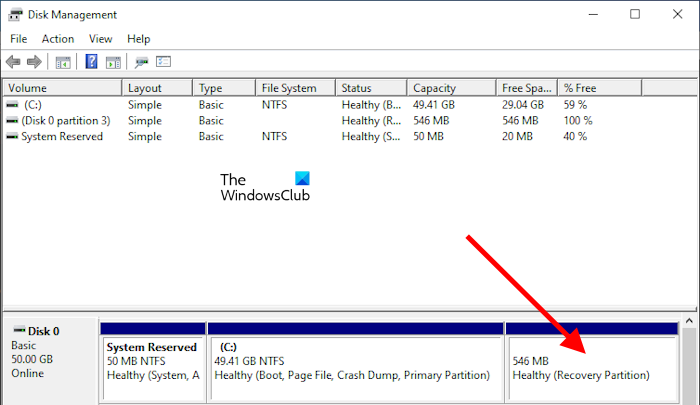
If you are a Windows user, you might have heard about Windows Recovery Environment, and some of you might have accessed it. WinRE is the short term used for Windows Recovery Environment. If the Recovery Partition is missing on your system or you have accidentally deleted it, you cannot boot into the Windows Recovery Environment.
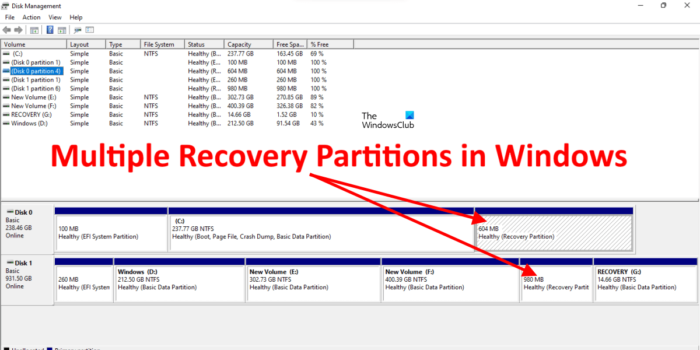
Some reports also show that users found more than one Recovery Partition on their computer systems. This happens when you upgrade the Windows operating system from a lower version to a higher version, say from Windows 10 to Windows 11, and there is not enough space on the existing Recovery Partition for the upgrade. In this case, Windows creates another Recovery Partition and leaves the previous Recovery Partition as it is. In such cases, you can delete the older Recovery Partition.
You will also find two Recovery Partitions on your computer if the OEM creates one and the other is created while installing the Windows OS.

When the Recovery Partition is missing, you will not find the Advanced Recovery Options in the Windows Recovery Environment (refer to the above image).
How to view Windows Recovery (WinRE) file on Windows 11/10
The WinRE file is the Windows Recovery Environment file that contains the system image and other crucial operating system files needed to perform required actions in the Windows Recovery Environment. This file is located in the root directory but is hidden. To view this file, you have to force Windows 11/10 to show the hidden files and protected system files.
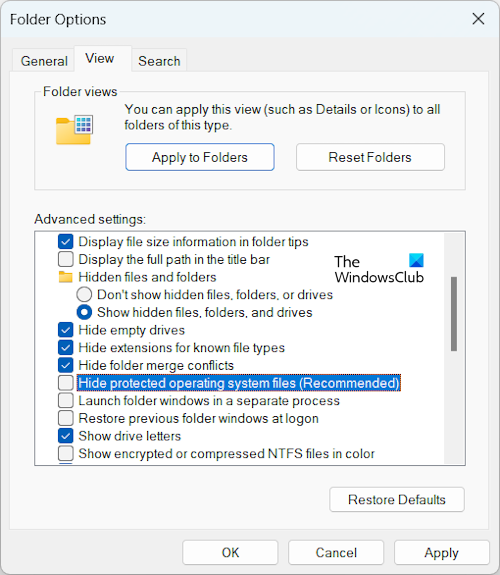
To force Windows to display the protected operating system files, follow the steps provided below:
- Open File Explorer.
- In Windows 11, click on the three dots and select Options. In Windows 10, go to View > Options.
- Select the View tab.
- Uncheck the Hide protected operating system files (recommended) checkbox.
- Click Apply and then click OK.
Now, go to the following location in File Explorer:
C:\Windows\System32\Recovery
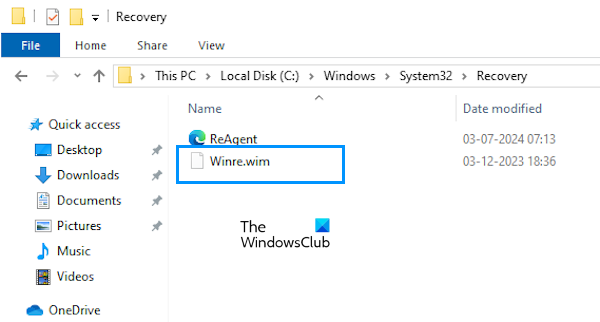
You will see the Winre.wim file there. It is the Windows Recovery Environment file.
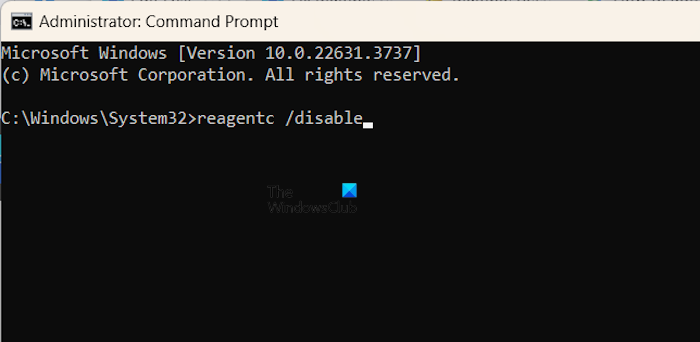
If you do not see this file, disable the Windows Recovery Environment by executing the following command in the elevated Command Prompt window.
reagentc /disable
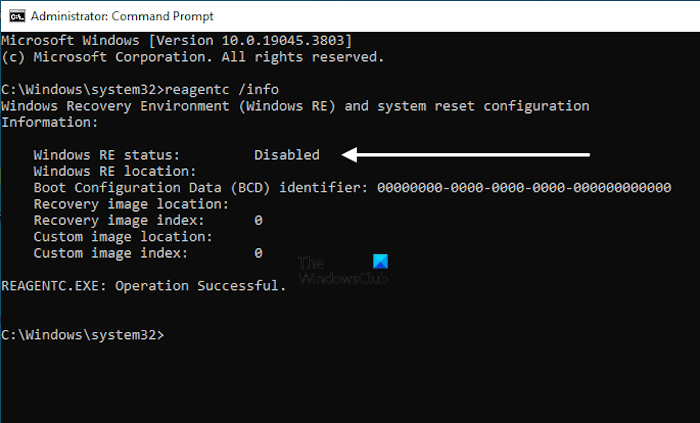
As you run the above command, the Winre.wim file will appear on the above-mentioned location on your C drive. The following command will show you the status of the Windows Recovery Environment.
reagentc /info
How to add Recovery Partition in Windows 11/10
To create or add a Recovery Partition on Windows 11/10, you have to create a new partition on your C drive without assigning a drive letter, then assign it the ID of Recovery Partition based on the partition style of your hard disk.
To view your hard disk’s partition table, open the Disk Management app, right-click on your hard disk, and select Properties. Then, go to the Volumes tab to view its partition style.
Let’s see this process.
First, create a new Recovery Partition in Disk Management. Follow the steps provided below:
- Open Disk Management.
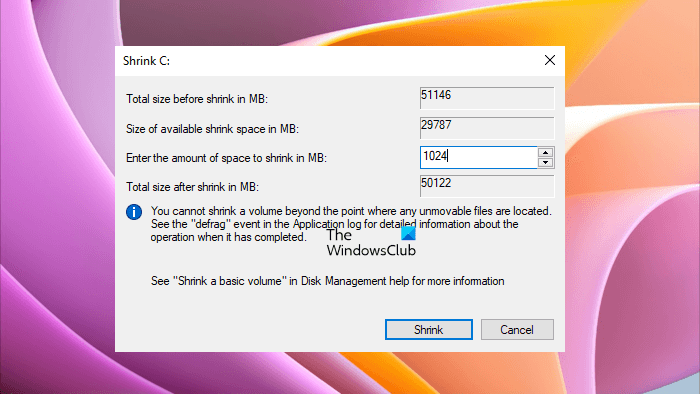
- Right-click on your C drive and select Shrink Volume.
- Enter 1024 and click Shrink. This will create a new Unallocated volume of 1 GB next to your C drive.
- Now, right-click on the Unallocated volume and select New Simple Volume.
- Click Next and select the Do not assign a drive letter or drive path option.
- Click Next and select the Format this volume option. Name this partition as Recovery Partition, and click next.
- Click Finish.
After performing the above steps, a new partition with the name Recovery Partition has been created. However, this partition does not contain the system image needed for the Windows Recovery Environment.
Now, open Command Prompt as an administrator and type the following command. Hit Enter after that.
diskpart
The above command will launch the Diskpart tool in the Command Prompt. Enter the following commands and hit Enter after entering each command:
list disk

select disk #

list partition

select partition #
In the above commands, replace # with the correct Disk number and Partition number. The Recovery Partition has an ID 27 (if the hard disk is MBR) and it is displayed as Type in the cmd. You have to assign this ID to the newly created Recovery Partition.
Now, type the following command and hit Enter:
detail partition
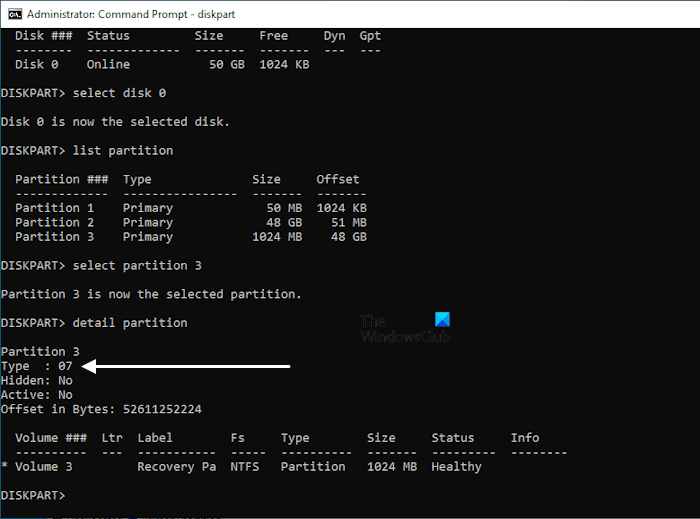
The above command will show you the details of the newly created Recovery Partition. That partition does not have ID 27 (refer to the above image). Set the ID=27 if the partition style of your hard disk is MBR.
Change the partition ID of the new Recovery Partition by executing the following command:
set id=27
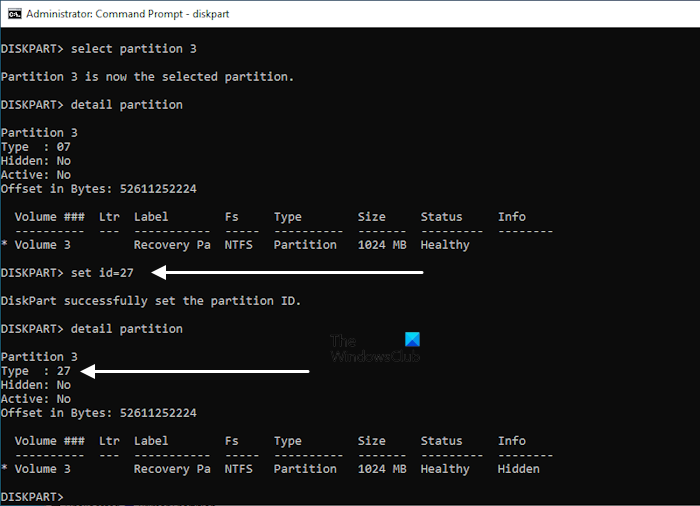
After the successful execution of the above command, the Winre.wim file will be copied to the new Recovery Partition. To confirm, you can view the details of the Recovery Partition. First, exit the Diskpart then type the following command:
reagentc /info
If your hard disk has a GPT partition style, you need to replace the ID 27 with the following ID:
de94bba4-06d1-4d40-a16a-bfd50179d6ac
Hence, in this case, the command will be:
set id=de94bba4-06d1-4d40-a16a-bfd50179d6ac
Those who have a GPT partition style have to execute one more command.
gpt attributes=0X8000000000000001
Now, the Recovery Partition has been created on your GPT hard disk.
That’s it. I hope this helps.
These posts will help you if you receive errors:
- REAGENTC.EXE The Windows RE image was not found
- REAGENTC.EXE Operation failed, An error has occurred
How to enable Recovery Partition in Windows?
The Recovery Partition is enabled or active by default on Windows 11/10. You need not enable it manually. You can check its status by executing the reagentc /info command in the elevated Command Prompt window. If it shows the status of the Recovery Partition disabled, you can enable it by running the reagentc /enable command in the Command Prompt as administrator.
Is recovery partition necessary?
A Recovery Partition contains a file called Winre.wim. This file contains the system image and other necessary files required to restore your system to a working state if any problem occurs. Recovery Partition also allows you to repair corrupted Windows OS. Therefore, a Recovery partition is necessary on Windows.
Read next: How to use Recovery Drive to restore Windows.
Leave a Reply