It is important that you have convenient access to the most frequently used utilities while working on your computer. One of these, at least for me, is Windows Settings. They serve a plethora of purposes and I heavily rely on them. One of the easiest ways to make them accessible is to pin them to the Taskbar, something that just requires a couple of clicks. However, if you aren’t in the habit of using your Taskbar to launch programs, an alternative for you is to add Windows Settings to the Desktop context menu. In this article, we will be discussing how you can make this change.
How to add Windows Settings to the desktop context menu
The process in place is very easy. All you need to do is create a relevant .reg file and ‘merge’ it with your existing registry settings to make the change to your existing context menu. Below are the steps followed condensed in brief:
- Open elevated Notepad using the Run dialog box or the Power User menu
- Copy-paste the entire (or portions of) the command
- Save the notepad file as a ‘.reg’ document in a place that is easily accessible
- Open the file’s location and merge it
- Confirm the warning prompts and wait for the changes to take effect
Let us now discuss the process in detail. Open elevated Notepad by typing ‘Notepad.exe’ in the Run dialog box and pressing Ctrl+Shift+Enter.
Copy-paste the following code in it and save it as a registry file.
Windows Registry Editor Version 5.00

[HKEY_CURRENT_USER\SOFTWARE\Classes\DesktopBackground\Shell\Settings]
"Position"="Middle"
"Icon"="SystemSettingsBroker.exe"
"SubCommands"=""

; Settings home
[HKEY_CURRENT_USER\SOFTWARE\Classes\DesktopBackground\Shell\Settings\shell\01subcmd]
"Icon"="SystemSettingsBroker.exe"
"MUIVerb"="Settings"

[HKEY_CURRENT_USER\SOFTWARE\Classes\DesktopBackground\Shell\Settings\shell\01subcmd\command]
@="explorer ms-settings:"

; System
[HKEY_CURRENT_USER\SOFTWARE\Classes\DesktopBackground\Shell\Settings\shell\02subcmd]
"CommandFlags"=dword:00000020
"MUIVerb"="System"

[HKEY_CURRENT_USER\SOFTWARE\Classes\DesktopBackground\Shell\Settings\shell\02subcmd\command]
@="explorer ms-settings:display"

; Devices
[HKEY_CURRENT_USER\SOFTWARE\Classes\DesktopBackground\Shell\Settings\shell\03subcmd]
"MUIVerb"="Devices"

[HKEY_CURRENT_USER\SOFTWARE\Classes\DesktopBackground\Shell\Settings\shell\03subcmd\command]
@="explorer ms-settings:bluetooth"

; Network & Internet
[HKEY_CURRENT_USER\SOFTWARE\Classes\DesktopBackground\Shell\Settings\shell\04subcmd]
"MUIVerb"="Network && Internet"

[HKEY_CURRENT_USER\SOFTWARE\Classes\DesktopBackground\Shell\Settings\shell\04subcmd\command]
@="explorer ms-settings:network"

; Personalization
[HKEY_CURRENT_USER\SOFTWARE\Classes\DesktopBackground\Shell\Settings\shell\05subcmd]
"MUIVerb"="Personalization"

[HKEY_CURRENT_USER\SOFTWARE\Classes\DesktopBackground\Shell\Settings\shell\05subcmd\command]
@="explorer ms-settings:personalization"

; Apps
[HKEY_CURRENT_USER\SOFTWARE\Classes\DesktopBackground\Shell\Settings\shell\06subcmd]
"MUIVerb"="Apps"

[HKEY_CURRENT_USER\SOFTWARE\Classes\DesktopBackground\Shell\Settings\shell\06subcmd\command]
@="explorer ms-settings:appsfeatures"

; Accounts
[HKEY_CURRENT_USER\SOFTWARE\Classes\DesktopBackground\Shell\Settings\shell\07subcmd]
"MUIVerb"="Accounts"

[HKEY_CURRENT_USER\SOFTWARE\Classes\DesktopBackground\Shell\Settings\shell\07subcmd\command]
@="explorer ms-settings:yourinfo"

; Time & language
[HKEY_CURRENT_USER\SOFTWARE\Classes\DesktopBackground\Shell\Settings\shell\08subcmd]
"MUIVerb"="Time && language"

[HKEY_CURRENT_USER\SOFTWARE\Classes\DesktopBackground\Shell\Settings\shell\08subcmd\command]
@="explorer ms-settings:dateandtime"

; Gaming
[HKEY_CURRENT_USER\SOFTWARE\Classes\DesktopBackground\Shell\Settings\shell\09subcmd]
"MUIVerb"="Gaming"

[HKEY_CURRENT_USER\SOFTWARE\Classes\DesktopBackground\Shell\Settings\shell\09subcmd\command]
@="explorer ms-settings:gaming-gamebar"

; Ease of Access
[HKEY_CURRENT_USER\SOFTWARE\Classes\DesktopBackground\Shell\Settings\shell\10subcmd]
"MUIVerb"="Ease of Access"

[HKEY_CURRENT_USER\SOFTWARE\Classes\DesktopBackground\Shell\Settings\shell\10subcmd\command]
@="explorer ms-settings:easeofaccess-narrator"

; Cortana
[HKEY_CURRENT_USER\SOFTWARE\Classes\DesktopBackground\Shell\Settings\shell\11subcmd]
"MUIVerb"="Cortana"

[HKEY_CURRENT_USER\SOFTWARE\Classes\DesktopBackground\Shell\Settings\shell\11subcmd\command]
@="explorer ms-settings:cortana"

; Privacy
[HKEY_CURRENT_USER\SOFTWARE\Classes\DesktopBackground\Shell\Settings\shell\12subcmd]
"MUIVerb"="Privacy"

[HKEY_CURRENT_USER\SOFTWARE\Classes\DesktopBackground\Shell\Settings\shell\12subcmd\command]
@="explorer ms-settings:privacy"

; Update & security
[HKEY_CURRENT_USER\SOFTWARE\Classes\DesktopBackground\Shell\Settings\shell\13subcmd]
"MUIVerb"="Update && security"

[HKEY_CURRENT_USER\SOFTWARE\Classes\DesktopBackground\Shell\Settings\shell\13subcmd\command]
@="explorer ms-settings:windowsupdate"

; Mixed Reality
[HKEY_CURRENT_USER\SOFTWARE\Classes\DesktopBackground\Shell\Settings\shell\14subcmd]
"MUIVerb"="Mixed Reality"

[HKEY_CURRENT_USER\SOFTWARE\Classes\DesktopBackground\Shell\Settings\shell\14subcmd\command]
@="explorer ms-settings:holographic"
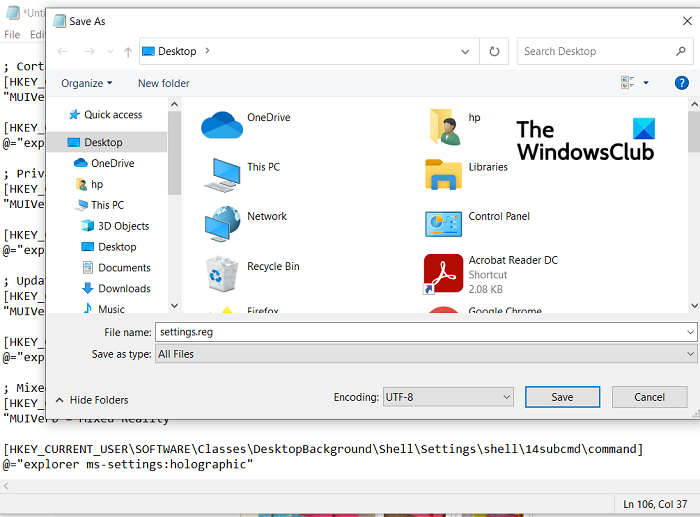
Go to File and save it as a ‘.reg’ file (it doesn’t matter what the file’s name is). Make sure that the File type is selected to be ‘All Files’ or else your file will be saved as a ‘.txt’ file only. Also, make sure that this file is saved in a place you can easily locate.

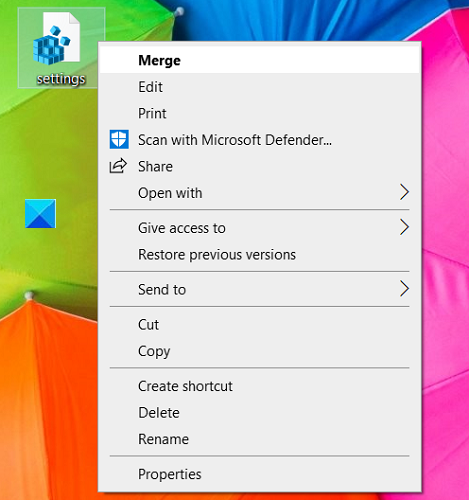
Visit the file’s location and right-click on the file. The first option will say ‘Merge’. This will only show up if you’re using Windows via the administrator’s account, so take note of that. Once you’ve clicked on Merge, a few warning prompts will show up, asking if you want to make these changes to your Registry. Confirm them and wait for a while for it to take effect.

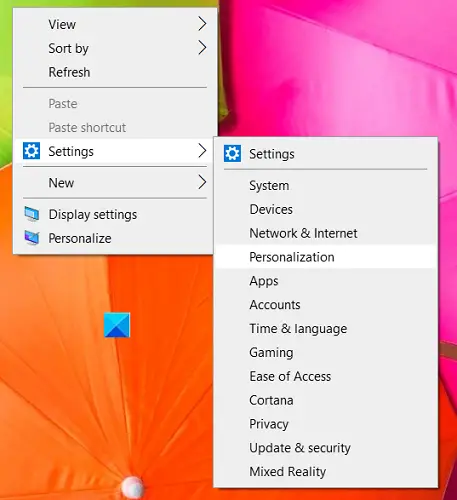
Now, you can right-click and open your context menu to see the Settings option along with all the settings sub-sections that are found on the settings page right here. This is what it looks like.

The customizations here exist beyond this point. You can edit the above block of code if you want only particular sections of Settings to show up on the context menu, i.e., if you don’t want one or more of them to show up, simply delete that block of code. Every settings sub-section is marked by a ‘;’ before its name so you can customize it accordingly. For example, if you want to remove Time and Language, locate ‘; Time & language’ and remove all the lines of code till the next sub-section shows.
TIP: Our Ultimate Windows Tweaker lets you add several useful items to the context menu with a click.
How do I add a shortcut to the context menu?

If you want to add any shortcut to a context menu, irrespective of its location, there’s a very easy procedure to be followed. By shortcuts here, I mean all those apps that have a URI command for them. These commands help you directly launch the app/setting. Here’s what you need to do:
- Visit the location where you want to create the shortcut, for example, Desktop.
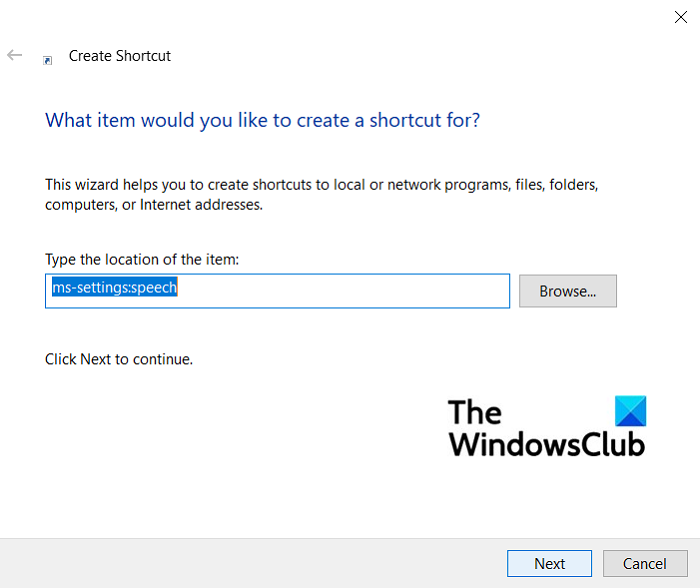
- Right-click here, and select to create a new shortcut
- A shortcut creation wizard will appear.
- If you don’t know the URI command of the relevant setting you can browse for it
- Then, name this shortcut and click on Finish
How do I add or remove items from a new context menu in Windows 10?
The context menu, as we’ve observed till now, is very customizable. You can add to or remove items from it as you wish using either the Registry Editor or one of the freeware available online.
Hope it helps!
Leave a Reply