OneDrive is a cloud storage platform developed by Microsoft. All users get 5 GB of free OneDrive storage after creating a Microsoft account. The files you store on OneDrive remain available on the cloud, and you can access them on any device by logging in to your Microsoft account. In this article, we will show you how to add tags to images in OneDrive.

How to add Tags to Images in OneDrive
Tagging is a useful feature. Adding tags to images is helpful if you have a lot of images in OneDrive, as it helps you search for a particular image quickly. You can create more than one tag for your images in OneDrive. Here, we will show you the following two methods to add tags to images in OneDrive.
- By signing in to OneDrive in your web browser
- By opening the OneDrive folder in File Explorer
Let’s see both of these methods in detail.
1] Add tags to images in OneDrive by using your web browser
The following instructions will help you add tags to your images in OneDrive.

- Open your web browser.
- Login to OneDrive by entering your Microsoft account credentials.
- Select My Files on the left side.
- Open the folder containing the image to which you want to add tags.
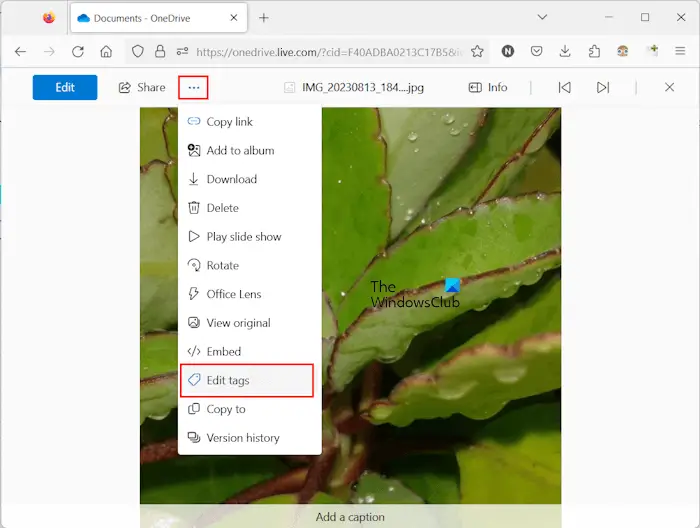
- Click on the three dots and then click on the Edit tags option.
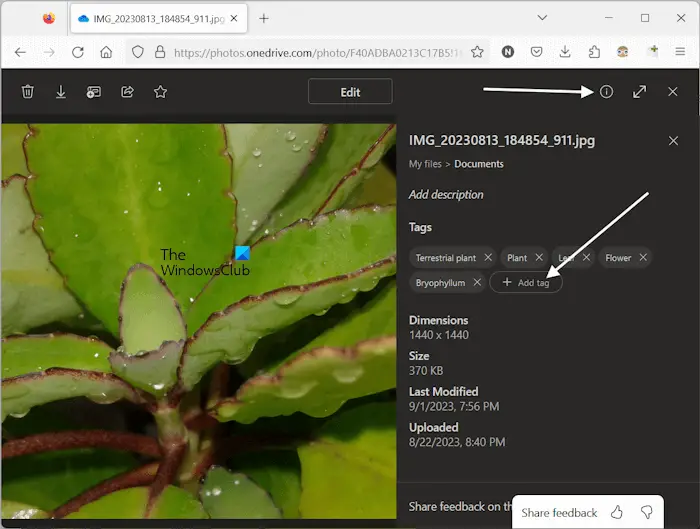
- A side pane will open on the right side where you will see some tags that were added to the photo automatically. Enter the tag that you want to add to the image and hit Enter.
You can delete the unwanted tags by clicking on the cross next to them. If you browse to the Photos category in OneDrive online and then open your photo, you will not see the three dots. In such a case, you have to edit or add tags by following the steps provided below:

- Open the image you want to edit tags for.
- Click on the “Show detailed information” button on the top right side (refer to the above screenshot).
- A right pane will open showing you the details of the image along with the available tags. Click on the Add tag button.
- Type the name to create a new tag and then press Enter.
To delete the previously available tags or unwanted tags, click on the cross next to them.
2] Add tags to images in OneDrive via File Explorer
Let’s see how to add tags to images in OneDrive on your Windows computer by using File Explorer. Go through the following instructions:

- Open File Explorer.
- Open your OneDrive folder.
- Now, open the folder containing images.
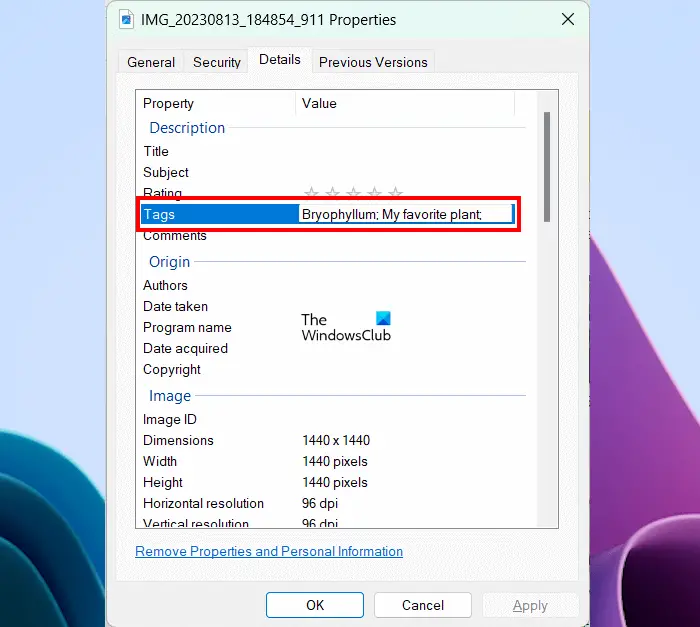
- Right-click on the image to which you want to add a tag and select Properties.
- Go to the Details tab.
- Click on the Tags field.
- Enter the tag you want and hit Enter.
- Click Apply and then click OK.
If you want to add multiple tags, separate each tag with a semicolon (;). After entering all the tags, press the Enter button. After performing the above steps, OneDrive starts syncing your image again to make the changes you made available online.
That’s it. I hope this helps.
Read: How to transfer OneDrive files to another user via PowerShell.
What are tags on photos?
Tags on photos are the additional keywords that are added to them in order to make them more searchable. In addition to this, tags also help you find similar images. For example, if you have a collection of different Rose flowers, you can give all of them a common Rose flower tag. After that, you can search all rose flower images by using the Rose flower keyword.
Read: How to TAG files in Windows 11
How do I manually tag a photo?
An option to add a tag to a photo is available in its properties. Open its properties on your Windows computer and go to the Details section. If the Tag option is not available there, change its format to JPG.
Read next: OneDrive files missing from folder.
Leave a Reply