Microsoft Excel is a powerful spreadsheet program that is used globally, especially for statistics, but do you want to take a screenshot of a data range in a worksheet, then paste it into another worksheet, where the screenshot will automatically fit perfectly in that worksheet? The feature to do this command is the Camera tool. The Camera tool allows users to capture screenshot images of their data and charts and paste them as images in any part of your worksheet or another worksheet. Let us see how to add the Camera tool in Microsoft Excel.

How to add the Camera tool in Excel
Follow the steps below to add the Camera tool in Excel:
- Launch Microsoft Excel.
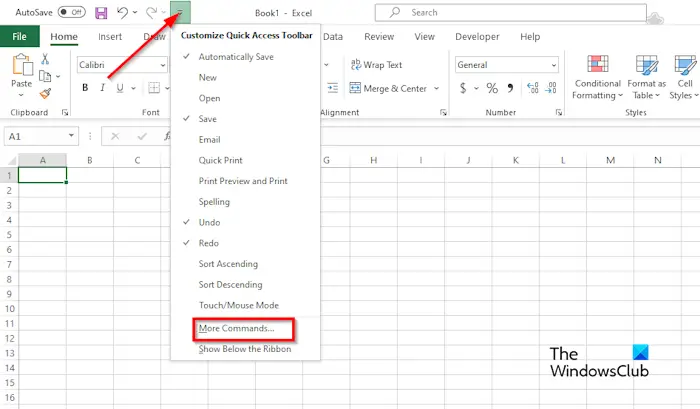
- Click the Customize Quick Access button.
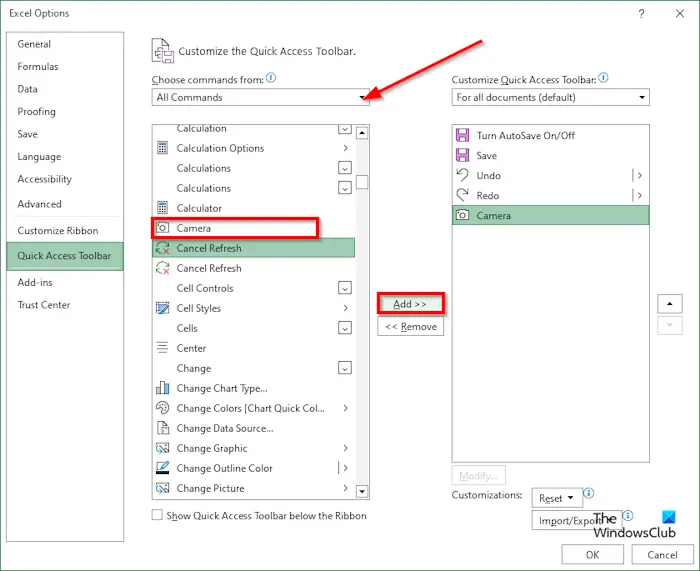
- Click the Choose Command From list box button and select All Commands.
- Select the Camera command, then click the Add button.
- Click OK.
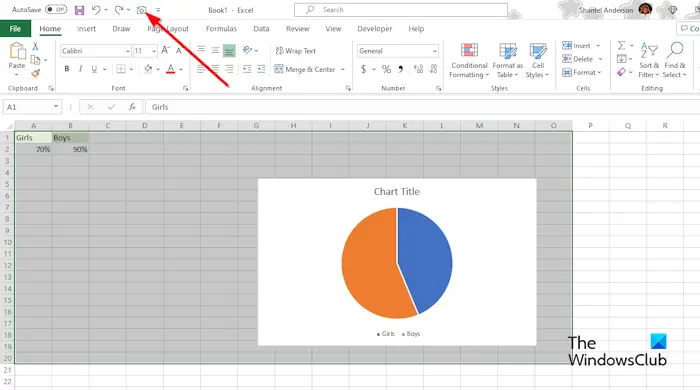
- The Camera tool is added to the Quick Access Toolbar.
- Highlight the data range and chart, then click the Camera tool.
- Click on the location where you want to place the data.
- The screenshot data will automatically fit in the spreadsheet, like the original data.
Launch Microsoft Excel.

Click the Customize Quick Access button on the Quick Access Toolbar.
An Excel Options dialog box will open.

Click the Choose Command From list box button and select All Commands from the menu.
Scroll down to the Camera command, click it, then click the Add button.
Click OK.
The Camera tool will be added to the Quick Access Toolbar.
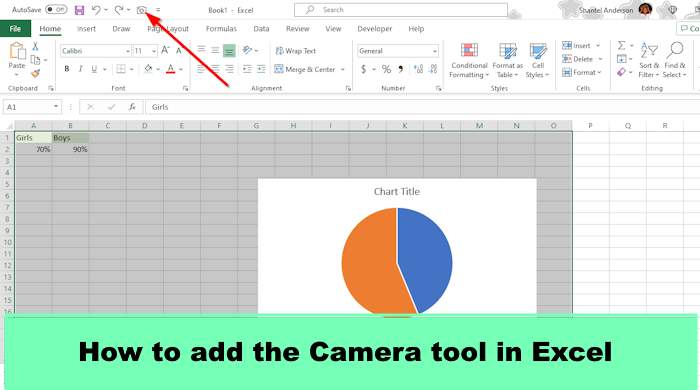
Now we have added data and also a chart to the spreadsheet. We are going to use the Camera tool to capture the data.
Open another worksheet.

Highlight the data range and chart, then click the Camera tool on the Quick Access Toolbar.
Now go to the other worksheet and click on the location where you want to place the data.
The screenshot data will automatically fit in the spreadsheet, like the original data.
We hope you understand how to add the Camera tool to Excel.
Read: How to use Get and Transform feature in Excel
What is the alternative to the camera tool in Excel?
The alternative to the Camera tool is the Screenshot feature, but they are completely different; the Screenshot feature allows users to screenshot any window open on their desktop, while the Camera tool allows users to capture screenshot images of their data and charts and paste them as images in any part of your worksheet or another worksheet. Follow the steps below on how to use the screenshot feature in Excel.
- Click the Insert tab, click the illustration button, then select Screenshot from the menu.
- Choose the window you want to screenshot or click Screen Clipping to capture the area of what you want to screenshot.
- The screenshot will appear on your spreadsheet.
READ: Delete Sheet not working in Excel
How do I take a picture in Excel?
Follow the steps below on how to take a picture in Excel:
- Select the range of data.
- On the Home tab in the Clipboard group, click on the Copy button.
- Select the location where you want to paste the data range and click the Paste button.
- In the Other Paste Options section, select the Picture (U) option.
- The copied data range will appear on the spreadsheet.
Leave a Reply