If you want quicker access to your Firewall, Antivirus, and Device Performance then read this article. Today we will show how to add Windows Security to your Context Menu in Windows 11/10.
The Windows Security context menu offers a vast system defender feature in your hand. It does not just allow you to scan but also to track its data and other information. This incredible software provides security from viruses and other threats, online account protection from hacking, firewall management, and device protection. The story does not end here; the security context menu also provides browser and application software control to warn us from visiting dangerous sites and downloading threatful applications and files.
The latest security updates installed in your Windows make your computer more secure. This security system keeps on running a scan at the backside of your computer to counter every threat without fail. Along with this, the automatic update reduces additional labor required by other antiviruses. Now the Windows operating system has an embedded security application called Windows Defender Dashboard and Windows Defender Security Center. Now, you can manage your system security aspects in your own way.

How to add Windows Security context menu in Windows 11/10
As mentioned above, the software provides tracking facilities to know the activity history of the system. This is a useful function for guardians wanting to keep an eye on their child’s day-to-day surfing activities. Subsequently, you can also track other devices connected to your system. The Microsoft Defender activities, actions taken on behalf of the user, performance, and health can be traced easily through the options available in the context menu.
To add Windows Security context menu in Windows 11/10, you can try the following suggestions:
- Download the Zip file first.
- Now open the File Explorer and extract its contents.
- Double click on the .reg file to merge it.
- Click Run if you get a warning.
- If you ever want to remove it from the context menu, simply double-click on the other .reg file.
Let’s now see the above steps in detail:
Related: How to add Windows Defender to Context Menu.
To add the Windows security context menu to your operating system, download the Zip file first.
Once it is downloaded, go to the download location in File Explorer. Then right-click on the Zip folder and select Extract All from the context menu.
On the next page, you need to select a destination where you want to extract the files. So, browse to your preferred location and click on the Extract button to proceed.
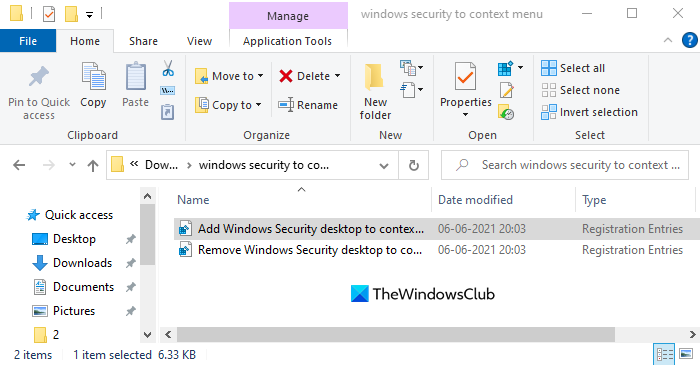
Here, you will find two files, Add_Windows_Security_desktop_context_menu.reg and Remove_Windows_Security_desktop_context_menu.reg

If you want to add Windows Security to the context menu, double click on the first one i.e. Add_Windows_Security_desktop_context_menu.reg.

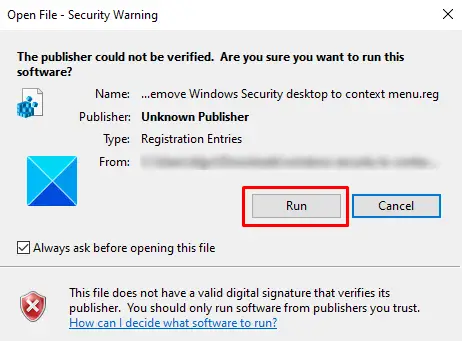
When the Security Warning window asks you, “The publisher could not be verified. Are you sure you want to run this software?”, click on the Run button to continue.
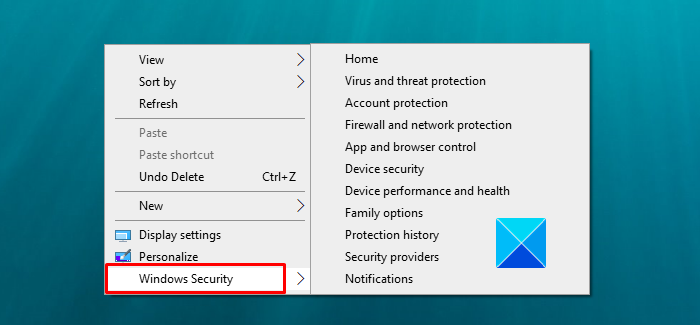
Once you have completed it, go to your Desktop screen and right-click there. You will see Windows Security is now added to your Context menu.
You can now delete the downloaded .reg file if you like.
If you ever don’t need to have the Windows Security context menu or just want to remove it for any reason, you can do it anytime.
Simply double-click on the Remove_Windows_Security_desktop_context_menu.reg file and follow the same process as above.
When the Security Warning window asks you, “The publisher could not be verified. Are you sure you want to run this software?”, click on the Run button to continue.
Right-click on your Desktop screen and check if the Windows Security option is now disabled from the context menu.
That’s it. Hope it helps.
Related: Add, Remove, Edit Context Menu items with Context Menu Editors.
Leave a Reply