Discord is a great application for connecting with your friends and family or fans of something in common. You can chat or have audio calls on it. Many people use Discord to communicate while playing games. Discord offers better audio quality than most games, making It a better choice for communication while gaming.
If you are not satisfied with the audio quality or it is not working well with the internet, you can always change it. Discord can change the audio bitrate for a better audio experience. If you lower the bitrate, it will go well with even the poorest quality of internet but the audio quality will be too bad to hear. If you increase the bitrate, the audio quality will increase and it will not work well in situations where you don’t have proper internet connectivity. Let’s see how we can change or adjust the audio bitrate on Discord.
How to change Audio Bitrate on Discord
Changing audio bitrate on Discord is a no-brainer. To change it:
- Select the server you want to change bitrate
- Click on the gear ⚙ icon
- Move the slider left or right to adjust the bitrate
Let’s see the process in detail.
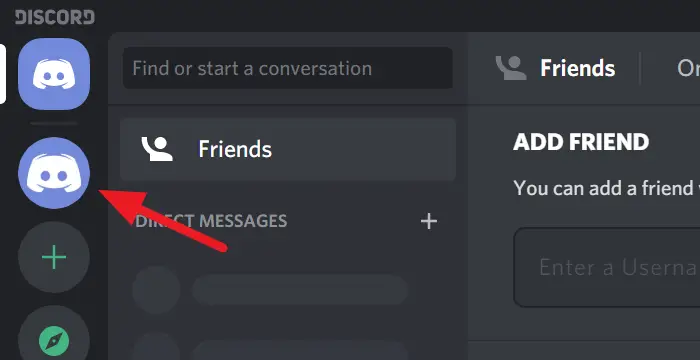
Open Discord on your PC and click on the Server you want to change the bitrate.

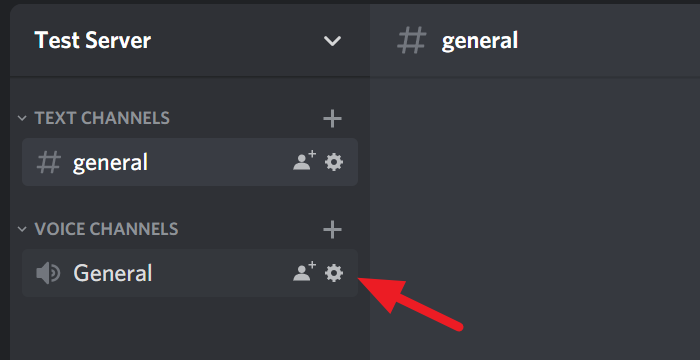
You will now see all about the server. Hover over to General under VOICE CHANNELS to see its options. Then, click on the Gear ⚙ icon to access its settings.

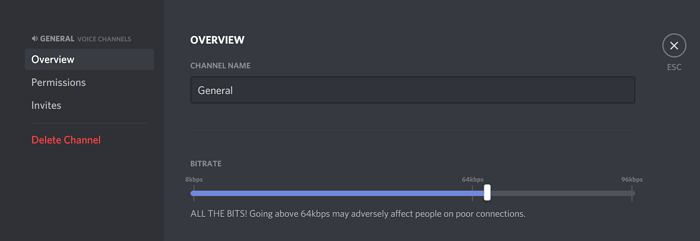
In the settings, you will see a BITRATE slider. Move it to the left to lower the bitrate or move it to the right to increase the bitrate. You can go from 8kbps to 96kbps bitrate on that slider. After you have changed the bitrate, hit Escape on your keyboard or click on the circled X icon on the screen to save the changes and close settings.

That’s it. You have just adjusted the bitrate as per your preference on Discord.
We hope this article is helpful. If you want to know how to reduce Discord CPU usage on Windows 11/10, click on the link below.
Read next: How to reduce Discord CPU usage in Windows.
Leave a Reply