You may need a video card (GPU) in a virtual machine for tasks like OpenGL, Direct3D, and CUDA. In that case, we usually use an emulated video card, which is not as good of a performer as a dedicated GP. Therefore, in this post, we will learn how to attach a physical video card to a VM on a host.
How do I pass my GPU through Hyper-V?
To attach a physical video card to a VM on a Hyper-V host, we will use GPU Passthrough.
GPU passthrough is an advanced feature that allows you to assign a physical GPU to a virtual machine. This feature is particularly useful for applications such as gaming or 3D rendering, where high-performance graphics are required. In this setup, the virtual machine gains direct access to the physical graphics adapter without the overhead of emulation, which can significantly improve graphics performance. By default, virtual machines in Hyper-V use an emulated graphics card, which may not be sufficient for demanding graphics tasks. With GPU passthrough, the virtual machine can harness the full power of the physical GPU, enabling it to handle more intensive graphics workloads efficiently.
What are the system requirements for GPU Passthrough?
Before we go ahead and set up GPU Passthrough, let us make sure to meet the following prerequisites.
Hardware requirements
- You need to make sure that your processor supports Intel-VT or AMD-V Virtualization.
- For PCI Passthrough, your processor must support an Input-Output Memory Management Unit (IOMMU).
- Your GPU must support GPU Virtualization technologies such as NVIDIA GRID or AMD MxGPU. These technologies are specific to individual vendors. Success rates can be improved by utilizing server-class hardware. Older devices that rely on PCI Interrupts (INTx) are not compatible.
- Finally, your system should support Single Root Input/Output Virtualization.
Software requirements:
- Operating System: Windows Server 2016 (or later) or Windows 11/10.
- Features: Hyper-V must be enabled.
- VM Generation: The virtual machine should be Generation 2.
- Drivers: All the GPU drivers should be updated to the latest version.
Limitations of GPU Passthrough:
If you want to use GPU Passthrough, you must avoid the following configuration.
- Your virtual machine should not be using Dynamic Memory.
- GPU Passthrough is only available on the highest Windows editions, like Windows Server 2019 Datacenter.
- If Windows Subsystem for Linux is deployed on the Hyper-V host, a VM error with code 43 can occur.
- Clustering features such as high availability and live VM migration are not supported.
- Save and restore with VM checkpoints are not supported.
After meeting the requirements mentioned earlier, we can leverage GPU Passthrough.
Attach a physical video card to a VM on a Hyper-V host
To attach a physical video card to a VM on a Hyper-V host using GPU Passthrough, follow the below steps.
- Enable Intel-VT or AMD-V Virtualization
- Configure your computer for GPU Passthrough
- Set up GPU Passthrough for Windows 11/10
- Set up GPU Passthrough for Windows Server
Let us talk about them in detail.
1] Enable Intel-VT or AMD-V Virtualization
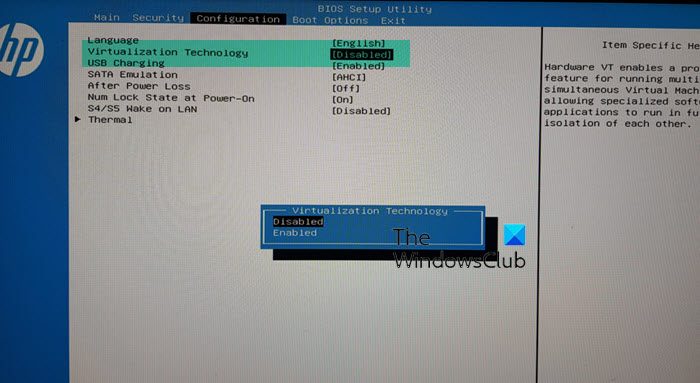
As mentioned in the prerequisites, our first step should be to enable Hardware Virtualization. So, if you are using an Intel CPU, you should enable Intel-VT, and AMD users, should enable AMD-V Virtualization.
To do so, boot into BIOS, go to the Configuration > Virtualization Technology, and then set it to Enabled, since these steps are exclusive to HP, you can go to the linked post to see how to enable the feature for your computer.
Read: How to enable or disable Nested Virtualization for VMs in Hyper-V?
2] Configure your computer for GPU Passthrough
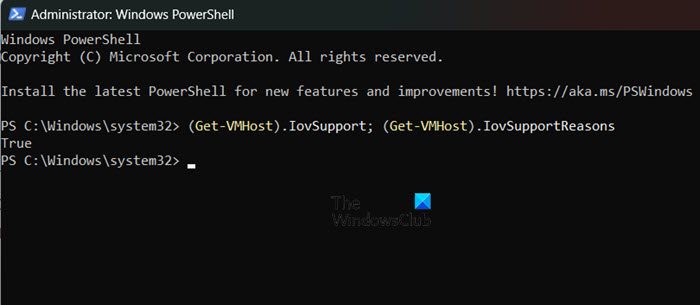
Next, we need to configure the host computer for GPU Passthrough. We started by enabling Hardware Virtualization, as mentioned earlier. Next, we need to make sure that IOMMU is enabled and automatic checkpoints are disabled.
So, you can check the linked guide on enabling hardware virtualization to enable IOMMU, but it is usually enabled by default. We can open PowerShell and run the following query to check if it is enabled.
(Get-VMHost).IovSupport; (Get-VMHost).IovSupportReasons
If it says, True, the feature is enabled, you can move on to the next configuration, but if it says, False, you need to enable this feature.
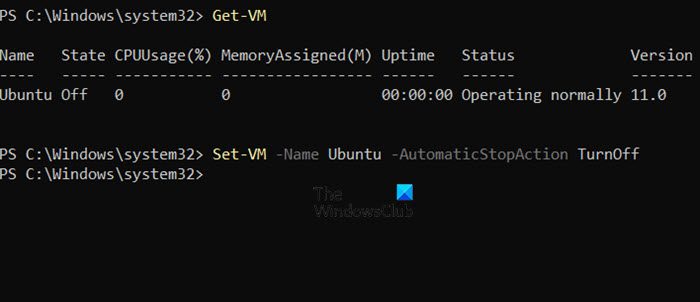
Now, go ahead and delete all the checkpoints of your VM, and then use the following commands to disable it.
Get-VM
Set-VM -Name NameOfVM -AutomaticStopAction TurnOff
Note: Replace the variable NameOfVM with the actual name of the virtual machine that you can fetch by running the previous command.
Read: How to enable Hyper-V on Windows 365 Cloud PC?
3] Set up GPU Passthrough for Windows 11/10
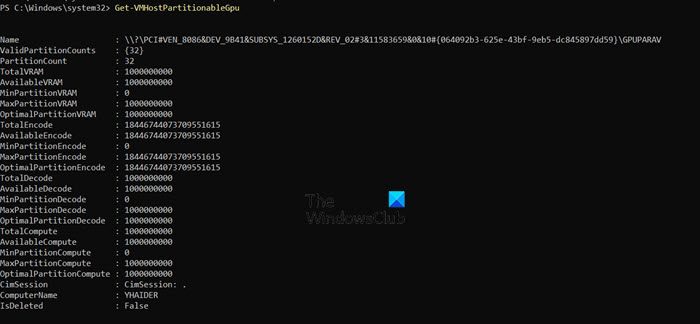
First, let us learn how to enable GPU Passthrough on Windows client operating systems.
You need to run the following command to check if your video card supports GPU Passthrough.
Windows 11
Get-VMHostPartitionableGpu
Windows 10
Get-VMPartitionableGpu
Next, we need to copy the graphics driver from the host client to the VM. To simplify the process, we recommend downloading the ZIP file from github.com and extracting it somewhere.

To run this script, we first need to allow script execution using the following two commands.
Set-ExecutionPolicy -Scope Process -ExecutionPolicy Bypass -Force

Set-ExecutionPolicy -ExecutionPolicy RemoteSigned -Scope CurrentUser
After running the command, you need to run the script using the following command. You can run it before and/or after adding your VM to GPU Passthrough
.\Update-VMGpuPartitionDriver.ps1 -VMName <VMNAME> -GPUName "AUTO"
Note: Make sure to add the path of the script and <VMNAME>. In my case, the script would be C:\Users\yusuf\Downloads\Easy-GPU-PV-main\Easy-GPU-PV-main\Update-VMGpuPartitionDriver.ps1 -VMName Ubuntu -GPUName “AUTO”.
Now, run the following command add your VM to GPU Passthrough.
Set-VM -VMName VMName -GuestControlledCacheTypes $true -LowMemoryMappedIoSpace 1Gb -HighMemoryMappedIoSpace 32Gb
Add-VMGpuPartitionAdapter -VMName <VMNAME>
To remove the GPU Partition, run – Remove-VMGpuPartitionAdapter -VMName <VMNAME>.
4] Set up GPU Passthrough for Windows Server
If you are using Windows Server, you need to run the following command in the elevated mode of PowerShell to set cache and limits for 32-bit (3 GB for 32-bit operating systems) MIMO space.
Set-VM -Name VMNAME -GuestControlledCacheTypes $True -LowMemoryMappedIoSpace 3Gb -HighMemoryMappedIoSpace 33280Mb
These limits define the memory allowing VM access to the device. Use a Machine Profile script from learn.microsoft.com to set accurate MIMO limits. Adjust values if VM shows resource shortage; 33280 MB is needed for MIMO space larger than 32-bit.
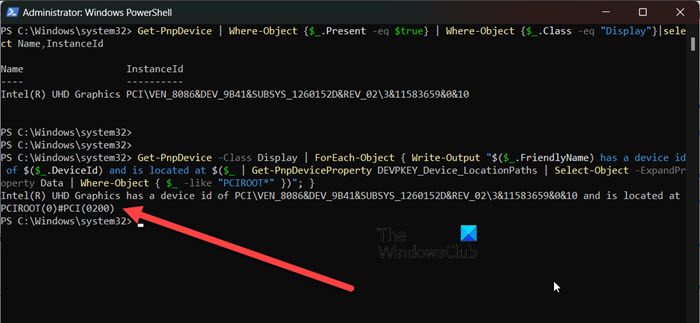
Next up, we need to check the PCI Express device’s location. To do so, run the following queries.
Get-PnpDevice | Where-Object {$_.Present -eq $true} | Where-Object {$_.Class -eq "Display"}|select Name,InstanceId
AND
Get-PnpDevice -Class Display | ForEach-Object { Write-Output "$($_.FriendlyName) has a device id of $($_.DeviceId) and is located at $($_ | Get-PnpDeviceProperty DEVPKEY_Device_LocationPaths | Select-Object -ExpandProperty Data | Where-Object { $_ -like "PCIROOT*" })"; }
You need to see where your GPU is located, it should be something like PCIROOT(0)#PCI(0200).
Finally, follow the steps mentioned below.
- Open Device Manager, expand Display adapters, right-click on your display drivers, and click on Disable device.
- Run the following command to dismount the GPU driver after changing the PCI address.
Dismount-VmHostAssignableDevice -LocationPath "PCIROOT(0)#PCI(0200)" -Force
- After changing the PCI address and VM name, run the following command to assign a GPU device to the VM.
Add-VMAssignableDevice -VMName VMNAME -LocationPath "PCIROOT(0)#PCI(0200)"
- Turn on the VM and check for a physical video card in the Device Manager.
- Install the video card drivers from the NVIDIA or AMD website.
If you want to switch back to the host machine, shut down the VM and run the following query on the host device.
Remove-VMAssignableDevice -VMName VMNAME -LocationPath $locationPath
Then, run the following command to connect the video card back to the Hyper-V host.
Mount-VMHostAssignableDevice -LocationPath $locationPath
That’s it!
Also Read: Configure Secured-core Server for Windows Server.