If you are an IT admin or a tech nerd, you know the importance of automation. One of the best automation tools for Windows users is Microsoft PowerShell. Not just that, Microsoft provides various tools to aid your automation needs, so, there is no need to install any third-party application. This guide will show how you can automate tasks with PowerShell.
What is a PowerShell Script?
If you have experience using PowerShell, you’ve likely already used commands to configure your operating system. A script is a collection of those commands in a .ps1 file. A .ps1 file contains a script executed by PowerShell, such as the basic Get-Help command. While simple commands like Get-Help may not be worth saving to a .ps1 file, more complex commands like Get-Date -DisplayHint Date should be written into a script file to save time. We’ll explore more complex commands that are worth saving in .ps1 files later on.
How to automate tasks with PowerShell
PowerShell is not just an application, it is a scripting language built on .Net CLR that automates IT tasks. It has backward compatibility with CMD and can automate simple or complex tasks. Because of its universal nature, it is available on Windows clients and servers, and in macOS, Linux, and Cloud environments, PowerShell is a compelling tool used by most IT professionals to automate their day-to-day tasks.
To automate tasks in PowerShell, we just need to follow the following procedure.
- Configure Execution Policy in PowerShell to allow scripts to run
- Create a PowerShell Script
- Run and test the PowerShell Script
- Schedule the script using Task Scheduler
Let us talk about them in detail.
1] Configure Execution Policy in PowerShell to allow scripts to run
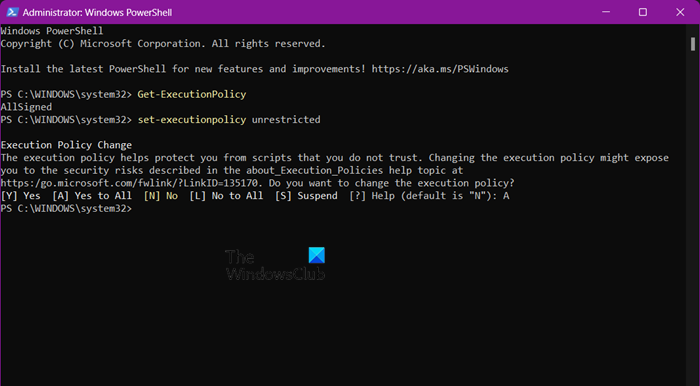
By default, Windows restricts the user from running a script in PowerShell with the help of an Execution Policy. However, one can pretty easily change by running a command.
To check the Execution Policy, run the following command in the elevated mode of PowerShell.
Get-ExecutionPolicy
If it says ‘AllSigned’, all scripts and configuration files are signed by a trusted publisher, including scripts written on the local computer.
To change the Execution Policy, run the following command.
set-executionpolicy unrestricted
OR
set-executionpolicy remotesigned
This will allow you to run PowerShell scripts.
2] Create a PowerShell Script
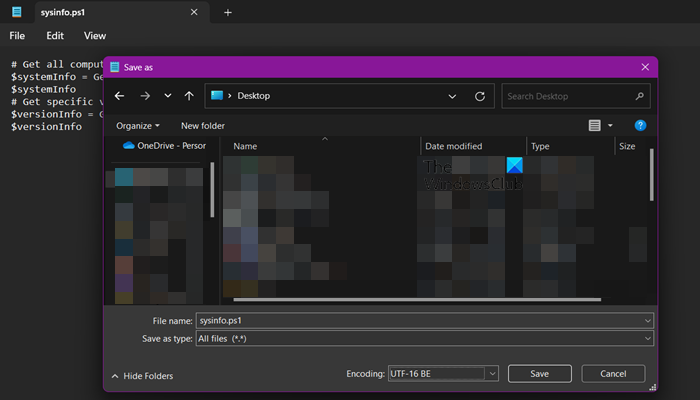
Exploring the realm of PowerShell scripts requires a separate article of its own, but here we will teach you how to create a basic PowerShell script and run it.
# Get all computer properties
$systemInfo = Get-ComputerInfo
$systemInfo

# Get specific version properties
$versionInfo = Get-ComputerInfo -Property "*version"
$versionInfo
This script retrieves all system and operating system properties, including version-related properties such as Windows version and BIOS version.
Even though there are various tools to write a PowerShell script, we will be using Notepad which comes pre-installed on your computer.
So, open Notepad, paste the script given earlier, go to File > Save as, give a name with .ps1 extension, change Save as type to All files, and hit Enter. If your file is not saving, change the location to Desktop and then try.
Note: We recommend you use Visual Studio Code to write the PowerShell script as Notepad lacks various features making it not an ideal scripting utility.
3] Run and test the PowerShell Script
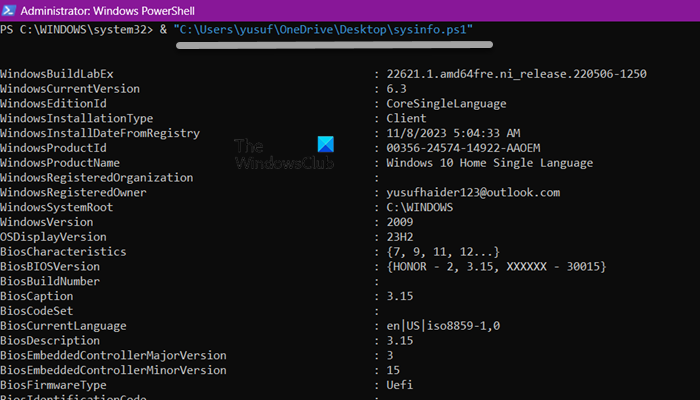
Now, let us see how to run the PowerShell script. Since we have created the PowerShell script using Notepad, to run it, we have to make use of PowerShell. So, open PowerShell as an administrator and then run the following command.
& "script-location/script-name.ps1"
If you are not sure what the exact location of your script is, right-click on it, go to Properties, and from the Location field, copy the exact location. Just put the location and name of the script in the syntax given earlier and you will be good to go.
4] Schedule the script using Task Scheduler
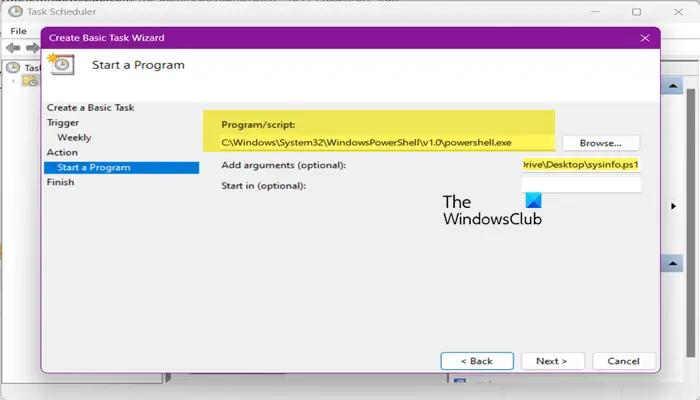
If your script is running fine, there is no harm in scheduling the script. To do the same, we will use Task Schedule, a built-in Windows application that can do as its name suggests. Follow the steps mentioned below to schedule your PowerShell script.
- Launch Task Scheduler.
- Right-click on Task Scheduler Library and click on Create Basic Task.
- Enter the name and description (if you want) and click Next.
- Now, select when you want the task to script and click on Next.
- Select the correct date and time in the next window and click Next.
- In the Action window, select Start a program and click Next.
- Then, in the Program/Scripts option, click on Browse.
- Navigate to C:\Windows\System32\WindowsPowerShell\v1.0 and select powershell.exe.
- Next, in Add arguments, enter the script name with the location and click on Next > Finish.
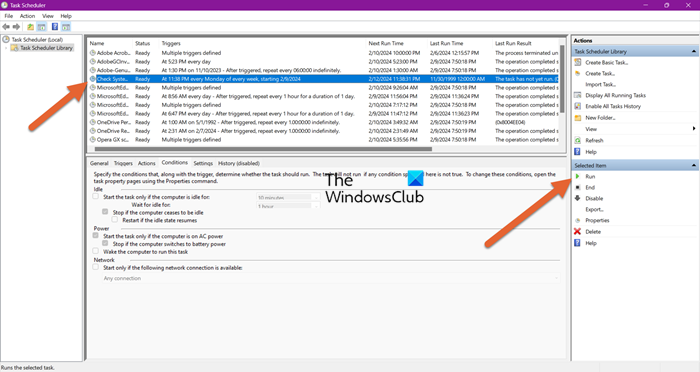
You can select the task and click on Run to confirm if it’s working or not.
Hopefully, now you know how to create and run a PowerShell script on a Windows computer.
Read: How to delete Scheduled Task in Windows
Can I use PowerShell to automate tasks?
Yes, with the help of PowerShell scripting language, you can write scripts that, when executed, can automatically do tasks for you. This script can be scheduled using the built-in Task Scheduler utility, and you will be good to go.
Read: How to run Scheduled Task after another Task completes
How do I schedule a PowerShell script to run automatically?
The Task Scheduler utility allows you to run the PowerShell script automatically. You can schedule it to run at a particular instance of time, and it will, without a doubt, do that for you.
Also Read: How to schedule a Batch File to run automatically on Windows.