If you want to backup network drive to local drive in Windows 11 or Windows 10, here is how you can do that with the help of AOMEI Backupper. It is free software that you can download to create a backup of any network drive to your local computer in Windows 11/10 PC.
A network drive is a folder or drive, which can be used by any other networked computer connected to a particular LAN. It helps you share files to multiple computers at once and backup the data on the go. It is pretty straightforward to add a network location or drive, and that is why it is quite popular among LAN users. However, if you need to back up a network drive you mapped earlier, you need to use third-party software.
There are many free backup software available in the market, but AOMEI Backupper Standard is freeware and compatible with Windows 11 and Windows 10. Whether you need to backup your network drive data to a local drive or another cloud storage, you can do that with the help of this tool. Therefore, download AOMEI Backupper Standard from the official website, ubackup.com, and install it first on your computer.
How to Backup Network Drive to Local Drive in Windows 11/10
To backup network drive to local drive in Windows 11/10, follow these steps:
- Open AOMEI Backupper Standard on your computer.
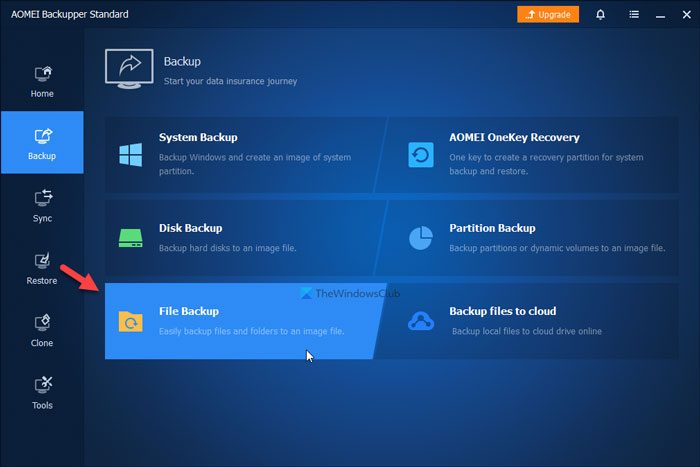
- Go to the Backup tab on the left side.
- Select the File Backup option.
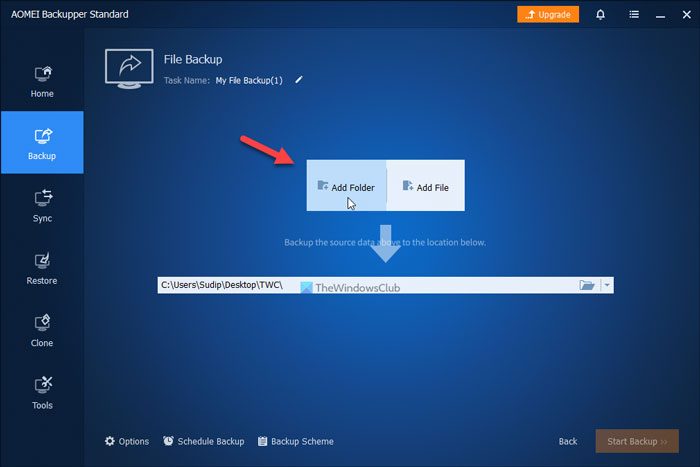
- Click on the Add Folder button.
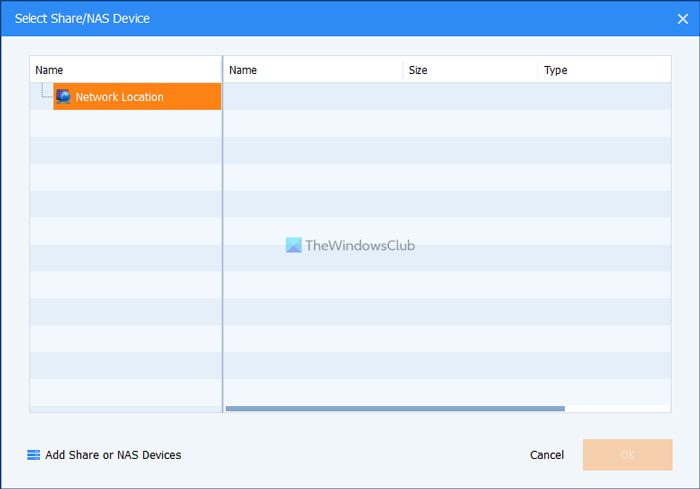
- Select Share/NAS and choose the network location.
- Click the OK button.
- Click the Add Folder button and select the local drive.
- Click the Start Backup button.
To learn more about these steps, continue reading.
At first, you need to open the AOMEI Backupper Standard software on your computer. By default, it opens the Home tab. However, you need to switch to the Backup tab and select the File Backup option.
Next, you need to choose the network drive first. For that, click on the Add Folder button visible on the screen.
Then, choose the network location as per your requirements and click the OK button.
You can select one or multiple folders from the network drive. Once done, you need to choose the local drive where you want to store the backup. For that, click on the Add Folder button and choose the location where you want to save the network drive backup.
After that, click the Start Backup button.
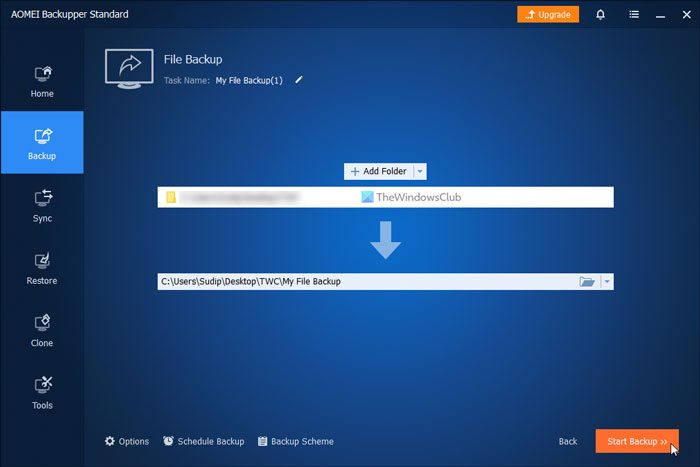
The backup process starts immediately after clicking the above-mentioned button. Once done, you can find all your selected files and folders in the location you selected earlier.
For your information, you can schedule the backup with the help of the AOMEI Backupper Standard tool. For that, you need to click on the Schedule Backup option and toggle the Enable Schedule Backup button to turn it on.
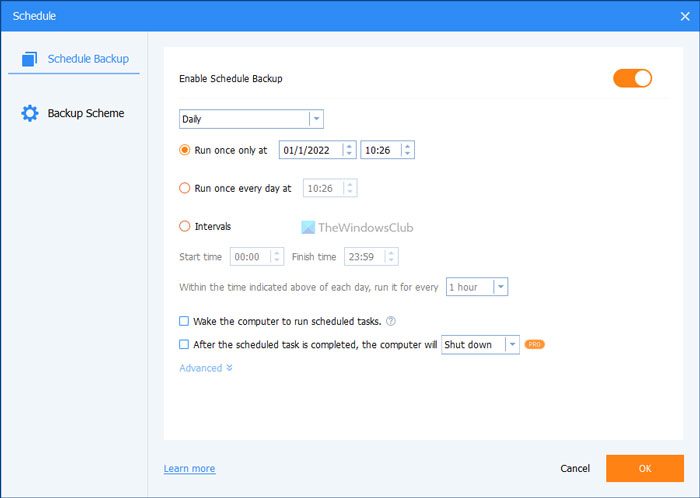
Then, you can choose the timing. At last, click the OK button to save the change.
Read: Free backup software for Windows Server.
How do I backup folders in Windows 11?
You can use different methods to back up folders in Windows 11. The most commonly used method that every Windows user knows is to copy the folders manually on an external storage device. Other methods include the use of File History, Windows Backup and Restore Tool, third-party backup software, and third-party disc image-creating tools.
How do I backup the network location?
To back up the entire network location in Windows 11 or Windows 10, you can use the AOMEI Backupper Standard. It is free software compatible with both of the mentioned versions of Windows. Settings things up is pretty straightforward so that you can start the backup process quickly.
That’s all! Hope this guide helped you back up the network drive to a local drive in Windows 11/10.
Leave a Reply