One way to get precise color, lines, or shapes between objects in your designs is to use Blend Tool in Adobe Illustrator. Learning how to use Blend in Illustrator helps to make your colors, text or lines blend more seamlessly when you design. You use blend if you want to distribute lines evenly between two objects or if you want to distribute colors smoothly between two objects.
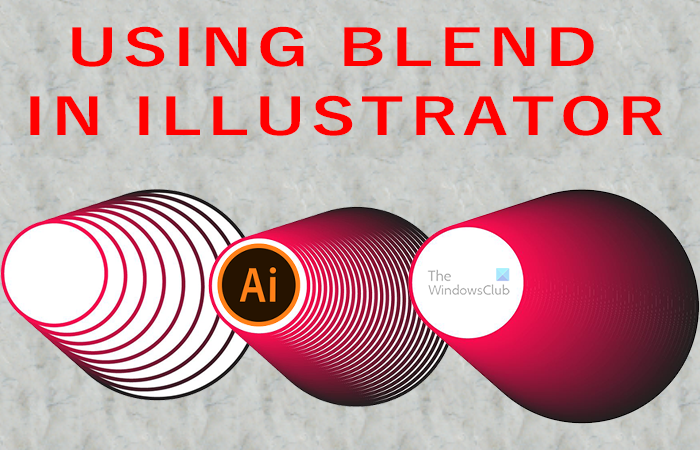
Whenever you use blend, the objects automatically become one. If you make any changes, the blend will automatically adjust. If you want o be able to make changes to one object in the blend, you can expand the blend. Expanding the blended object makes it break down into individual objects.
How to blend Objects in Illustrator using Blend Tool
There are two ways of using Blend Tool in Illustrator. This article will show you how to use both in your Illustrator designs. So lets begin.
- Creating the blend
- Blend options
- Change the spine of the blended object
- Reversing the stacking order in the blended object
- Expand the blended object
- Remove the blend
1] Creating the blend
There are two ways of using blend in Illustrator, one way is using the Blend tool or using the Make blend option.
a) Use the Blend tool
To use the blend tool to blend objects in Illustrator, create the objects that you want to blend. In this case, I will use two circles and give them different colors. I will also place one on the other.

These are the objects that will be used.
With the objects created in Illustrator is time to use the Blend tool. You will use the following steps to blend.
- Select the Blend tool
- Depending on what outcome you want, you would do one of the following.
- To blend in sequential order with no rotation, click anywhere on each object, but avoid anchor points.
- To blend to a specific anchor point on an object, click the anchor point with the Blend tool. When the pointer is over an anchor point, the pointer changes from a white square to transparent with a black dot in its center.
- To blend open paths, select an endpoint on each path.
- When you have added all the objects that you want in the blend, you then press the Blend tool again.
Tip: Illustrator will use the default settings or the last Blend settings you used to calculate the number of steps to create a smooth transition from color to color or step. If you want to make changes, select the blended object then double-click the Blend tool.
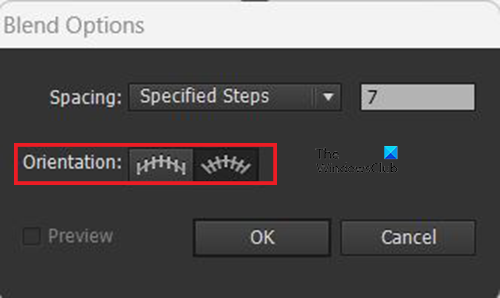
You will see the Blend options box appear, here you can choose the number of steps to take for the blend. You can choose Smooth color, Specified steps, or Specified distance. You can also choose the orientation.

This is the blended shapes with options changed. The Spacing is Specified Steps and the steps are 7. Note that the more stapes you add the more lines will be added.
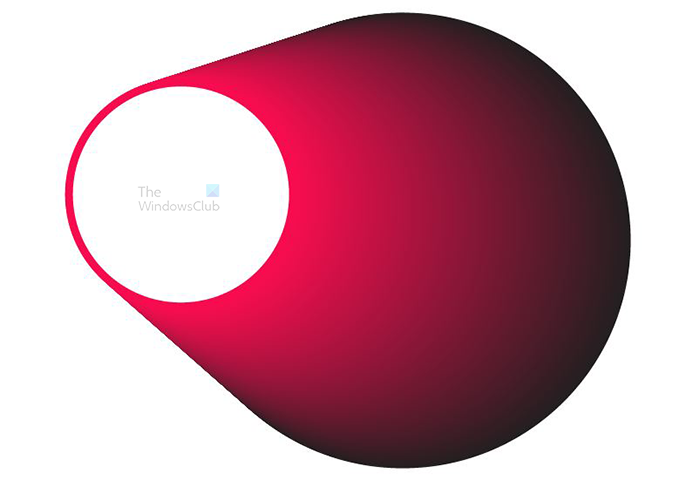
This is the blended shapes with options changed, the Spacing is Smooth color.
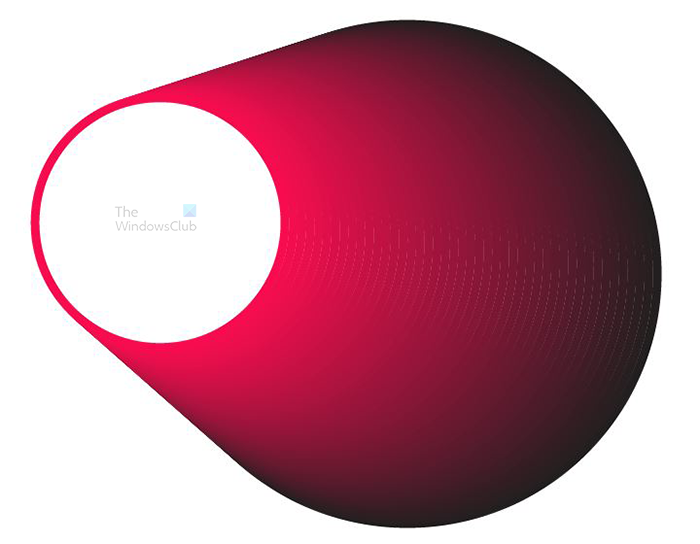
This is the blended shapes with options changed, the Spacing is Specified distance. This allows you to choose how close or how far apart you want lines to be. This image has a Specified distance of 0.06 in. you notice that it looks almost like the smooth color options. The difference here is that you can see the lines. If you want it to be without the lines you would have to make the distance closer.
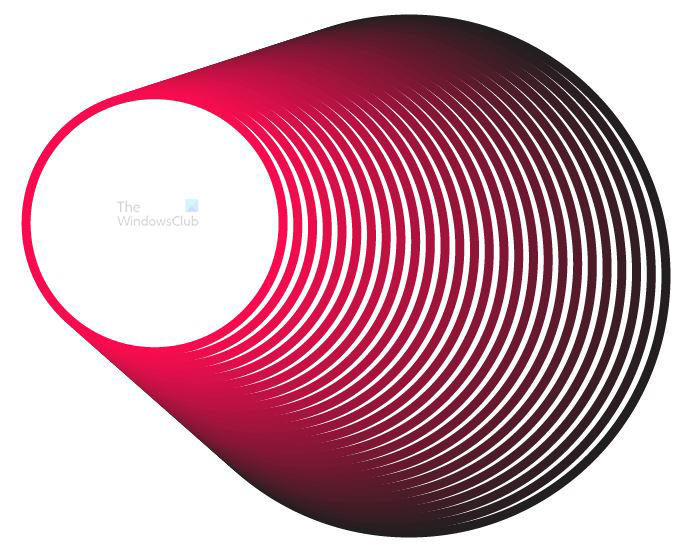
You can make the distance greater as well and get another effect. This image has a distance of 1.0 in.
b) Use the Make Blend option
You can use the Make Blend option to blend objects. To use the Make blend option, use the following steps.
- Select all the objects that you want to blend
- Go to the top menu bar and press Object then Blend then Make Alt + Ctrl + B. Illustrator will apply the default blend or the last blend used.
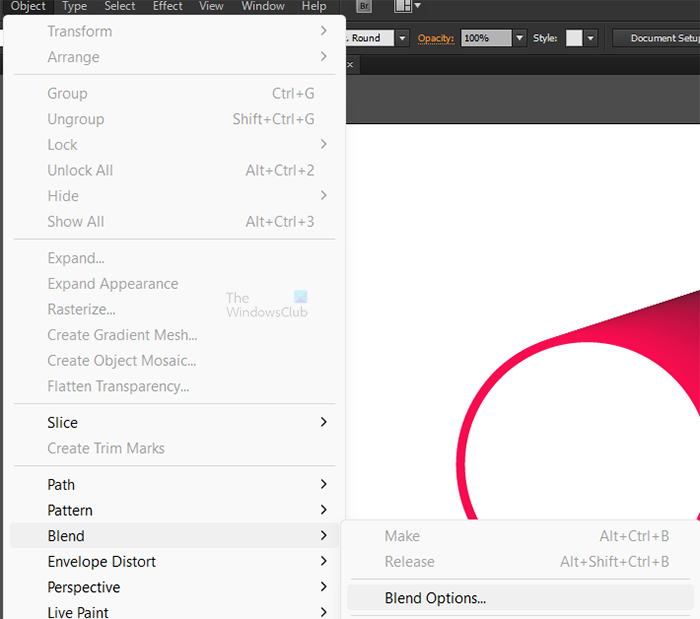
If you want to make adjustments to the Blend options, select the blended object then go to the top menu bar and press Object then Blend then Blend options.

The Blend options box will appear, you can choose the option that you want. Select Preview to see a live preview as you make changes. When you have chosen what you want, press Ok.
2] Blend options
When you open the Blend options box, you will see different options. Below you will be explained what each means. To change the Blend options, do any of the following.
Double-click the Blend tool
Go to the top menu bar and press Choose Object then Blend then Blend Options.
or
In the Properties panel, click the Blend Options button in the Quick Actions section.
Or
Double-click on the Blending tool in the tools menu.
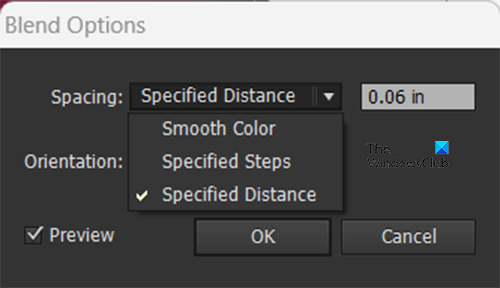
The Blend Options dialog box appears, in which you can set the following blend options:
Spacing
The spacing that you choose will determine how many steps are don’t to get the blend. The closer the spacing, the smoother the blend will be.
Smooth Color
Smooth color allows Illustrator to auto-calculate the number of steps for the blends to make the colors appear smooth. If objects are filled or stroked with different colors, Illustrator will make the colors have a smooth color transition. If the objects contain identical colors, or if they contain gradients or patterns, the number of steps is based on the longest distance between the bounding box edges of the two objects.
Specified Steps
With Specified steps, you can choose how many steps you want to be between the objects that you want to blend.
Specified Distance
With Specified distance, you choose how far apart you want the blended steps to be. The distance specified is measured from the edge of one object to the corresponding edge of the next object.
Orientation

Determines the orientation of blended objects.
Align to Page
Orients the blend perpendicular to the x-axis of the page.
Align to Path
Orients the blend perpendicular to the path.
3] Change the spine of the blended object
The spine is the path along which the steps in a blended object are aligned.
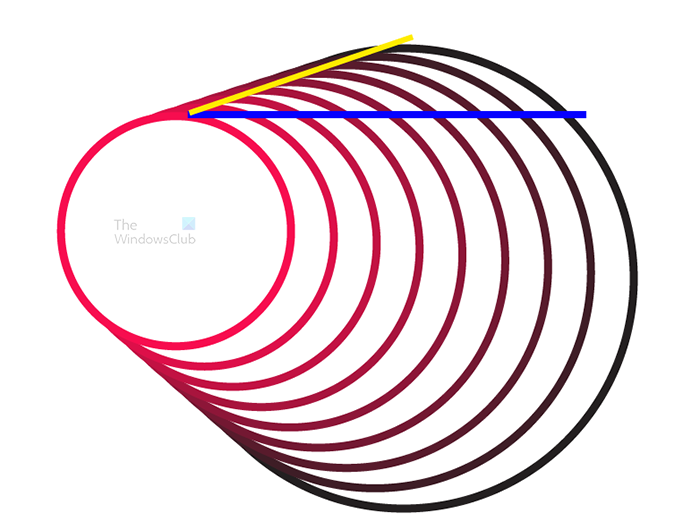
By default, the spine forms a straight line.
To adjust the shape of the spine, drag the anchor points and path segments on the spine with the Direct Selection tool.
To replace the spine with a different path, draw an object to use as the new spine. Select the spine object and the blended object, and choose Object then Blend then Replace Spine.
To reverse the order of a blend on its spine, select the blended object and choose Object then Blend then Reverse Spine.
4] Reversing the stacking order in the blended object
When you blend objects, they go in a specific order. You can choose to reverse the order that they are stacked in, to reverse the order, follow the steps below.
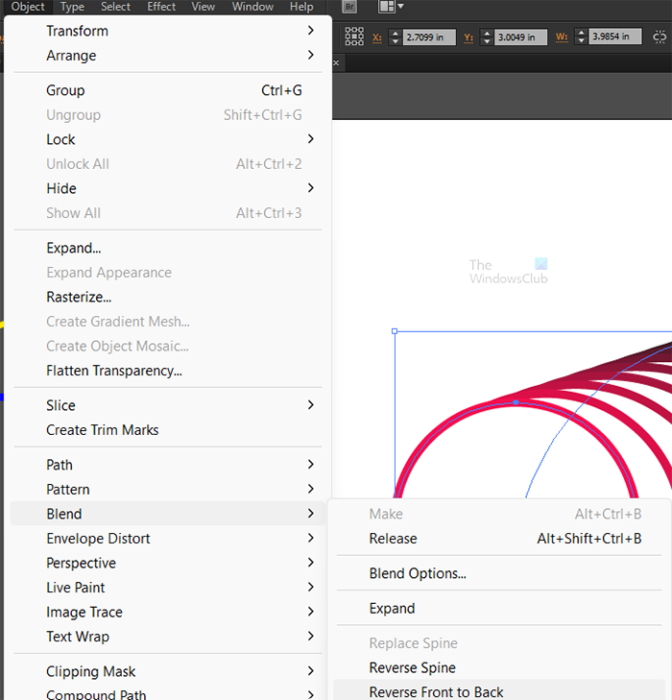
- Selected the blended object
- Go to the top menu bar and select Object then Blend then Reverse Front to Back.
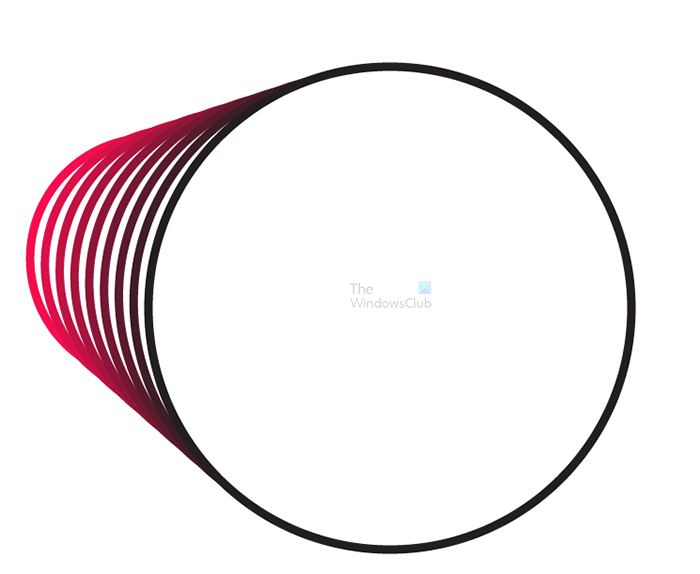
This is the image where the order is reversed.
5] Expand the blended object
When you blend objects, they automatically become one object. If you want to be able to select the individual pieces you will have to Expand the object.
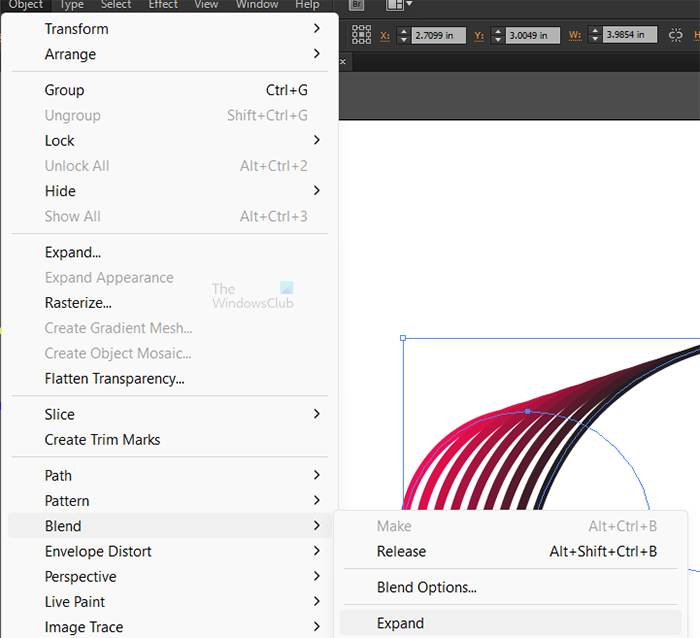
To expand the object go to the top menu bar and select Object then Blend then Expand. You will see the individual parts that make up the blend having their own selection handles.
6] Release the blend
If you want to remove the blend from the objects, you can do so easily.
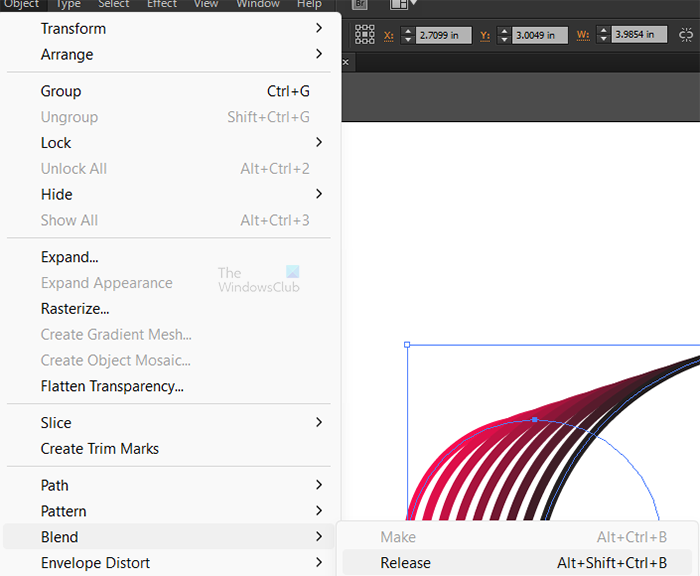
Go to the top menu bar and select Object then Blend then Release or press Alt + Shift + Ctrl + B. Note that if you had reversed the stacking order before you release the blend, the released objects will keep the new stacking order.
Read: How to use the Clipping Mask in Illustrator
How do you blend between two objects in Illustrator?
To blend between two objects, do the following:
- Draw an object and then hold Alt + Shift while dragging it to another spot on the artboard. This action will duplicate the image.
- Select both objects and go to the top menu and press Object then Blend then Make or press Alt + Ctrl + B. Illustrator will use the default Blend options to blend both objects.
- To change the defaults and give your own blend options go to the top menu and press Object then Blend and then Blend Options. From the Blend options, make the changes that you want.
How do you use the Blend tool in Illustrator?
The blend tool is used to blend objects in Illustrator. Blending objects will evenly distribute the lines or colors between objects. To use the blend tool do the following:
- Draw the objects that you want to blend
- Select the blend tool from the left tools menu
- Click on all the objects that you want to blend. Illustrator will use the default blend options or the last used blend options to blend the objects
If you want to change the blend options, double-click on the Blend tool to bring up the Blend options. You can then change the blend options for your objects. Press Ok to conform and keep the changes.