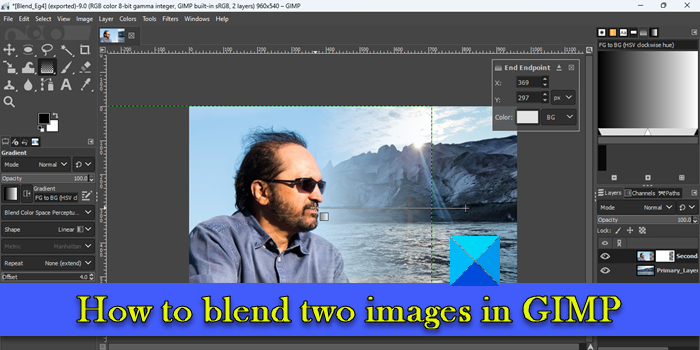
In this post, we will show you how to blend two images in GIMP. Image blending refers to the technique of merging parts of different photos to create stunning composites or artistic effects. Image blending is a common task and there are many ways of doing it. In GIMP, you can blend two images seamlessly using layer opacity, blend mode, and a layer mask.
How to blend two Images in GIMP
It’s fairly easy to blend two images in GIMP. All you have to do is:
- Open the two Images in GIMP.
- Blend the images using layer opacity/blend mode/layer mask.
- Export the resultant image as JPEG/PNG.
Let us see this in detail.
1] Open the two Images in GIMP
Open the image you want to use as a background. Click on the File menu in the top-left corner and select the Open option. Browse and select the image and click on the Open button.
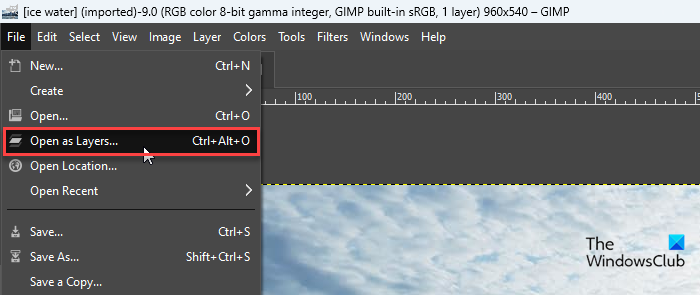
Now open the second image using the File > Open as Layers option. This will create a layer of the second image on top of the background image.
The following image gives a closer look at the two pictures I will be using to create the blending effects.

I will refer to the background image (Image 1) as the background layer and the image on top (Image 2) as the top layer.
If you’re not sure which image to make the background, create a blank new image in GIMP and open both images using the Open as Layers option. Then reposition images using the Move tool.
Note: The methods suggested in this post require you to have both images in the same size. If you source the images directly from your camera, you’re good to go. But if not, you should check the size of the images and resize them as needed before applying the blend effect. We recommend using the Scale tool to resize images in GIMP.
2]Blend the images using layer opacity/blend mode/layer mask
Blending in GIMP could be achieved in many ways. However, in this post, we will restrict ourselves to the following 3 methods, as they are fairly simple and easy to learn.
A] Blend two images using layer opacity
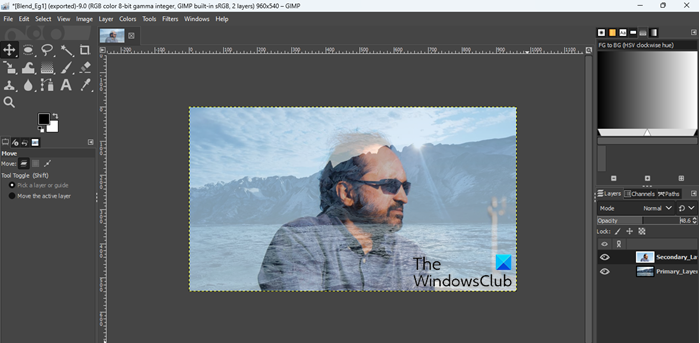
Select the top layer in the Layers panel on the right side. You will see the Opacity option above the list of layers, which is set to 100 by default. This means the top layer is 100% visible and is blocking the view of the background layer. Reducing its opacity will make it fade into the background image.
Take your cursor to the Opacity slider and as it turns to an up arrow icon, click and drag the mouse pointer toward the left.

Move the cursor to the left or to the right to adjust the layer’s level of transparency. Release the cursor once you get the desired results.
The following image gives a closer look at the blend effect created using the layer opacity in GIMP.
B] Blend two images using an image blend mode
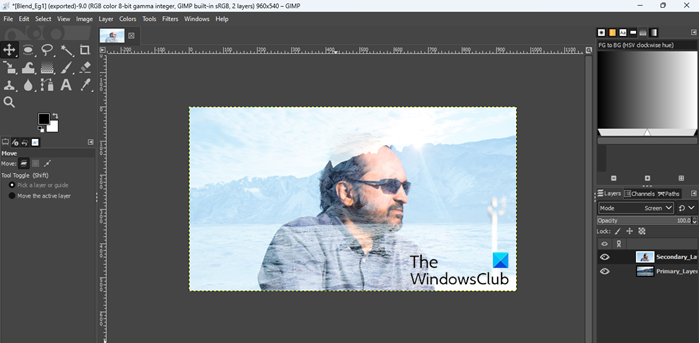
Layer modes, also known as blending modes in GIMP, are used to algorithmically combine images by adjusting the brightness, saturation, hues, tones, and transparency of the selected layer. Using a blend mode is pretty much easy. However, each mode produces a different effect, so you need to experiment with the available modes to see which one works best for you.
Select the top layer. Click on the Mode dropdown in the Layers panel. By default, the blending mode is set to Normal, which means the selected layer is not at all blending with the layers underneath. Select a different mode (Multiply, Divide, Screen, and Overlay, are the common ones) from the dropdown to apply it to the layer.
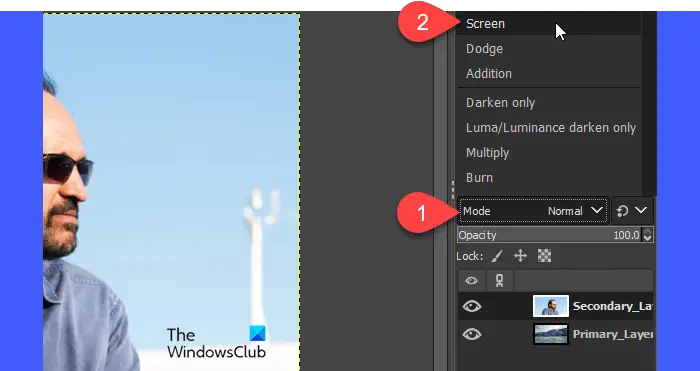
Use the up/down arrows on your keyboard to see the results of other blending modes on the image.
Tip: You can combine the blend mode with the layer opacity to get the desired output.
As you can see in the below image, I have applied the ‘Screen’ mode which has created a brightening effect on our top layer.
C] Blend two images using a layer mask
A layer mask allows you to selectively modify the opacity of different areas of a layer to create a more realistic blending effect. It typically works on a grayscale channel. A white pixel on the layer mask makes the corresponding pixel on the layer underneath visible. A black pixel on the layer mask keeps the corresponding pixel on the layer underneath hidden from view. Pixels in shades of black and white allow partial transparency resulting in a perfect blend of images.
To blend two images using the layer mask, you need to first add a layer mask to your layer. Right-click on the top layer and select the Add Layer Mask option from the menu that appears.
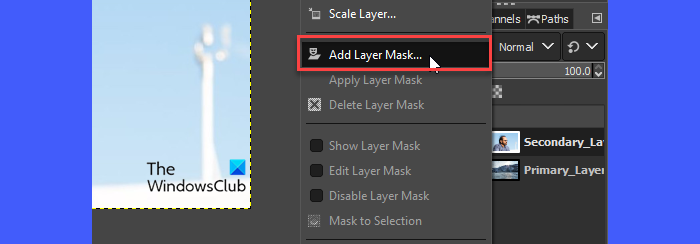
Alternatively, you can click on the Layer menu and select Mask > Add Layer Mask.
In the Add Layer Mask window, use the default settings to initialize the layer mask and click on the Add button.
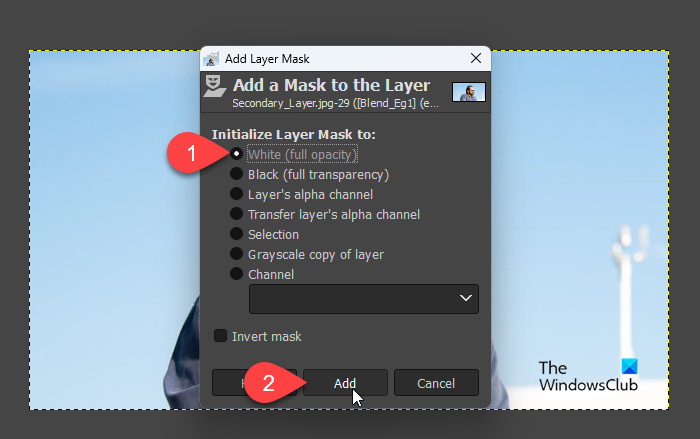
A thumbnail will appear next to the top layer in the Layers panel, indicating that the layer mask has been added. Keeping the default settings – White (full opacity) – will fill the entire layer mask with white pixels, making it opaque. You may then use the GIMP tools (Gradient, Paint Brush, etc.) to create blending effects with the two images. In this post, we will use the Gradient tool to create a smooth blending effect.
Select the Gradient tool from the toolbox on the left. Select Black as the foreground color and White as the background color.
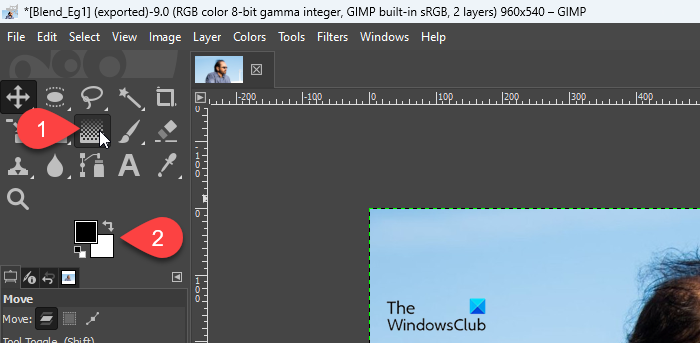
Then click on the desired area of the image and drag out a gradient.
In this example, I am keeping the left side of the photo visible, so I am dragging a black-to-white gradient in the opposite direction (horizontally, from the right to the left). Also, I have moved the image a bit to the left side of the canvas to keep the object in the right place.
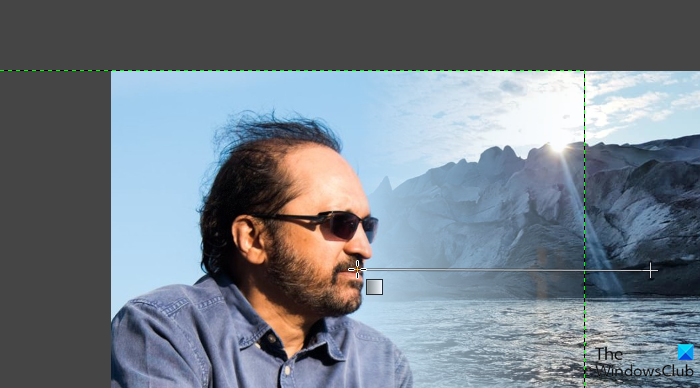
You can drag the gradient in any direction to get the desired results. Press the Enter key to apply the gradient. To make a straight line, press the Ctrl key while dragging the gradient.
This will merge the two images and create a smooth blending effect.
3] Export the resultant image
When you get the desired results, export the image. The Save or Save As option will save the image as an XCF file, which is GIMP’s native image format.
Click on the File menu and select the Export As option. In the Export Image dialogue box, give a suitable name to the image file and select the destination folder. Then click on the Export button to save the image.
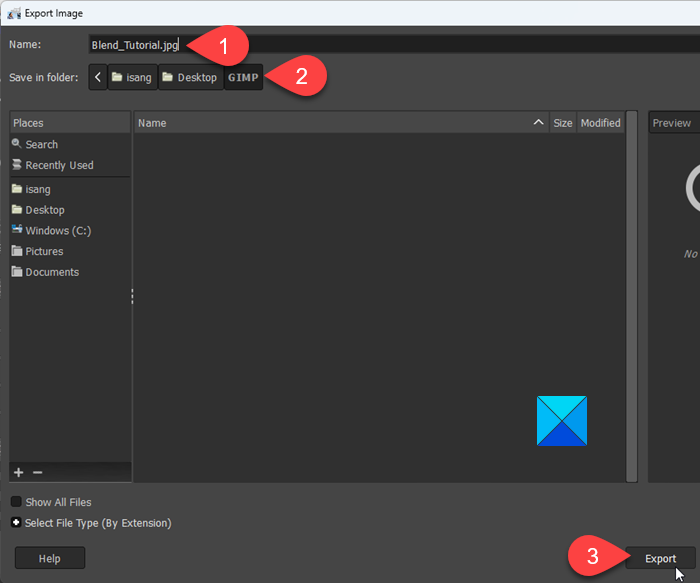
By default, the image will be saved in its original format. To change the format, click on the Select File Type (By Extension) option and select the desired format from the list that shows up.
I hope you find this post useful.
Also Read: How to Make a Gradient in GIMP.
Is there a blending tool in GIMP?
The latest version of GIMP (GIMP 2.10) offers a Gradient tool that can be used to blend images together. This tool was known as the Blend tool in the earlier versions of GIMP. It uses a foreground color and a background color to fill the selected area with a gradient blend. Use the tool over a layer mask to perfectly blend images. The softness of the blend depends on how far you stretch the gradient.
How do I merge two layers in GIMP?
There are 3 different ways to merge the selected layer with the layer underneath in GIMP. One, click on the Merge Down icon at the bottom of the Layers panel. Two, right-click on the layer and select the Merge Down option from the context menu. And three, Click on the Layer menu and select the Merge Down option.
Read Next: Photoshop vs GIMP – Comparison and Differences.