GIMP is a free image editing application that enables you to add effects to photos or create cool graphic designs. GIMP users can apply blur effects to their photos while retaining the sharpness of the rest of the image. Blurring out certain parts of your images can be helpful such as maintaining privacy, number plates, faces, signs, or any other particular objects that you want to blur.
What are the Types of Blur filters in GIMP?
In GIMP, a blur is a set of filters that blur images or a part of them. In GIMP, there are eight types of blur filters, namely:
- Gaussian blur: The most commonly used blur in GIMP, it has an efficient operation that allows it to create a very blurry blur in a relatively short time.
- Mean Curvature blur: This filter uses mean curvature to blur the image-preserving edges.
- Median blur: This filter calculates the median.
- Pixelize blur: This filter turn the image into a set of large square pixel.
- Selective Gaussian blur: This filter allows you to set a threshold so that only pixels that are similar to each other are blurred together.
- Circular Motion blur: This filter blurs in a rotational direction around a center that you can set.
- Linear Motion blur: This filter blurs a direction that you can set.
- Zoom Motion blur: This filter blurs in a radial direction around a center that you can set.
- Tilable blur: This filter is the same as a Gaussian blur, except that it wraps around the edges of an image to help to reduce edge effects when you create a pattern by tiling multiple copies of the image side by side.
How to Blur Images and Background using GIMP
Follow the steps below to make images blurry in GIMP.
- Launch GIMP and load the image that you want to blur
- Click the Selection tool from the toolbox (Choose the one that is suited to select the things in your image to blur)
- Click and drag the cursor over the parts of the image you want to blur
- Click the Filter tab, then hover the cursor over the Blur option
- Now, select the type of blur you want from the list
- Adjust the settings for the type of blur you are applying
- Click OK after you are satisfied with the preview of the effects, apply to the blur
- Use one of the selection tools to select another area of the image, and then repeat the process to make more things blurry, if needed
- Export the image with a new file to save the changes while preserving the original image
Launch GIMP and load the image that you want to blur.

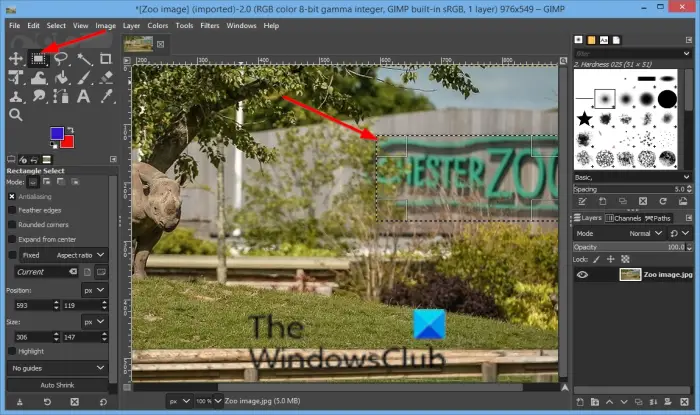
Click a Selection tool from the toolbox (Choose the one that is suited to select the things in your image to blur). You can use the Rectangle select tool for signs, the Eclipse select tool for faces, and the Free select tool for things that have an irregular shape. In this tutorial, we have selected the Rectangle select tool.
Click and drag the cursor over the parts of the image you want to blur.

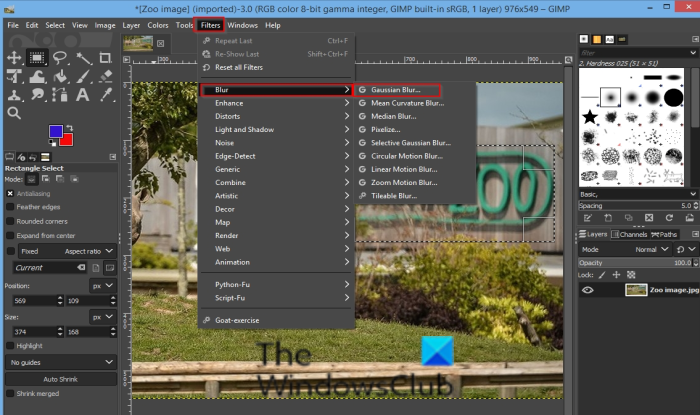
Click the Filter tab, then hover the cursor over the Blur option.
Now, select the type of blur you want from the list (we chose the Gaussian blur).

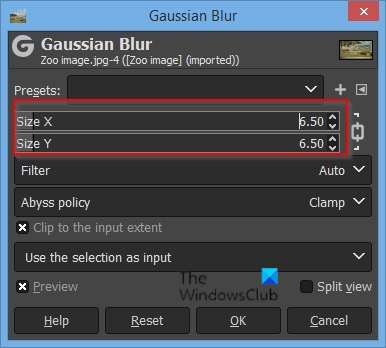
A Gaussian blur dialog box will open
Adjust the settings for the type of blur you are applying.
Click OK after you are satisfied with the preview of the effects, apply to the blur
Use one of the selection tools to select another area of the image, and then repeat the process to make more things blurry, if needed

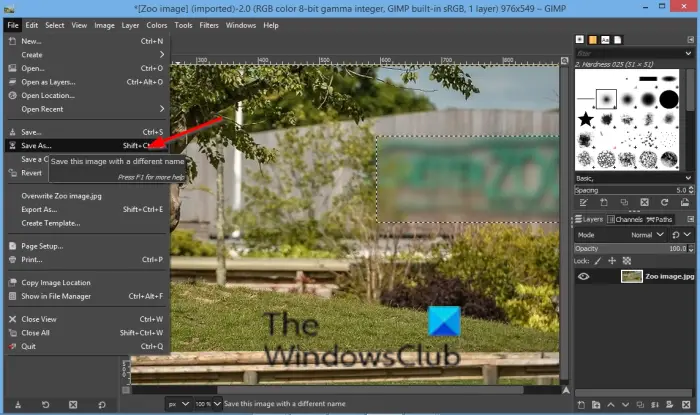
Now save the image.
We hope this tutorial helps you understand how to make images blurry in GIMP; if you have questions about the tutorial, let us know in the comments.
Now read: How to add text in GIMP.
What is a selective blur filter in GIMP?
The Selective Blur filter is an excellent tool for reducing graininess in photos without blurring sharp edges. By setting a threshold, you can control which pixels are blurred, making an excellent choice for keeping your photos sharp and clear. This is useful for creating depth-of-field effects or simply blurring a background while keeping the foreground in focus.
Leave a Reply