One useful feature of Illustrator is the use of layers. Layers are like transparent leaves that the artwork is done on. Parts of the artwork are done on a different layer and then combined. To make the layers interact with each other better, the Blending modes are changed. The blending mode is how the layers interact with each other.
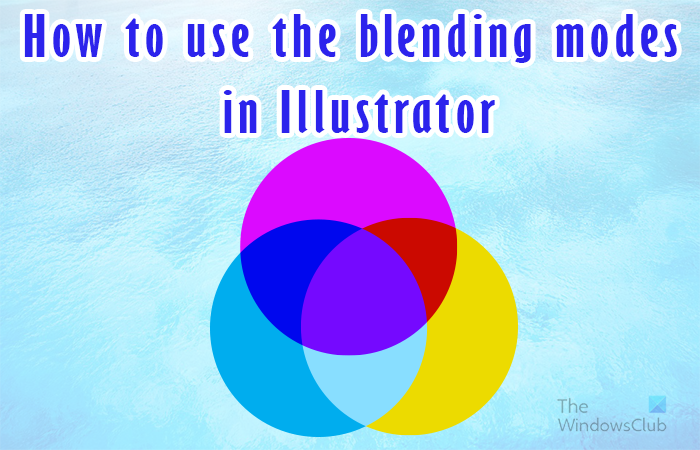
The Blending mode tells the layer above what color and how much color to allow through. This would then change what you would see. Learning how to use the blending modes in Illustrator is very important. There are sixteen Blending modes available in Illustrator and they will all give a different result when used.
How to change Blending Mode in Illustrator
The outcome of your choice of blending mode will look different based on the color that is used for the layer on top, and the percent transparency (Opacity). This article will go through the blending modes and images with examples will be used.
- Open and prepare Illustrator
- Place objects in Illustrator
- Blending modes available in Illustrator
- Apply blending mode to the top object
1] Open and prepare Illustrator
To open Illustrator you can double-click on the Illustrator icon. Depending on the version of Illustrator that you are using the results will be different. However, you will be led to a screen where you choose the options that you want for your document.
2] Place objects in Illustrator
For this article, the objects will be created in Illustrator. The examples will be simple rectangles that will be used to demonstrate what the different Blending modes look like. To place objects in Illustrator you can do so in a few ways. You can click and drag the image in Illustrator. You can also go to File then Open then choose the image that you want and then click Open. You can also right-click on the image then click Open with then Illustrator (version). Note that blending modes will only show when you have two or more images or objects in Illustrator. The change will show through the object at the top.
3] Blending modes available in Illustrator
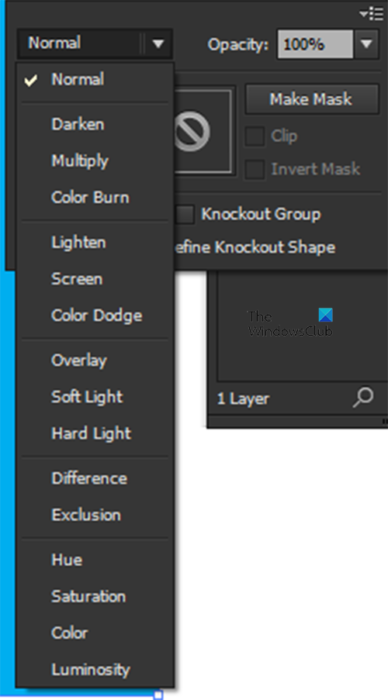
Normal
Paints the selection with the blend color, without interaction with the base color. This is the default mode.
Darken
Selects the base or blend color—whichever is darker—as the resulting color. Areas lighter than the blend color are replaced. Areas darker than the blend color do not change.
Multiply
Multiplies the base color by the blend color. The resulting color is always a darker color. Multiplying any color with black produces black. Multiplying any color with white leaves the color unchanged. The effect is similar to drawing on the page with multiple magic markers.
Color Burn
Darkens the base color to reflect the blend color. Blending with white produces no change.
Lighten
Selects the base or blend color—whichever is lighter—as the resulting color. Areas darker than the blend color are replaced. Areas lighter than the blend color do not change.
Screen
Multiplies the inverse of the blend and base colors. The resulting color is always a lighter color. Screening with black leaves the color unchanged. Screening with white produces white. The effect is similar to projecting multiple slide images on top of each other.
Color Dodge
Brightens the base color to reflect the blend color. Blending with black produces no change.
Overlay
Multiplies or screens the colors, depending on the base color. Patterns or colors overlay the existing artwork, preserving the highlights and shadows of the base color while mixing in the blend color to reflect the lightness or darkness of the original color.
Soft Light
Darkens or lightens the colors, depending on the blend color. The effect is similar to shining a diffused spotlight on the artwork.
If the blend color (light source) is lighter than 50% gray, the artwork is lightened, as if it were dodged. If the blend color is darker than 50% gray, the artwork is darkened, as if it were burned in. Painting with pure black or white produces a distinctly darker or lighter area but doesn’t result in pure black or white.
Hard Light
Multiplies or screens the colors, depending on the blend color. The effect is similar to shining a harsh spotlight on the artwork.
If the blend color (light source) is lighter than 50% gray, the artwork is lightened, as if it were screened. This is useful for adding highlights to artwork. If the blend color is darker than 50% gray, the artwork is darkened, as if it were multiplied. This is useful for adding shadows to artwork. Painting with pure black or white results in pure black or white.
Difference
Subtracts either the blend color from the base color or the base color from the blend color, depending on which has the greater brightness value. Blending with white inverts the base-color values. Blending with black produces no change.
Exclusion
Creates an effect similar to but lower in contrast than the Difference mode. Blending with white inverts the base-color components. Blending with black produces no change.
Hue
Creates a resulting color with the luminance and saturation of the base color and the hue of the blend color.
Saturation
Creates a resulting color with the luminance and hue of the base color and the saturation of the blend color. Painting with this mode in an area with no saturation (gray) causes no change.
Color
Creates a resulting color with the luminance of the base color and the hue and saturation of the blend color. This preserves the gray levels in the artwork and is useful for coloring monochrome artwork and for tinting color artwork.
Luminosity
Creates a resulting color with the hue and saturation of the base color and the luminance of the blend color. This mode creates an inverse effect from that of the Color mode.
Note: The Difference, Exclusion, Hue, Saturation, Color, and Luminosity modes don’t blend spot colors—and with most blending modes, a black designated as 100% K knocks out the color on the underlying layer. Instead of 100% black, specify a rich black using CMYK values.
4] Apply blending mode to the top object
When you place the objects in Illustrator they will automatically be placed on the same layer. You can choose to place each object on a different layer. However, you must place the object with the bending mode above the others that you want to be affected by it.
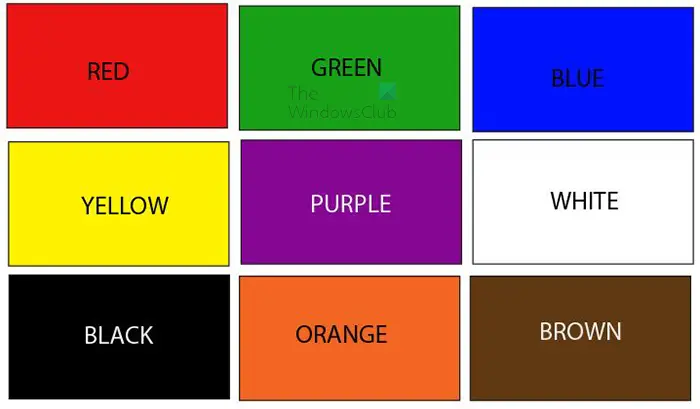
This is the object that will be going below the object that the blending mode will be applied to. This object is made up of nine rectangles of different colors.

This is the object that will go above and have the blending mode applied to it. Note that the color that you use for the object at the top and the percent opacity will affect the outcome. The object that will be used will be purple. You can use whatever color you want or even use a gradient.
Apply the blending mode
To apply the blending mode, select the object that you want to apply the blending mode to then place it above the other objects.
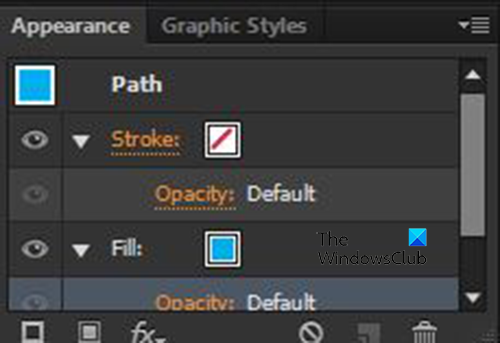
You would then go to the right panel and look in the Appearance panel.
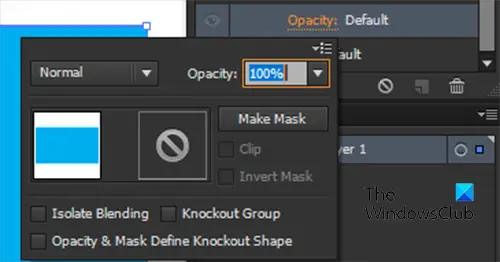
Click the arrow beside Stroke or Fill depending on what color mode you want to change. Note that you can apply blending modes to the fill of an object as well as the stroke of an object. You then click Opacity and you will see a menu with the Blending mode and Opacity for the object.

Click the word Normal to see a list of the available blending modes. Normal is the first blending mode and this blending mode will keep the object just as it is. You can look at the list in Step 3 to see what the different blending modes will do.
Below are a few examples of the different blending modes and what they will look like.
The blue color will be placed above half of the color rectangles. This will help you to see the original color and the color under the blue when the mode of the blue is changed. Because there are so many Blending modes, only five examples will be shown. However, you can experiment with the other blending modes to see the outcome.
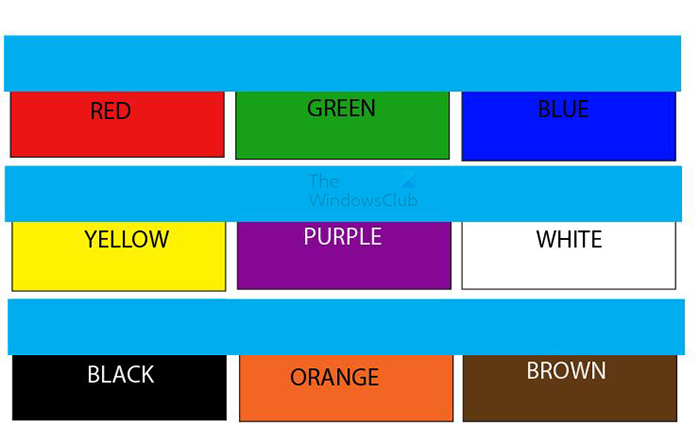
This is the original look of the objects.
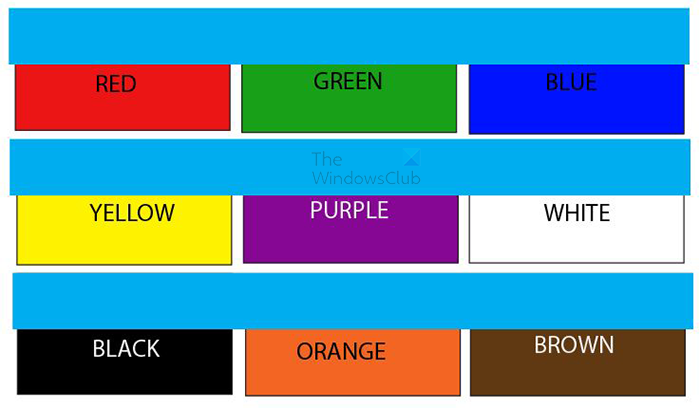
Normal Blending mode
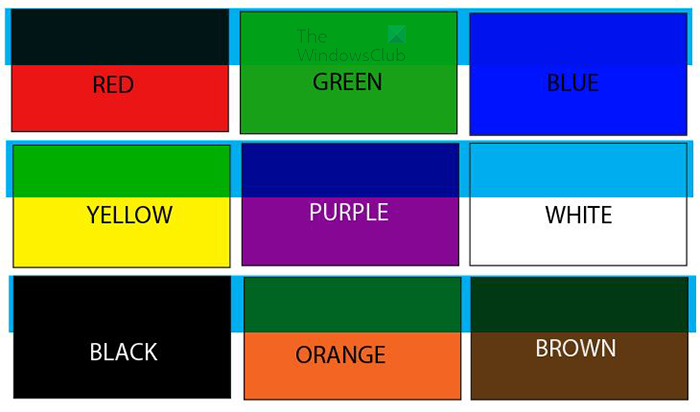
Darken Blending mode
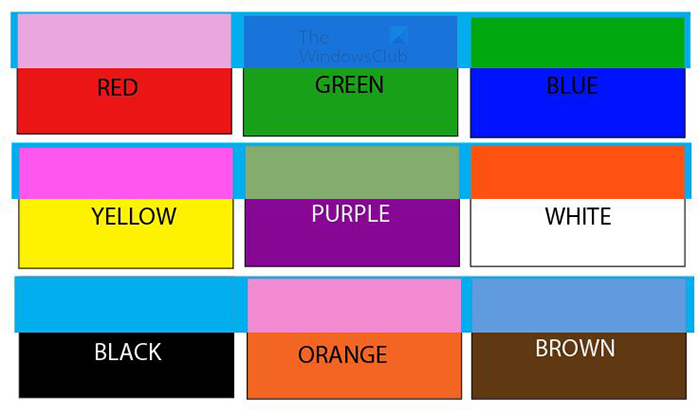
Exclusion Blending mode
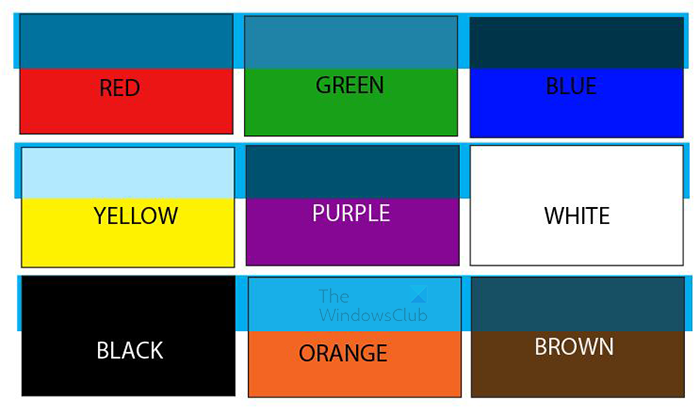
Hue Blending mode
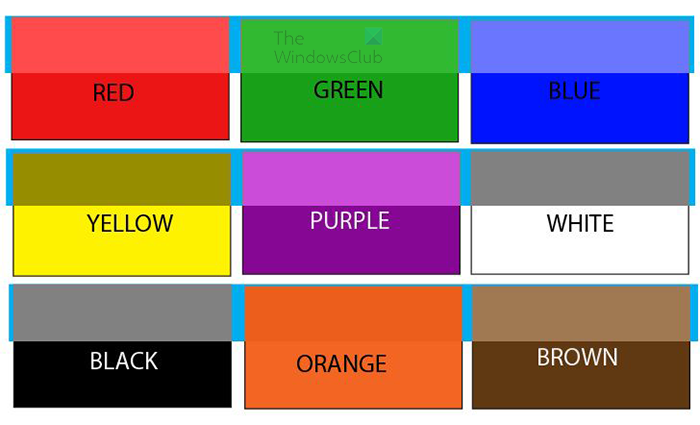
Luminosity Blending mode
Tip: If you have multiple objects with different Blending modes you can select all the objects with the same blending modes. To select all the objects with the same blending mode go to the top menu bar and click Select then Same then Blending mode.
Read: How to make a White Background Transparent in Illustrator
What does the Color blending mode do in Illustrator?
The Color blend mode preserves the luma of the bottom layer while adopting the hue and chroma of the top layer.
What is the most used Blending mode in Illustrator?
The Multiply Blending mode is the most used blending mode in Illustrator. The Multiply blending mode Multiplies the base color by the blend color. The resulting color is always darker. The Multiply blend mode uses the dark pixels to darken the underlying layer, while white becomes transparent.
Leave a Reply