With access to a Microsoft Exchange Server account or an Office 365 Account, you can control the number of emails to be kept offline in Outlook. This post describes how to configure your Outlook account to do so.
Change how much email to keep offline in Outlook
Outlook downloads all your tasks, contacts and calendar appointments from Microsoft Exchange Server to your PC. However, it should use services like Hotmail or Office 365 for this. If you have chosen to use the services of a different mail provider (Google or Yahoo), Outlook will not allow you to set the limit for the number of emails to be kept offline.
Limit Exchange mailbox items to be synchronized in Outlook
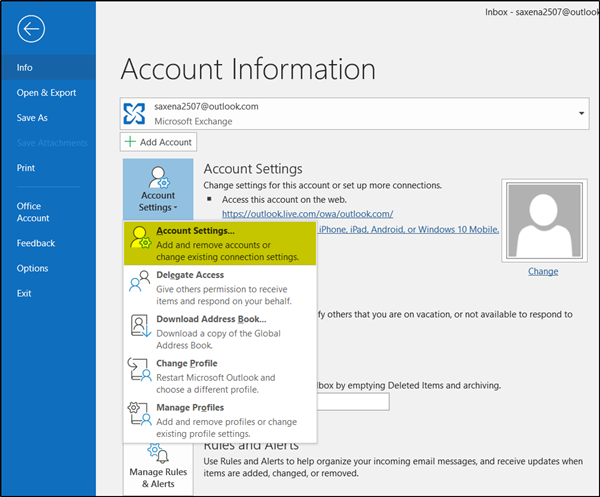
1] Open your Outlook account and navigate to File menu.
2] Next, move to ‘Account Settings’ section and choose ‘Account Settings’ option from the drop-down menu.

3] Now, moving to the Account Settings window, select the account to change the default and then, hit the ‘Change’ button.
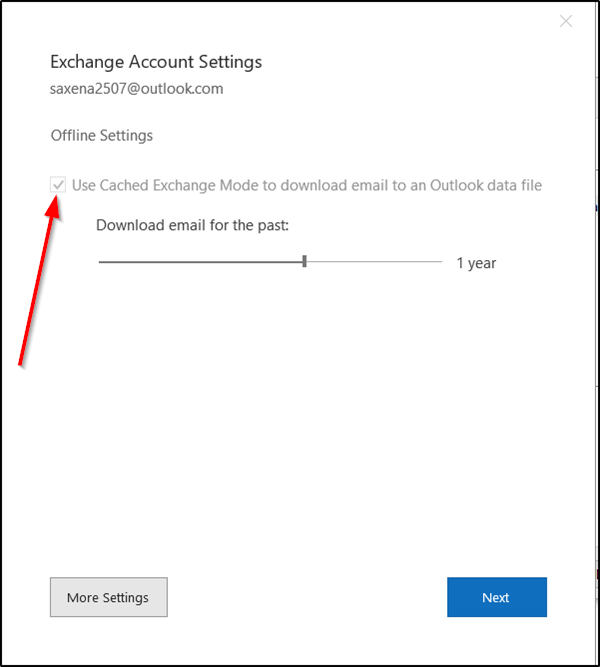
4] Instantly, a ‘Change Account’ will appear, showing you a ‘Use Cached Exchange Mode’ enabled under ‘Offline settings’ section.
5] If it’s not enabled by default, check the box marked against it. If not done, mails will fail to download on your PC.
6] After that, proceed to change how much mail you would like to keep offline in Outlook via ‘Mail to keep offline’ slider.

7] Currently, the time limits available are:
- 3 Days
- 1 Week
- 3 Weeks
- 1 Month
- 3 Months
- 6 Months
- 1 Year
- 2 Years
- 5 years
- All
Please note that the above limits (3 Days, 1 Week, and 2 Weeks) aren’t available for earlier versions of Office like Office 2013.
8] Select the desired period from the above options. For some reasons, if you are not able to change it then, you need to seek administrator privileges to make the changes.
9] If prompted after the changes made, hit ‘Next’.
10] You’ll need to restart your Outlook, so click ‘OK’ and close the Account Settings window.
11] Following this, Outlook may take a little while to update. It strictly depends upon the limit you’ve configured.
Finally, when it is done, you’ll see a message at the bottom.
Read next: How to Auto Delete Mail in Outlook selectively.
Leave a Reply