In this post, we will show you how to change the page orientation to landscape in Microsoft Excel. Page orientation refers to the way data is printed on paper. It can either be vertical (portrait) or horizontal (landscape).
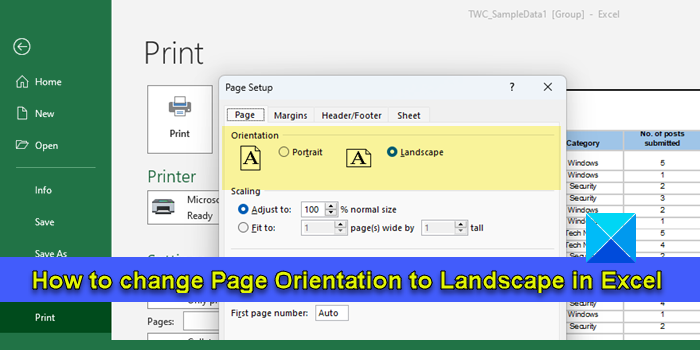
Portrait is the default page orientation Excel uses to print data on a sheet. However, if the worksheet consists of more columns than rows, you might want to switch to the landscape mode. Printing the data in landscape mode prevents cutting off the columns from the right side on a single-page view. In this post, we will take you through different methods of changing the page orientation in Excel.
How to change Page Orientation to Landscape in Excel
You may use the following methods to change the page orientation to Landscape in Excel:
- Change page orientation using the Page Layout menu.
- Change page orientation using the Page Setup tool.
- Change page orientation using Print Settings.
Let us see these in detail.
1] Change page orientation using the Page Layout menu
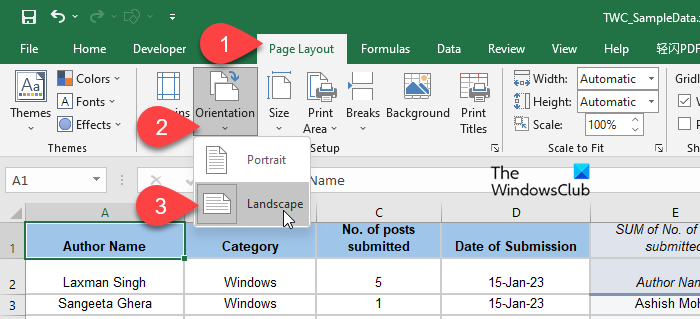
This is the easiest way to change the orientation of a page in Microsoft Excel.
- Open the desired workbook and select the worksheet for which you want to change the page orientation.
- Click on the Page Layout tab on top of the Excel editor window.
- Under the Page Setup section, click on the down arrow icon below the Orientation option (the second option in the section).
- Select the Landscape option to switch to the landscape mode for printing.
Dashed vertical lines will appear on the worksheet, giving you an idea about how many columns will be covered horizontally when you print the data in landscape mode.
Note: You can also change the page orientation of multiple worksheets at once. Press and hold the Ctlr key and click on the name of each worksheet whose orientation you want to change. The sheets will be grouped together. Then change the orientation to landscape using the Page Layout menu. After changing the orientation, right-click on the sheet name (any worksheet in the group) and select Upgroup Sheets.
2] Change page orientation using the Page Setup tool
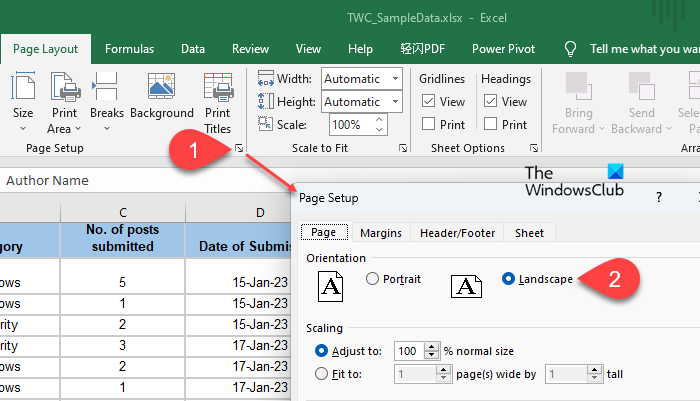
The next method involves changing the page orientation from within the Page Setup dialogue box. Here’s how:
- Select the desired worksheet and click on the Page Layout tab.
- Click on the expand arrow icon in the bottom-right corner of the Page Setup section. The Page Setup dialogue box will appear.
- Select Landscape from Orientation options on top of the Page tab.
- Click on the OK button.
3] Change page orientation using Print Settings
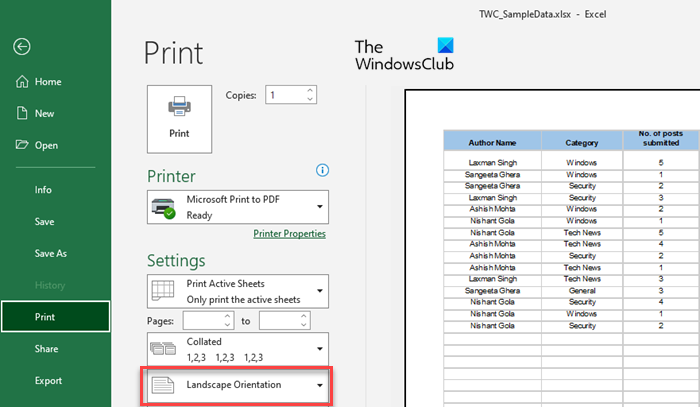
You can also change the page orientation to landscape when you decide to print the worksheet/workbook. Here’s how:
Click on the File menu and select Print from the options in the left panel. The Print preview screen will appear.
Locate Portrait Orientation under the Print Settings on the left. Click on the down arrow icon next to it. Select Landscape Orientation from the dropdown. The changes will be reflected in the print preview.
Alternatively, click on the Page Setup link at the bottom of the Print Settings. Page Setup popup will appear. Select Landscape under Orientation and click on the OK button.
Bonus: Create a workbook template to print in Landscape orientation by default
If you frequently switch to landscape orientation, you can create a template workbook which is configured to print in the landscape mode. This will eliminate the need to manually change the page orientation while working on future workbooks.
- Open a new Excel workbook.
- Add as many sheets to it as you think might be required in future.
- Select the sheet/sheets to which you want to apply landscape orientation. The sheets will be grouped together.
- Go to the Page Layout tab.
- Select Orientation > Landscape.
- Make any customizations to the workbook if required.
- Ungroup the sheets.
- Click on File > Save As.
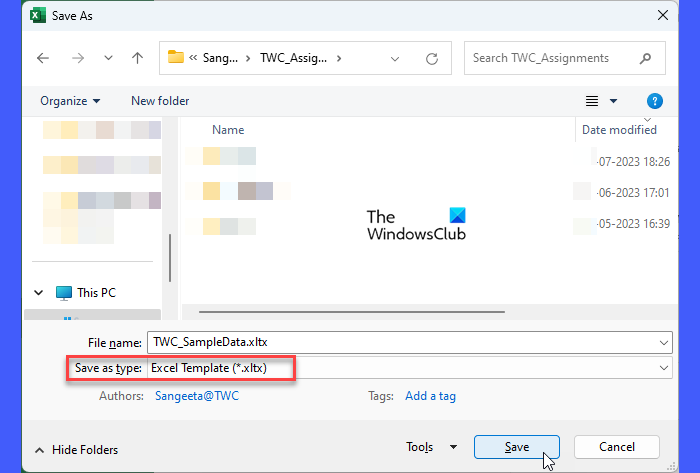
- Save As dialogue box will appear. Give a suitable name to the file. Choose Excel Template (*xltx) in the Save as type field. If the workbook contains macros, select Excel Macro-Enabled Template (*.xltm).
- Click on the Save button.
The workbook will be saved as a template. To use the template, open Excel and select File > New. Click on the Personal tab (next to the Office tab). Then click on the name or icon of your template.
That’s it! If you have any doubts, please share in the comments section below.
Also Read: How to change Page Orientation in Google Docs.
How do I rotate orientation in Excel?
To rotate the page or change the page orientation in Excel, select the desired worksheet (or group multiple worksheets together) and click on the Orientation option under the Page Layout tab. Then select the orientation you want to apply to the selected sheets (portrait to span the data vertically or landscape to span the data horizontally).
What is the shortcut to change orientation in Excel?
To change the page orientation in Excel using the keyboard shortcut, select the worksheet and press Alt+P. This will highlight the keyboard shortcut to each option under the Page Layout tab. Press O to select Orientation. Portrait and Landscape options will show up. Use the up and down arrow keys to select the desired option.
Read Next: How to make one page landscape in Microsoft Word.
Leave a Reply