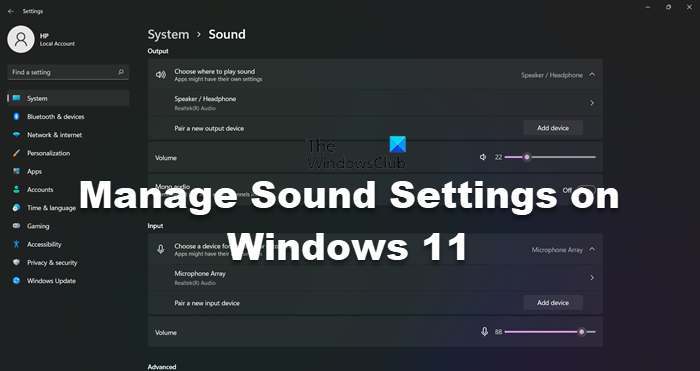
Windows 11 is the latest iteration of the OS and people are talking about everything from the new features this OS has to the aesthetical changes Microsoft has made, but there is so little attention being given to Audio. So, in this article, we present to you a complete guide on how to configure, improve, change, reset or manage Sound settings, choose speakers in Windows 11 for better audio.
How do I manage or configure the Sound settings on Windows 11?
To manage Sound Settings on Windows 11, we are going to use Windows Settings. You can open it from the Start Menu or by a keyboard shortcut: Win + I. Once the Settings is launched, go to Sounds, from there you can change the Sound Settings. We would recommend you go through the changes we have mentioned hereinafter to manage your audio.
How to change Sound Settings on Windows 11 to get better Audio
To improve or manage Sound settings in Windows 11 for better audio, follow these suggestions:
- Change Output Sound device
- Enable Spatial Sound
- Enable or Disable Enhance Audio
- Update Audio Drivers
- Add Audio Device
- Enable or Disable Mono Audio
- Adjust Left and Right Audio
- Run Audio Troubleshooter
Let us see them in detail.
1] Change Output Sound device
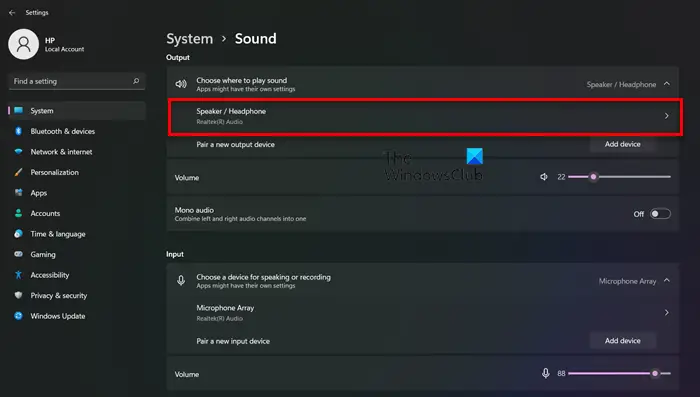
Windows has the ability to detect a newly added sound device, but sometimes it fails to do the same. So, we need to change the setting manually. To do that, follow the given steps.
- Open Settings.
- Go to System > Sound.
- Under Output, you will see Speaker/Headphone, click on it and select a device.
This way you can choose any output device that is connected to your system.
2] Enable Spatial Sound
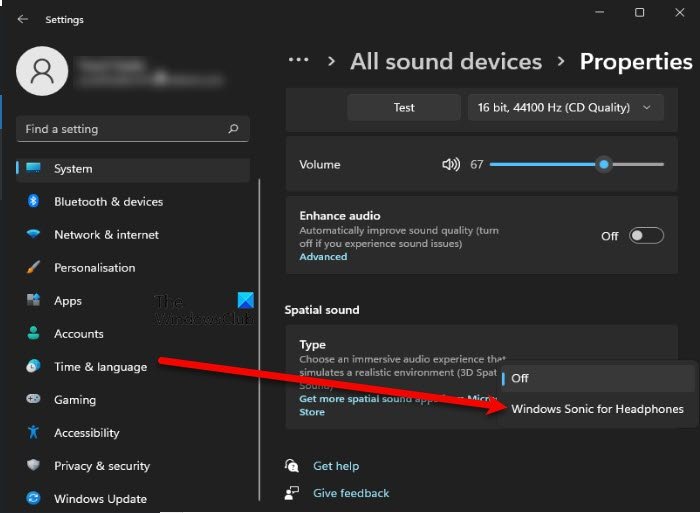
To add a bit of panache and a confident texture to the sound coming out of your speaker, we need to enable Spatial Sound. Follow the given steps to do the same.
- Open Settings.
- Go to System > Sound > Speaker (from the Output section).
- Now, from Spatial Sound, change the Type to Windows Sonic for Headphones.
This will give you an immersive experience.
3] Enable or Disable Enhance Audio
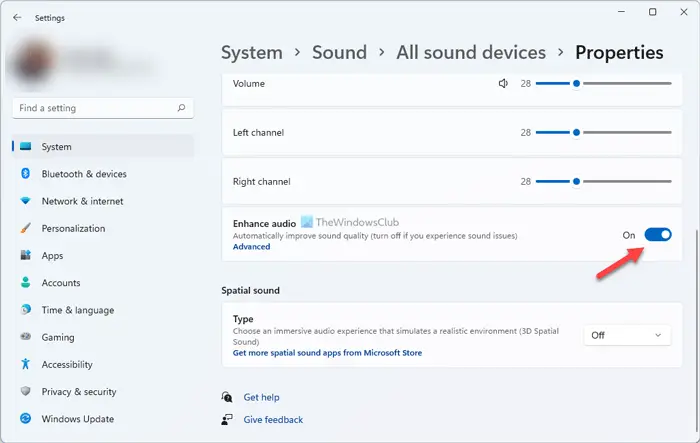
Audio Enhancement is one of the most controversial features of Windows. It works on some computers, but on some, it makes things worse. So, it is better to know how to enable or disable it. Following are the steps to do the same.
- Open Settings.
- Go to System > Sound.
- From Output, click Speakers.
- Enable or disable Enhance audio.
- Click Advanced, tick or untick the feature you want and click Apply > Ok.
Hopefully, that will do the job for you.
4] Update Audio Drivers
One can not talk about managing a computer’s audio and leave out the Audio Drivers. If you are an audio-based professional such as music production, DJ, etc, you know the importance of drivers. To make sure that your Audio Drivers are performing as per the requirement, you need to keep them updated. Following are some of the methods to update Audio Drivers.
- Update Windows to update Audio Drivers.
- Download a free driver update software.
- Go to Device Manager and update the driver.
- Download the latest version of the driver from the manufacturer’s website.
You can pick any of them and update the drivers.
Related: How to adjust Bass and Treble in Windows 11
5] Add Audio Device
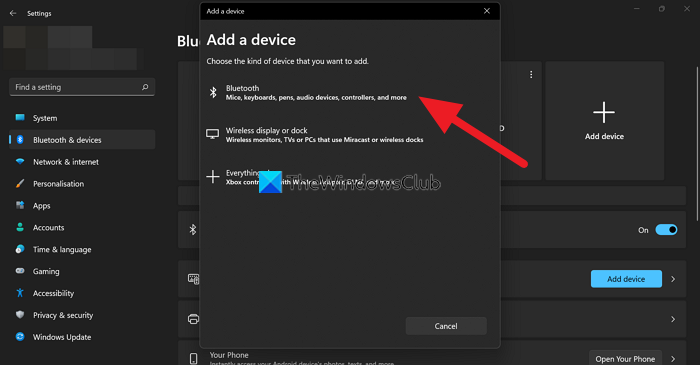
If you have a wireless headphone or speaker and want to connect it to your Windows 11 computer, follow the given steps.
- Open Settings.
- Go to System > Sound.
- Click Add device.
- Select Bluetooth and add the device.
6] Enable or Disable Mono Audio
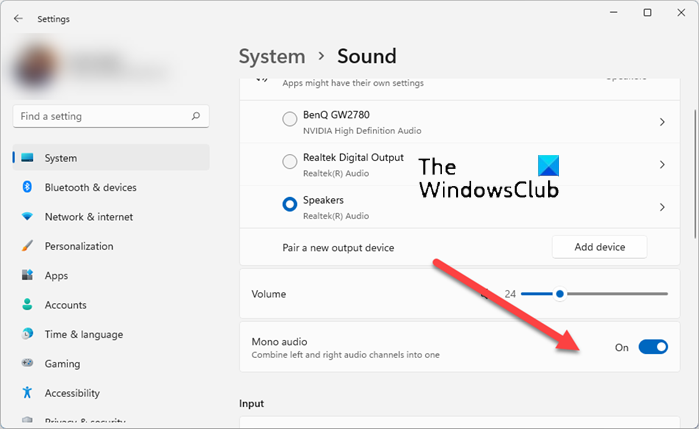
Mono Audio feature combines audio from the left and right audio channels into one. If you like the idea and want to enable it then follow the given steps.
- Open Settings.
- Go to System > Sound.
- Use the toggle to enable or disable Mono audio.
Mono Audio is not for everyone, so, enable it, and check if it works. If you are not a fan of that combination, then disable it.
7] Adjust Left and Right Audio
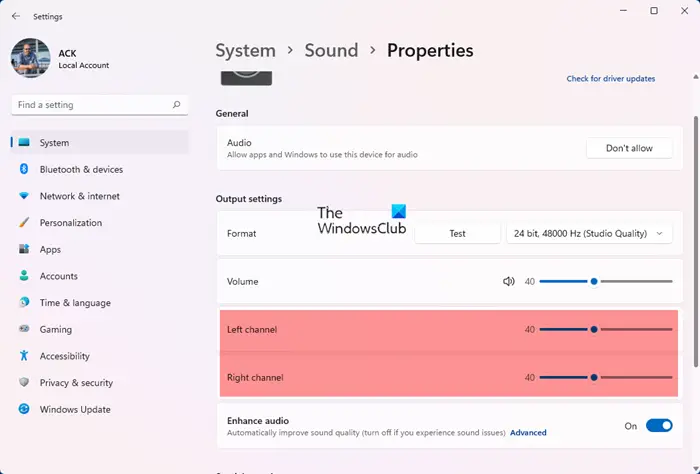
If you are not a fan of Mono Audio and want separation between the two audio channels, left and right, then follow the given steps.
- Open Settings.
- Go to System > Sound.
- From Output, click Speakers.
- Click Advanced from Enhance audio section.
- Click Levels > Balance.
- Then use the slider to change the levels of Left and Right channels.
- Click Ok.
- Click Apply > Ok.
8] Run Audio Troubleshooter
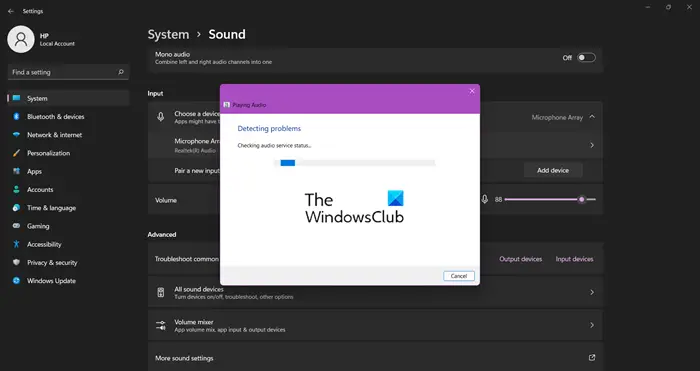
Finally, we have a Windows utility that you can deploy when facing a sound or audio problem. To run the Audio Troubleshooter, follow the given steps.
- Open Settings.
- Click System > Sound.
- Scroll down navigate to Advanced.
- Click Output devices from Troubleshoot common sound problems.
- Follow the on-screen instruction to run the troubleshooter.
That’s it!
How do I get to the Sound Control Panel in Windows 11?
To open Sound Control Panel, hit Win + R, type “Control” and click Ok. Then, go to Hardware & Sound > Sound, you can also, change the View by to Large icons and then click Sound. Alternatively, you can also click on the Speaker icon from the Taskbar and click Sound, you will be redirected to your destination.
Read: How to open old Sound settings panel in Windows 11
How to reset all sound settings on Windows 11
To reset all Sound settings on Windows 11, follow the given steps
- Open Settings by Win + I.
- Go to System > Sound > Volume Mixer.
- Click Reset from the Apps section.
- Restart your PC.
Also Read: Enable or Disable the Startup Sound on Windows 11.
Leave a Reply