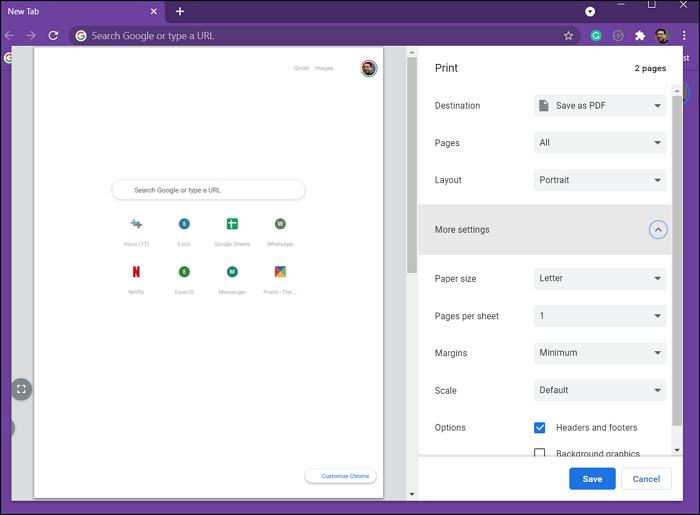
Like any other browser, Chrome offers a way to print whatever is open in the browser directly. When you choose to print, it offers settings related to print, and it can be changed. The default of Chrome’s Print Settings are set to save as PDF, which can be changed on your Windows PC.
How to change the Default Print Settings in Chrome

To can change the default print settings in Chrome:
- Launch Chrome and open any Webpage
- Click on the three-dot menu on the top-right and select print or use Ctrl + P
- If you had never changed anything here, it would display Save as PDF option
- Click on the Save As PDF dropdown, and then on See More to add more printers
- Next, to change settings, you can click on More Settings
- Here you can change Paper Size, Margins, Scale, etc.
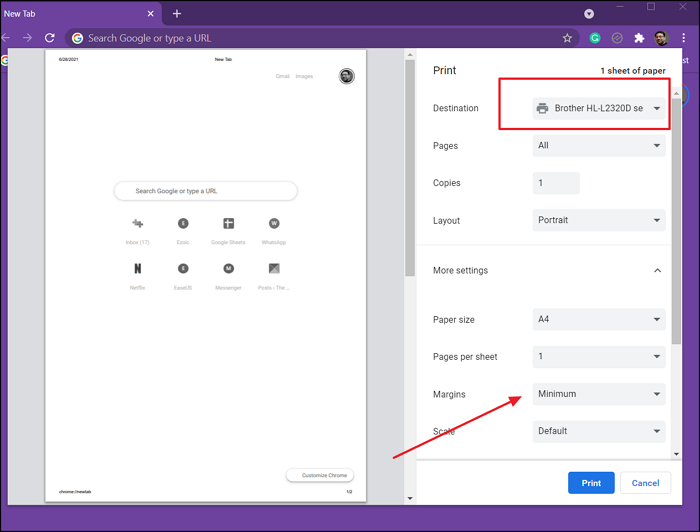
- To change the default setting, you need to change at least one, and then click on the Print or Save option.
- Once done, it will remember the settings the next time you open it.

Note: I will suggest changing the print setting when Save as PDF is set. Since you need to click on the Print or Save as PDF option every time you need to change the setting, using a Printer will only waste the page. However, you can always keep the printer offline and then cancel from the Print-Job.
The drawback of Print Setting in Chrome
One of the major drawbacks of Print Settings in Chrome is that it does not remember the changed setting for each printer. If you change Margin settings to Minimum for One printer, it will display the same for the second printer. This can be not very pleasant.
The workaround for this is to use Ctrl + Shift + P to open the System Print Dialogue that allows you to configure print settings for each printer, including Print to PDF.
I hope the post was easy to follow, and you can now change the default print settings of Chrome. There are few drawbacks, but then there is an alternate way to get around it.