Here is a tutorial to change the time zone and language settings in Outlook (Microsoft 365 version) on Windows 11/10.
How to change Time Zone and Language in Outlook 365
For Microsoft 365 users, it is pretty easy to change your time zone and language settings in Outlook on Windows systems. Here are the steps to do that:
- Open Outlook.
- Click on the File menu.
- Tap on Options.
- Go to the Calendar tab.
- Change Time Zone as per your requirement.
- Move to the Language tab.
- Set the desired display and authoring languages.
- Press the OK button.
Firstly, open the Microsoft Outlook app on your computer. Now, click on the File menu and then choose Options.
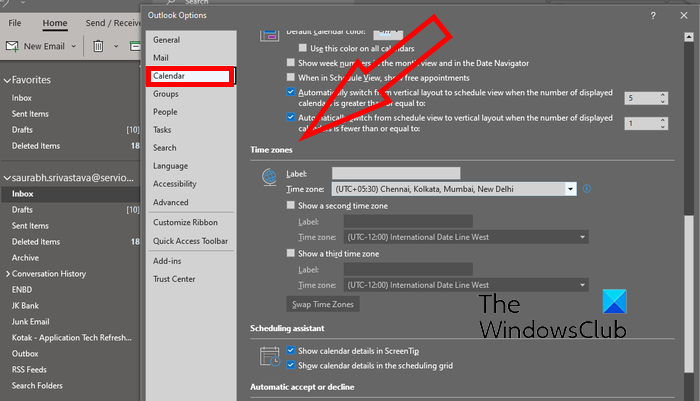
Inside the Outlook Options window, move to the Calendar tab.

Next, scroll down toward the Time zones section. After that, click on the Time zone drop-down menu button and select the desired time zone to set up for your Outlook. You can also add a custom label for the chosen time zone.
You can also add second and third time zones if required. simply tick the Show a second time zone/Show a third time zone checkbox and choose the desired time zone. It also provides an option to swap positions of time zones in case of multiple time zones.
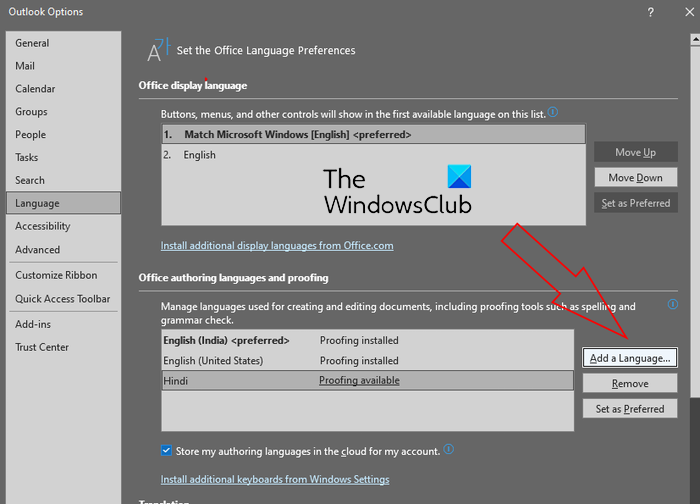
Now, to change language settings in Outlook, navigate to the Language tab. You can now set the desired display (interface) language under the Office display language section.

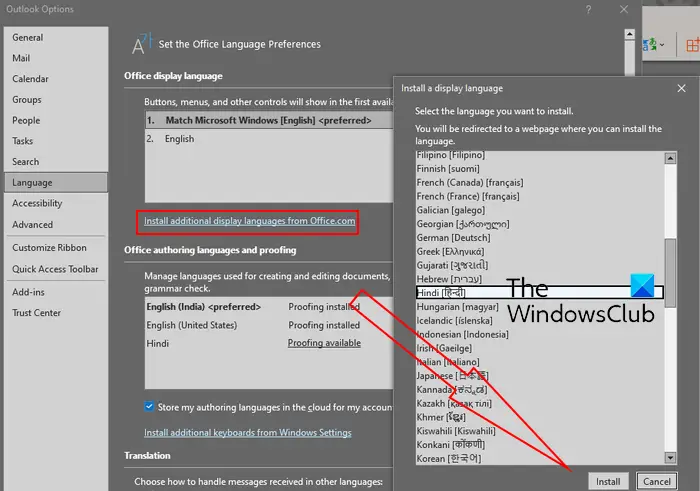
If the language that you want to use to display buttons, menus, etc. in Outlook is not listed, click on the Install additional display languages from Office.com option. You can choose a display language and click on the Install button to install it. After that, you can select the language under Office display language and click on the Set as Preferred button.

You can also change the authoring language for creating and editing documents. To do that, select the desired authoring language under Office authoring languages and proofing section. If the language you need to set for authoring and proofing is not listed, click on the Add a Language button, click on the desired language, and press the Add button. Finally, choose the added language and tap on the Set as Prefered button.
When done, click on the OK button to save changes.
So, this is how you can change the time zone and language settings in Outlook 365 on Windows 11/10.
Read: Set time zone automatically greyed out in Windows.
How to set Time Zone and Language in Outlook.com?

If you use the web version of Outlook, you can use the below steps to configure the time zone and language settings:
- Open Outlook.com in a web browser.
- Login to your account.
- Click on Settings > View all Outlook settings option.
- Go to the General tab.
- Move to the Language and time tab.
- Set the preferred language, time zone, and other settings.
First, open the Outlook web in a browser of your choice and make sure to log in with your Microsoft account.
Now, tap on the Settings button present at the top-right corner and then click on the View all Outlook settings option from the bottom.
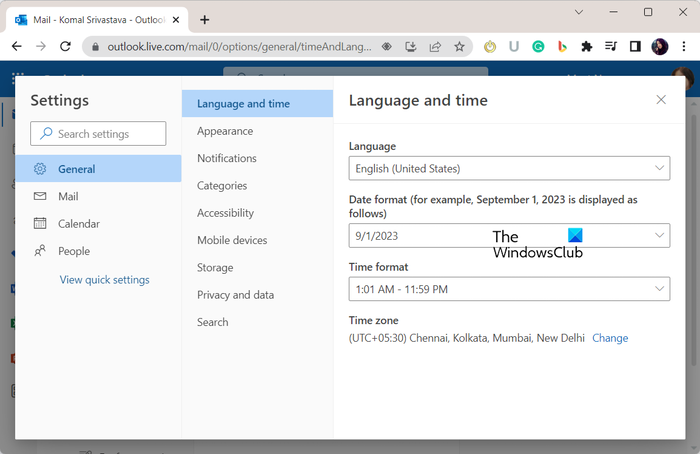
In the Settings window, move to the General tab and then go to the Language and time tab.
Next, click on the Language drop-down option and set the desired language. After that, press the Change button next to the Time zone option and then choose your correct time zone. You can also change the date format and time format.
Related read: Adjust for daylight saving time automatically is grayed out in Windows.
How to set language and timezone for all users in Office 365?
The admin of an organization can set the time zone and display language for specific or all users in Microsoft Office 365. However, if allowed, an individual can also change the language and time zone for Office 365 apps. For that, open Microsoft 365 and click on the Settings button from the top-right corner. After that, click on the Change your language option under Language and time zone and then set the display language and time zone accordingly.
How do I change my Outlook 365 language to English?
If you want to change the language back to English in Outlook, open the app and click on File > Options. After that, go to the Language tab, select the English language ad display language, and press the Set as Preferred button. You can switch your authoring language back to English the same way.
Now read: Standard Settings to configure before you start using Outlook.com.
Leave a Reply