The View features in Microsoft applications showcase the windows views in different layouts from the default view. In OneNote, there are three layout views you can display in your OneNote window. These views are Normal View, Full Page View, and Dock to Desktop.
Types of OneNote Views
- Normal View: The Normal View is the default view; it displays the ribbon and navigation tab.
- Full Page View: The Full page View shows only the current page.
- Dock to Desktop: The Dock to Desktop View displays the OneNote window to the side of the desktop. You can have your OneNote notes on the side while you work in another program.
How to change View in OneNote on Windows 11/10
1] The Normal View

- Open OneNote.
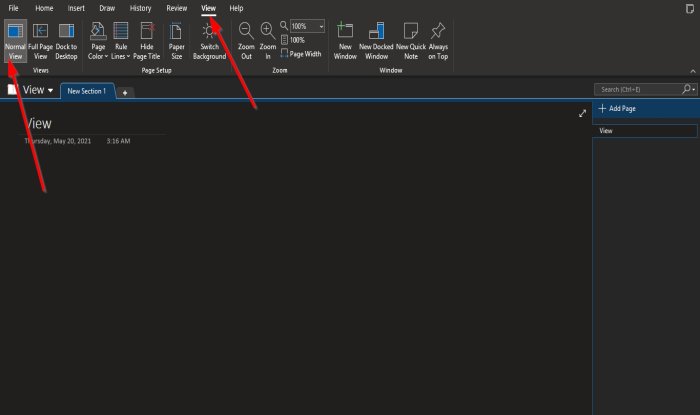
- Click the View tab.
- In the View group, you will see the Normal View as the default view.
2] The Full Page View

- Click the View tab.
- In the View group, click the Full Page View button.
- Once clicked, the page will appear in full view.
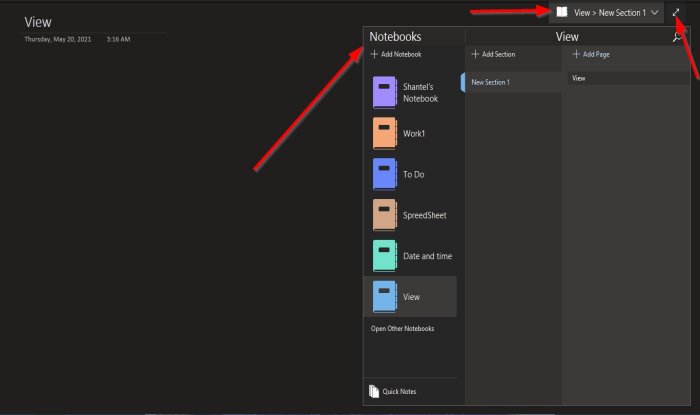
- In the Full Page View window, where you see View >New section 1.
- If you choose to click View >New section 1, you will see options to Add New Notebooks, Open other Notebooks in OneNote, Quick Notes, Add Sections and Add pages.
To return the screen to normal, click the Double Arrow on the right of the window. The screen is returned to normal.
3] Dock to Desktop

- Click the View tab.
- In the View group, click the Dock to Desktop button.
- Once clicked, the screen will appear on the right.
- It also displays a link button to Link Files, Deletes the link on the page, Stops taking link notes, and Link notes options.
You can change the screen’s position by clicking the top of it drag it on the screen; it can appear on the top and the bottom of your desktop.
To return the screen to normal, click the Double Arrow on the right of the window.
We hope this tutorial helps you understand how to change Screen Views in OneNote.
Read next: How to add Date and Time in OneNote.
Leave a Reply