Many users prefer playing games on Xbox in pairs for added entertainment, and hence, it’s important to know how to change the Xbox controller to Player 1 on Windows PC. However, the Xbox PC controller sometimes gets stuck on Player 2, making it challenging to change to Player 1.
For example, as you connect an Xbox controller to your PC it may keep defaulting to Player 2. As per users, even unplugging and re-plugging the controller resets it to Player 2. However, we have some effective workarounds to fix the issue if the PC controller is stuck on Player 2.
Why is the Xbox controller saying Player 2 on PC?
One of the possible reasons why your Xbox controller would go to Player 2 is that the game is configured to send control to the player with the highest kills. Another reason could be if you have set the game to send control to the player who has been playing the game the longest.
Among other reasons could be if there’s a glitch with the controller components or the driver, a pending Windows update, or an incompatible USB plug. Therefore, we have created a guide for you explaining how to change the Xbox controller to Player 1 on Windows PC.
Before you proceed to change the Xbox controller to Player 1, make sure that you connect the controller to your Windows PC. For this, you must install the Xbox PC emulator to your system (PC/laptop). You can then connect the Xbox either using a wired connection or wirelessly. For a wired connection, you need to plug in the cable to the USB 3.0 port of your PC, and for a wireless connection, pair the Xbox controller with the PC using Bluetooth.
How to change my Xbox controller to Player 1 on Windows PC?
If the PC controller shows that it’s stuck on Player 2, restart your PC and check if it helps. But if the Xbox controller is not working, you may want to check your USB cable for any damage. Alternatively, you may change the USB cable port from USB 3.0 to USB 2.0 port to see if it helps fix the issue. If none of this helps, you can proceed with the below troubleshooting methods.
- Restart and Connect Controller
- Delete specific controller driver
- Run the troubleshooter
- Update the Windows
- Disable the HID-compliant game controller
1] Restart the PC and connect the Controller
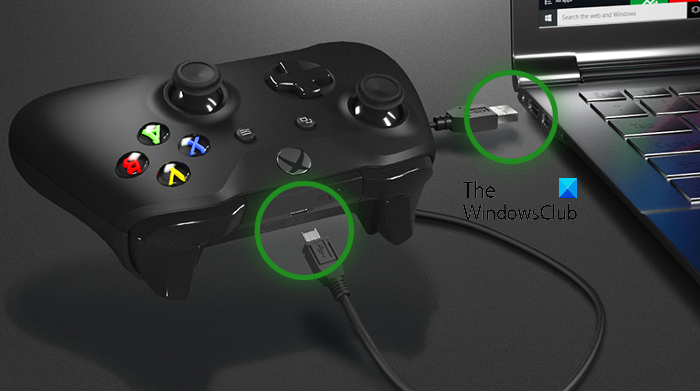
This method has proven to be the most effective for many users. In this, you need to restart your PC with the Xbox wired controller connected. If using a wireless connection, connect the controller immediately to Bluetooth as soon as the computer turns on.
For a wired connection, as soon as the system reboots, search for a connection with the controller. When connected, it should show four blinking lights. Once Windows starts and you reach the desktop, the controller should be connected to Player 1.
If using Xbox One controller, you may need to calibrate it on your PC if Windows does not recognize it.
Read: How to connect Xbox One controller to Windows, Mac, and Linux
2] Remove the specific controller driver
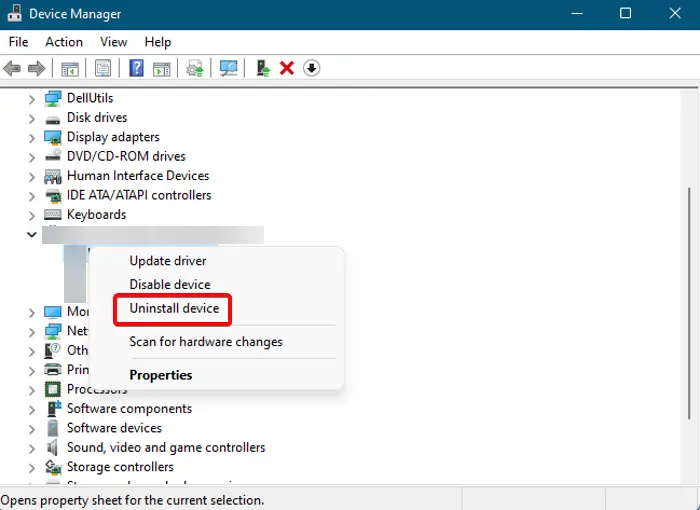
Sometimes, deleting a specific controller driver and then reconnecting the Xbox controller may help you change it to Player 1 on your Windows PC:
- Press the Win + R keys to launch the Run console.
- Type in Control Printers in the search bar and hit Enter to open the Devices and Printers window.
- Next, look for Xbox controllers for Windows and Xbox 360 wireless controllers. Right-click on the Xbox controller for Windows and select Uninstall device.
- Now, click on Uninstall again in the prompt to confirm the action.
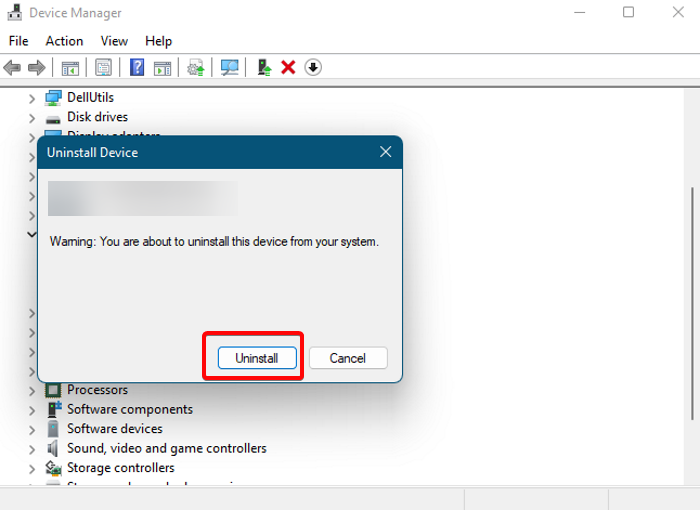
- Also, disconnect the controller that says Player 2.
Now, connect the Xbox controller to your PC and check if it shows Player 1.
3] Run the troubleshooter
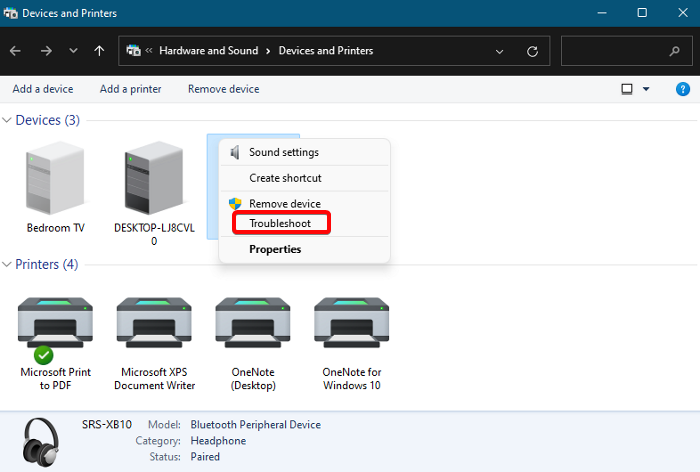
While you can run the hardware and devices troubleshooter if the controller is detected but not working in-game on PC, you can also try running the specific device troubleshooter as shown below:
- Press the Win + R keys to open the Run dialog.
- Here, type Control Printers and hit Enter to open the Devices and Printers window.
- Next, right-click on Xbox 360 controller for Windows and select Troubleshoot.
- Now, wait for the troubleshooter to detect any issues. If any issues are found, it will apply the fix to Update the Windows automatically.
Read: Xbox Startup and Online Troubleshooter will help fix Xbox One Errors
5] Disable the HID-compliant game controller
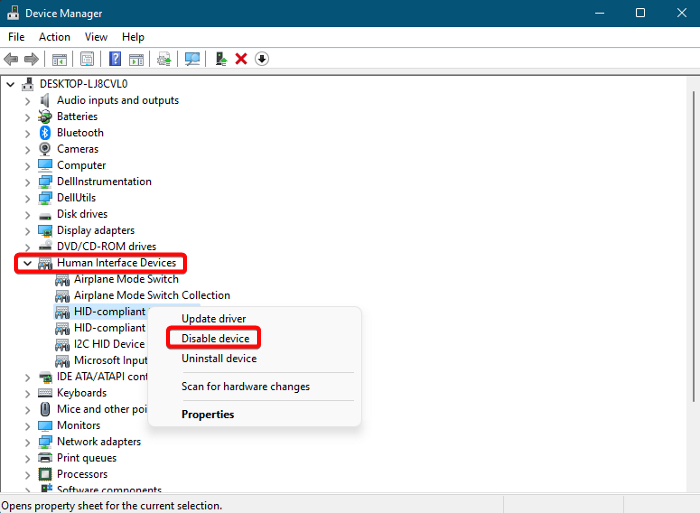
It could be possible that your Windows PC is detecting the HID-compliant game controller as Player 1 and hence, the Xbox controller is stuck on Player 2. In this case, disabling the game HID-compliant game controller can help you change the Xbox controller to Player 1. In this case, open the Device Manager > Human Interface Devices > HID-complaint game controller > right-click > Disable device.
This should change the Xbox controller to Player 1 on your Windows PC.
6] Re-install the Xbox controller device driver
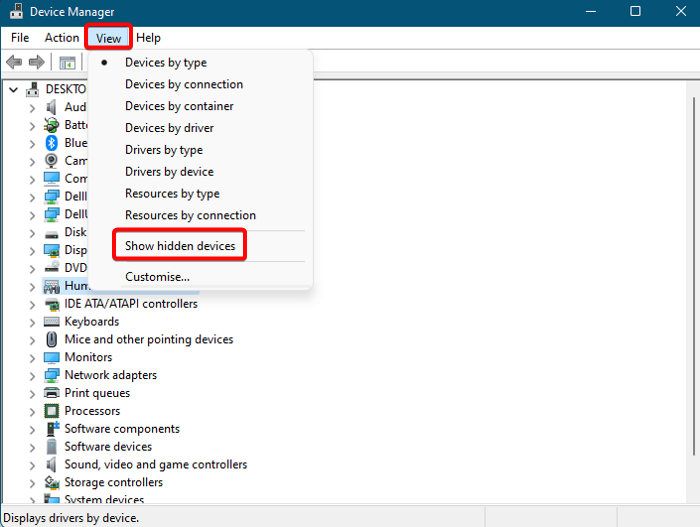
In some cases, the Xbox controller may be stuck on Player 2 on your PC due to some glitch with the driver. In this case, you may uninstall and reinstall the Xbox controller device driver and this should help you change the controller to Player 1. Open the Device Manager > View > Show hidden devices > look for the Xbox controller device and right-click > Uninstall device.
Once done, close Device Manager, restart your PC, and plug in the controller. It should revert to Player 1 successfully.
Read: How to re-connect Wireless Xbox One controller with the console
How do I change my Xbox controller profile on my PC?
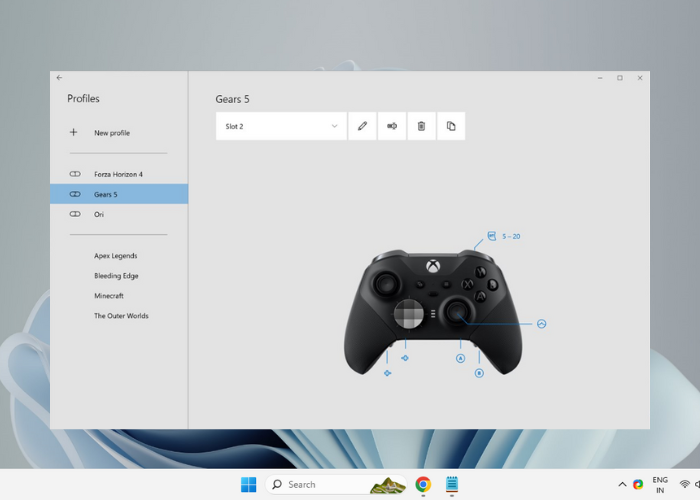
The Xbox accessories app not just allows you to remap the controller buttons on PC and Xbox One, but it also allows you to create or change controller profiles. To create a profile or change to another, here’s what you can do:
- Press the Xbox button > My games & apps > See all > Apps > Xbox Accessories.
- Go to the Xbox Adaptive Controller, and select Configure.
- Choose the New profile option, and create a profile name.
- Once done, press the B button.
To create multiple profiles in the app and change between them, you can follow the Xbox support page for more info.
How to make Xbox One controller player 2?

If using a single controller, you can use the Xbox Copilot feature to link two controllers and team up with another player. So, if one of the players needs help with their console, this can be useful.
To use Copilot on a Windows device, you need the Xbox Accessories app which you can download from the Microsoft Store. Here’s how to enable Copilot:
- Press the Start button, and type Xbox Accessories or select from the list. Now, sign in.
- Select More options.
- Now, select Turn on Copilot.
To know how to use Copilot with your Xbox console, you can visit the Microsoft Xbox support page for more info.
Leave a Reply