This tutorial will help you easily check if your User Account has Admin rights in Windows 11/10 so that you can access it and use it.
There is a Standard, Work & School, Child, Guest, and Administrator account feature in Windows 11/10 which is pretty good. You can easily create a new user account and add other accounts anytime. But we need an administrator account to run things that need elevated privileges. In that case, we have to check which account is an administrator.
How to check if User Account has Admin rights in Windows 11/10
We have covered four different and built-in ways to find out which user account is an administrator account:
- Using Settings app
- Windows PowerShell
- Control Panel
- Local User and Groups.
Let’s check all these options.
1] Using the Settings app
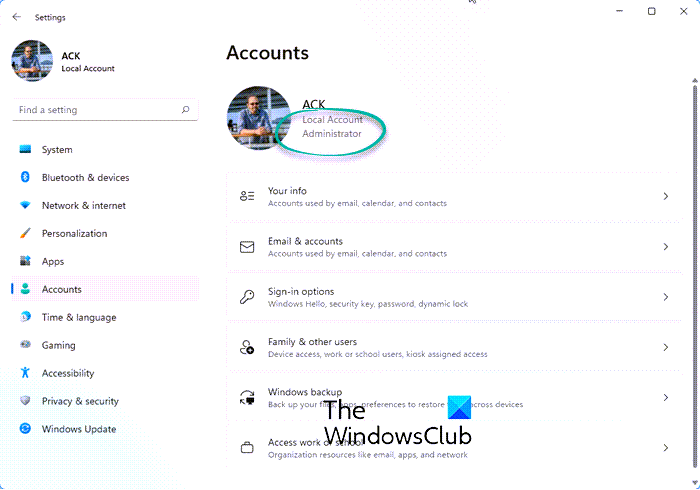
The modern Settings app of Windows 11/10 lets you access and use numerous options related to Personalization, Devices, System, Update & Security, Cortana, etc. You can also use this app to check if your user account is administrative or not.
For this, open Settings app. The quickest way to open this app is using the hotkey/shortcut key ‘Windows key + I’. After opening the app, click on the Accounts section.
Under the Accounts section, you will see Your Info on the right part. There you can easily check if you’re logged in with an administrator account or not.
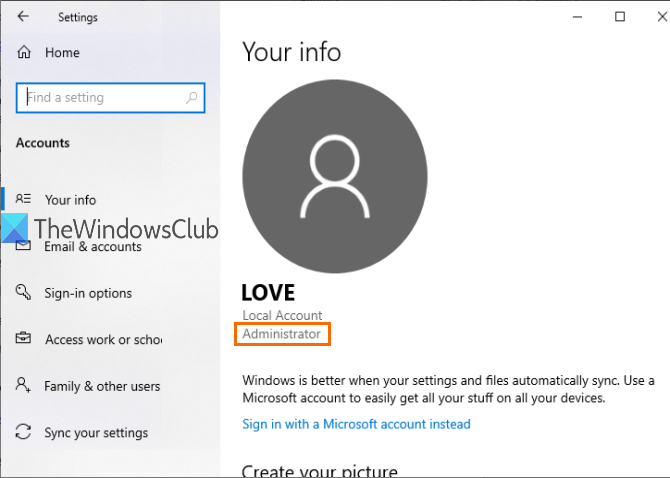
If the account is not an Administrator, you can log out from that account and log in with another account and repeat the same steps.
2] How do you check if a user is an Administrator using CMD or PowerShell
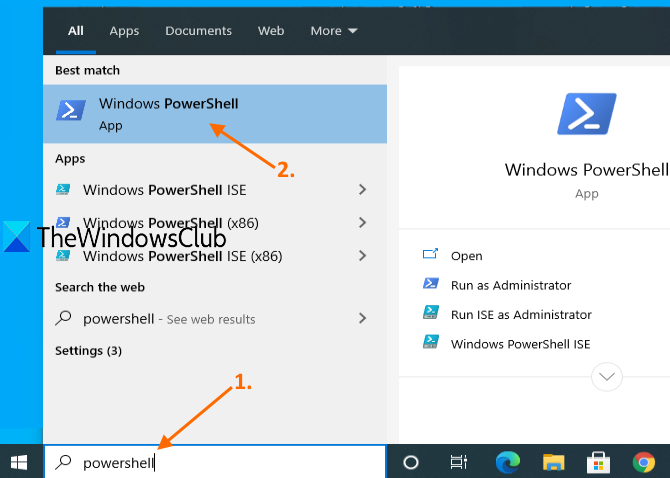
Using Command Prompt or PowerShell is an easier way to find out administrator accounts including the built-in Administrator account of Windows. Just a simple command will provide the output.
First of all, open CMD or PowerShell using the Search box.
When the console window is opened, enter and execute the following command:
net localgroup administrators
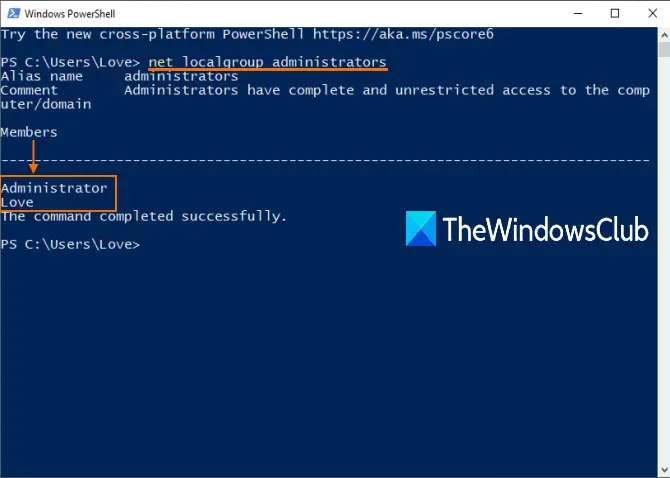
This will show the list of administrator accounts as highlighted in the image above.
3] Using Control Panel
Type control panel in the Search box and press Enter.

When Control Panel is opened, select User Accounts. After that, again click on the User Accounts option.
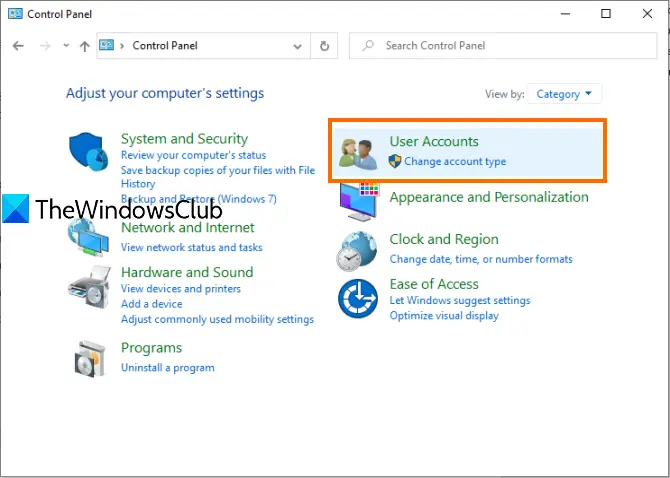
Now, on the right-hand part of the Control Panel window, you can see the information related to your account.
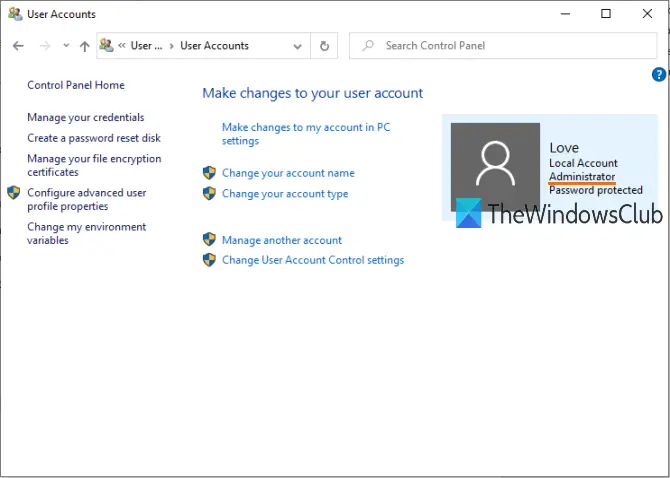
It will show if the account is standard or Administrator, local or Microsoft account, and password protected or not.
4] Using Local Users and Groups
This option also shows a built-in Administrator account and other Administrator account created by you.
For this, open Local Users and Groups window.
When the window is opened, click on the Groups folder. You will see the list of different accounts and members on the right part. Double-click on the Administrators option.
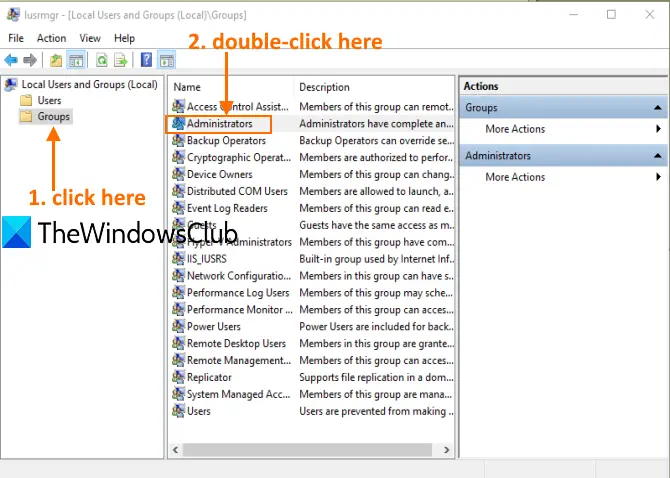
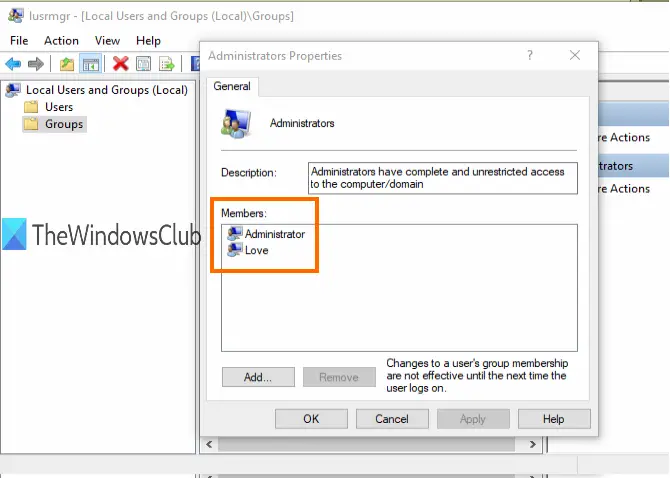
It will open the Administrators Properties window. There you will see all the administrators’ accounts under the Members section.
That’s all.
The next time whenever you have to check for an administrator account in your Windows 11/10 PC, we hope that these options will be helpful.
Read: Complete Guide to Manage User Accounts in Windows.
That’s all you need to do.
How do I find the built-in Administrator account?
To enable, activate, or turn on this built-in Administrator account, type CMD in the search box. CMD will appear at the top. Right-click on it to ‘Run as administrator’.
To enable this built-in Administrator account, type this command & hit Enter:
Net user administrator /active:yes
How do I remove administrator rights from the user account?
An administrator can change any user account from Admin to Standard user account or vice-versa. If you have an admin account, go to Settings > Accounts > Family & other users. Select the account for which you want to change the role and change from Admin to Standard users. You can also use the command line tool net user to change the account type.