If your printout has lines or blurry text, you need to clean your printer’s print head. Over time, the ink gets stuck on the print head, and if it does not, it remains unclear, resulting in improper prints. This post will guide you through cleaning the Nozzle and Print Head using software or manually in Windows 11/10.

How to Clean Print Head in Windows 11/10
There are two ways to clear Print Head. The first method is where the OEM Software includes a Clean Print Head option, and the second is where OEM software doesn’t offer this solution, and you will need to clear the head manually.
For example, HP Software offers Clean print head options through software, but Brother printer doesn’t have anything similar. Instead, you will have to clean things manually.
- Clean Print Head using OEM Software
- Clean Print Head Manually
Before we proceed, make sure you have installed the printer software. That software allows you to view ink levels and use other tools.
Clean Print Head using OEM Software

- Open Windows Settings using Win + I keyboard shortcut.
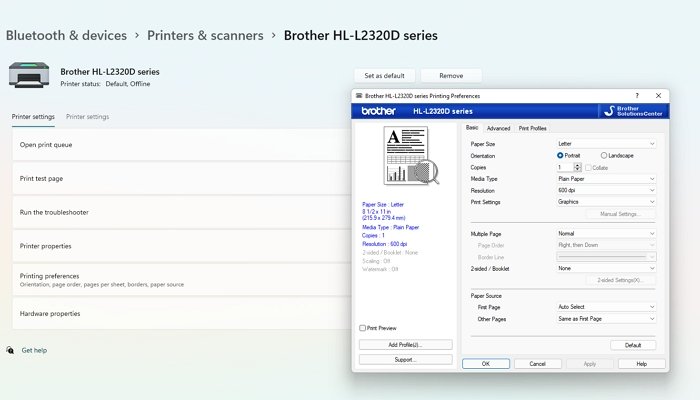
- Navigate to Bluetooth and devices > Printer and scanners.
- Click on your printer listing to view more options.
- Then click on Printing Preferences, and it will launch the printer software.
- Locate the Tools or Maintenance section in the software and click on the Clean Print head or Cleaning/Deep Cleaning button.
- It will then ask you for more options, such as which ink to clean and so on.
- Run the tool, and you should hear the printer head moving. It may print out something.
If that is done, your issue with the printer head should be resolved.
Note: If you need to clean the Nozzel, then the option to clean that should also be available in the software.
Clean Print Head Manually
If your printer doesn’t offer a software method, then you will need to do it manually. It is usually in the case of Laser printers where there are no nozzles, and nothing is stuck there. Instead, you have Toner and Drum arrangement, which cannot be cleaned through the software.

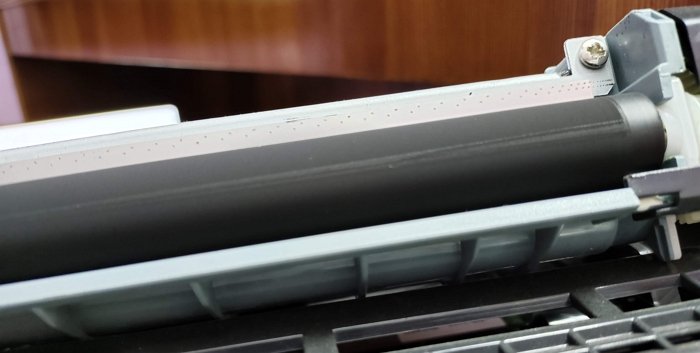
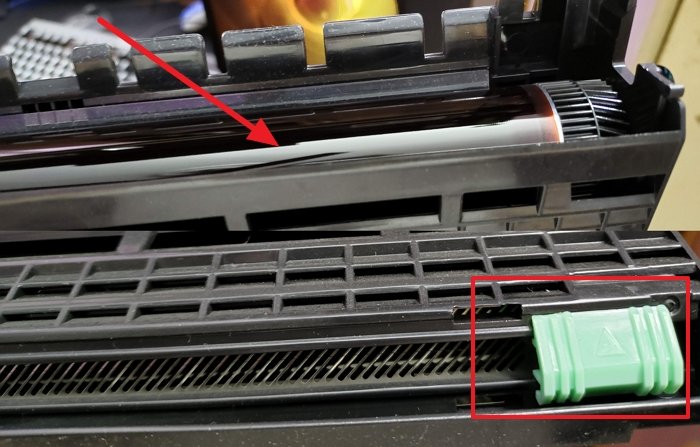
So to clear the print head, you need to take out the Drum and then the Toner section. The toner unit has a black roller that contains the ink, which you can clean it using a soft cloth. The drum has two parts. First is the grey or green-looking roller and an orange or green header that can move on a wire-like arrangement.

First, Clean the roller of the drum using a soft cloth. Then use the header to clean the wire. It will remove anything which is stuck on it and let you print without any issue. Done that, print a test page, and check if there is an issue.
Read: How to Print Double-Sided on Windows?
How do you unclog a Print nozzle?
If the software method is not able to remove it, then you need to clean it manually. The best way to clear it is using a soft cloth, sanitizer, or vinegar. Once done, you will need to print a test page a couple of times to ensure all clogs are clear.
How to align Printhead?
Print Head alignment means that print heads are in sync with the paper feed movement. When you run the alignment program, the printer will print blocks of rectangles with white space. If everything looks right in place, then it’s aligned. If not, then re-run the alignment program using the printer software.
How do you know if your printhead is bad?
If the printhead has many spots that cannot be cleaned, it needs to be replaced. This usually happens when the printer is not used for a long time, and when used, it damages the printer head. It doesn’t happen for the first time, but repeat instances of less usage can result in this.
Leave a Reply