Origin is a digital platform developed by EA (Electronic Arts) that is used to purchase and play video games. Origin Client is available for both Windows and Mac operating systems. Sometimes gamers encounter different issues with Origin while downloading, installing, and playing video games. One of the causes of Origin errors is the corrupted cache. The problems that occur due to the corrupted cache can be fixed easily by clearing the Origin cache. If you do not know how to clear Origin cache on Windows 11/10, this detailed guide will show you how to do that.
How to clear Origin cache on Windows 11/10
Cache is a storage component that stores temporary files of different programs. By storing these temporary files, the cache makes apps and programs run faster. When some of the cache files get corrupted, you may encounter issues with the respective programs. In this case, clearing the cache data can help. The following instructions will help you how to clear the Origin cache on Windows 11/10:
- Close Origin if it is already running
- Make sure that Origin Client is completely closed
- Delete all the folders from the Origin folder in the ProgramData directory
- Delete the Origin folder from the Roaming folder
- Delete the Origin folder from the local folder
- Restart your computer
Let’s see all these steps in detail.
1] Close the Origin client if it is already running. Also, make sure that it is not running in the background. To check this, follow the steps below:
- Open the Task Manager.
- Select the Processes tab and look for the following two processes:
- Origin.exe
- OriginWebHelperService.exe
- If you find the above two processes in the Task Manager, right-click on each of them and select End Task.
- Close the Task Manager.
2] Press the Win + R keys to launch the Run command box. When the Run command box appears, type %ProgramData%/Origin and click OK. This command will automatically open the Origin folder located inside the ProgramData directory on your C drive.
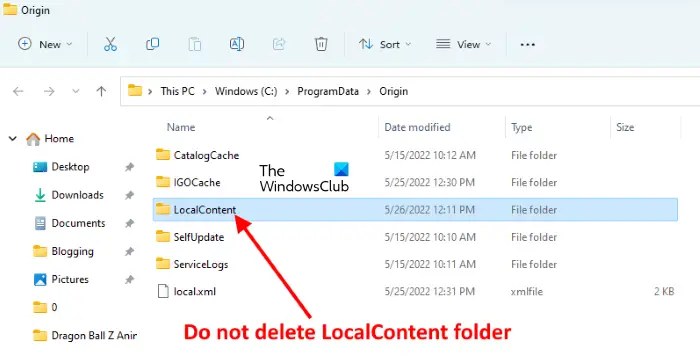
Delete all the files and folders inside the Origin folder except the LocalContent folder.
3] Open the Run command box again and type %AppData%. After that, click OK. This command will open the Roaming folder directly. Locate and delete the Origin folder from the Roaming folder.
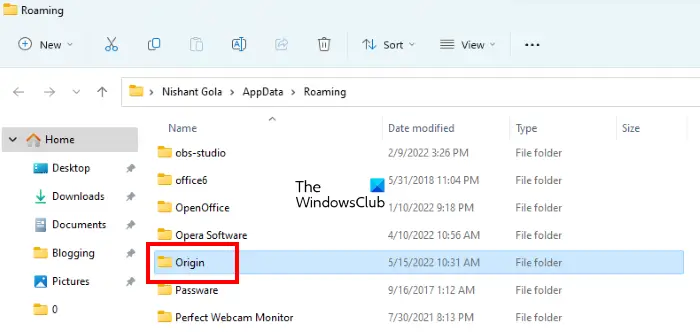
After deleting the Origin folder, close the File Explorer.
4] Now, open the Run command box once again and type %userprofile%. Click OK. This command will open your user profile folder directly. Now, open the AppData folder. If you do not see the AppData folder, it might be hidden. In this case, you have to enable the Show hidden items option in File Explorer.
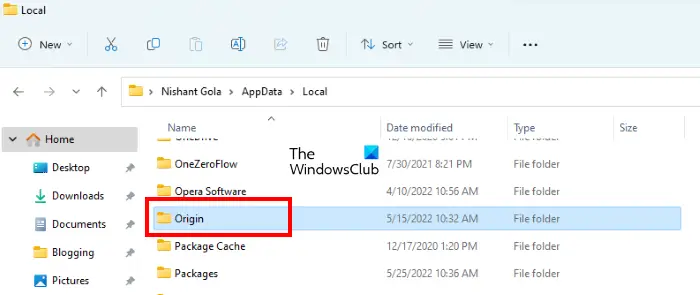
Open the AppData folder, then open the Local folder. Locate and delete the Origin folder.
6] Now, close the File Explorer and restart your computer. After restarting your device, launch the origin Client. Because you have cleared the cache files of Origin Client, you have to log into Origin again. Enter your login credentials and sign back in.
Read: How to clear Windows Store Cache in Windows 11/10.
How do I clear my game cache?
To clear the game cache on Windows 11/10, you have to delete the temporary files. The steps to delete temporary files are explained below:
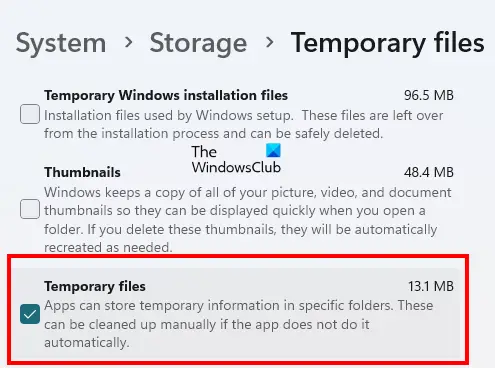
- Open Windows 11/10 Settings.
- Go to “System > Storage > Temporary files.”
- You will see different files there. To delete the game cache, select the Temporary files and then click on the Remove files button. If you want to delete other temporary files too, select them and click on the Remove files button.
Can I delete my Sims 4 cache?
If you are experiencing problems with the Sims 4 game, like it is not working properly or crashing, you can clear its cache files. To do so, open the Sims 4 folder. By default, it is located inside the Documents folder. Follow the steps below to clear the Sims 4 cache:
- Open the Documents folder and then open the Electronics Arts folder.
- Now, open the Sims 4 folder.
- Delete the following items inside the Sims 4 folder:
- cache folder.
- localthumbcache file.
After deleting the above two items from the Sims 4 folder, its cache will be deleted.
That’s it.
Read next: How to clear Steam cache files on Windows PC.
Leave a Reply