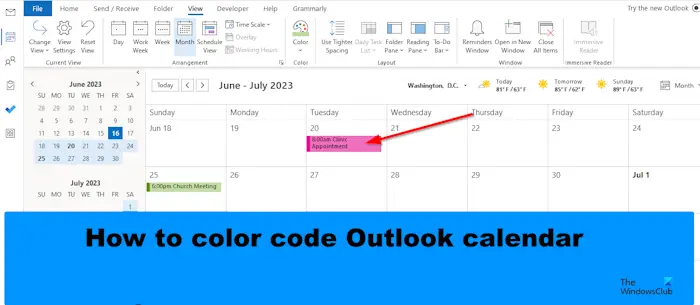
Outlook has various features, such as the Calendar, which allows you to create appointments or meetings and invite recipients to them. What if you want each meeting or appointment to have different colors? Outlook has a feature to do all that; this feature is Conditional Formatting. The Conditional Formatting format allows you to categorize your meetings are appointments and color code them.

How to color code Outlook Calendar
Follow the steps to color code your Calendar in Outlook:
- Launch Outlook.
- Open your calendar.
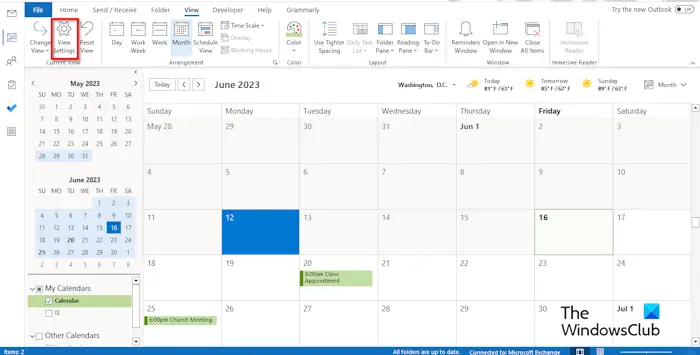
- Click the View Settings button in the Current View section.
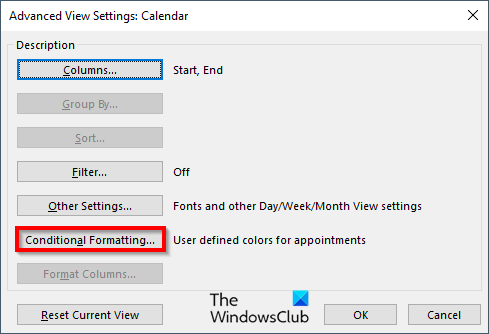
- Click the Conditional Formatting button.
- Click the Add button, name the rule, and choose a color.
- Then click the Condition button.
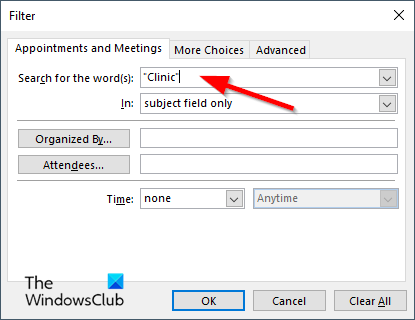
- In the Search for word box, type the word from the appointment or meeting you want to color code.
- Add quotation marks around the text, then click OK for all dialog boxes.
Launch Outlook.
Open your calendar.

On the calendar interface, click the View Settings button in the Current View group.
An Advanced View Settings Calendar dialog box will open.

Click the Conditional Formatting button.
A Conditional Formatting dialog box will open.
Click the Add button, name the rule, and choose a color.
Now click the Condition button.
A Filter dialog box will open.

In the Search for word box, type the word from the appointment or meeting you want to color code.
Add quotation marks around the text, then click OK.
Click OK for all other boxes.
You will notice that the color has changed for the meeting you have conditional formatted.
We hope you understand how to color code calendars in Outlook.
What are the default color categories in Outlook?
In Microsoft Outlook, the default colors are Blue Category, Green Category, Yellow Category, Red Category, Orange Category, and Red Category. In Outlook, you can always name the color categories or even add a new one. Follow the steps below to use color categories to color code your calendar.
- Right-click the Meeting or appointment and select Categorize from the menu.
- You can choose a category from the list, but if you want a new color, select All Categories.
- A Color Categories dialog box will open.
- Click the New button.
- An Add New Category dialog box will open.
- Name the New color category, then choose a color then click Ok.
- Then select the new color category, then click OK.
- The color of the appointment or meeting is changed.
READ: How to turn Email into Appointment in Outlook
How do I auto color code in Outlook?
- Open your calendar.
- Click the View Settings button in the Current View group.
- An Advanced View Settings Calendar dialog box will open.
- Click the Conditional Formatting button.
- A Conditional Formatting dialog box will open.
- Click the Add button, name the rule, and choose a color.
- Then click the OK button.
- You will notice that all events in the calendar will be that color.
READ: How to prevent forwarding of Meeting Invites in Outlook.
Leave a Reply