Corsair iCUE software offers several functionalities to the users, like RGB lighting control, performance monitoring such as fan control, etc. Sometimes, Corsair iCUE software does not work properly. In such a case, we have to completely uninstall it and then reinstall it. In this article, we will show you how to completely uninstall Corsair iCUE on Windows 11/10.
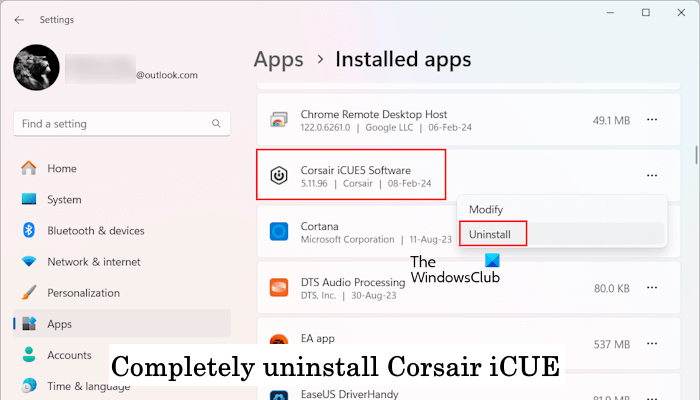
How to completely uninstall Corsair iCUE on Windows 11/10
The following instructions will guide you on how to uninstall Corsair iCUE on Windows 11/10.
- Uninstall Corsair iCUE via Settings or Control Panel
- Delete all the related Services
- Delete Registry keys
- Delete leftover files
Below, we have explained all these steps in detail.
1] Uninstall Corsair iCUE via Settings or Control Panel
First, uninstall Corsair iCUE from your computer via your system Settings or the Control Panel. The following steps will help you with that:
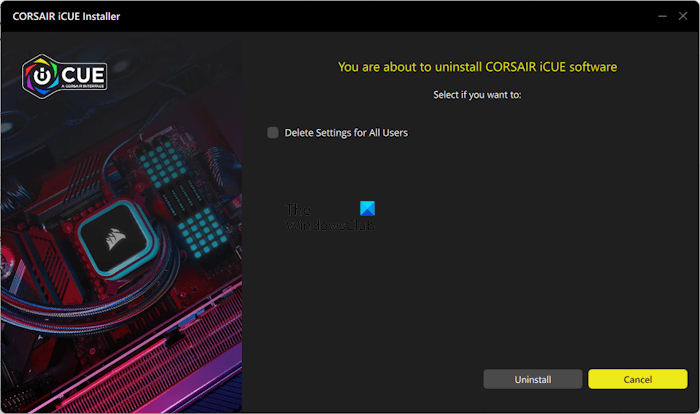
- Open the Control Panel.
- Select Category in View by mode.
- Now, click Uninstall a program.
- Locate Corsair iCUE 5 software (depending on the version you installed on your PC).
- Now, click Uninstall. Click Yes in the UAC prompt.
Click Uninstall and follow the on-screen instructions.
2] Delete all the related Services
After uninstalling the Corsair iCUE software, the next step is to delete all the related Services. To do so, open the Services Manager and look for the Services related to the Corsair iCUE software. If you find any Service there, delete it.
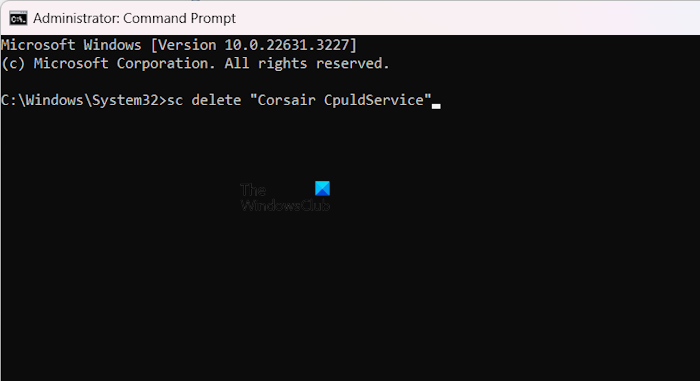
Open the elevated Command Prompt window, type the following command, and hit Enter.
sc delete "name of the service"
Type the correct name of the Service under quotations in the above command.
3] Delete Registry keys
After deleting all the Services related to the Corsair iCUE software, the next step is to delete the Registry keys associated with the software. Open the Registry Editor and go to the following paths:
HKEY_CURRENT_USER\Software
HKEY_LOCAL_MACHINE\SOFTWARE
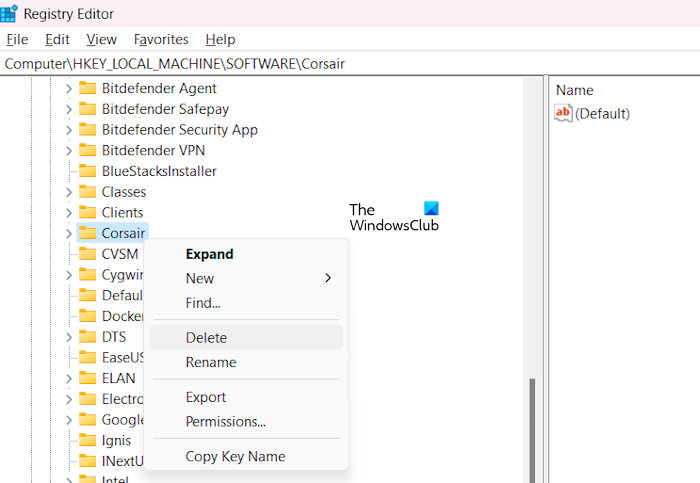
Now, locate the Corsair key and delete it. You can also use the Find feature (Ctrl + F) in Registry Editor to find the Corsair Registry Keys and delete them.
4] Delete leftover files
The last step is to delete all the leftover files of the Corsair iCUE software. Open the File Explorer and then open the C drive. Now, open the following folders:
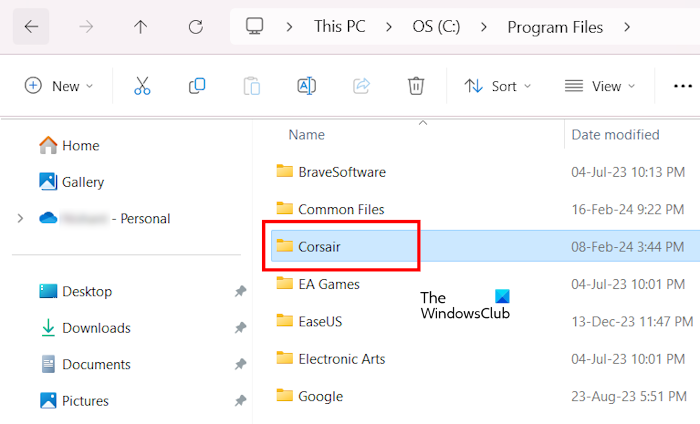
- Program Files
- Program Files (x86)
- ProgramData
The ProgramData folder is hidden by default. Therefore, you have to unhide the hidden files and folders. Delete the Corsair folder from each of the above-mentioned folders. After deleting the Corsair folders, restart your computer.
The Corsair iCUE software has been completely removed from your computer.
Can’t uninstall Corsair iCUE
If you cannot uninstall the Corsair iCUE software or receive an error while uninstalling it, use the following fixes to fix this problem.
- Close Corsair iCUE properly
- Uninstall it in Safe Mode
- Repair Corsair iCUE via the Command Prompt
- Use a third-party uninstaller tool
Let’s see all these fixes in detail.
1] Close Corsair iCUE properly
Corsair iCUE starts automatically on system startup and keeps running in the background. Therefore, it is important to close the software completely before uninstalling it.
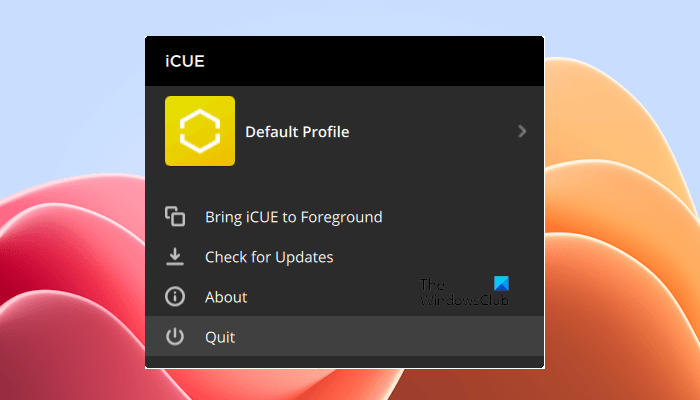
Follow the steps provided below:
- Close Corsair iCUE.
- Open the System Tray, right-click on the Corsair iCUE software, and select Quit.
- Open the Task Manager.
- Select the Processes tab.
- Close all the Corsair iCUE processes (if any) running in the background.
Now, see if you can uninstall iCUE this time.
Read: How to remove Leftover Files after Uninstall in Windows
2] Uninstall it in Safe Mode
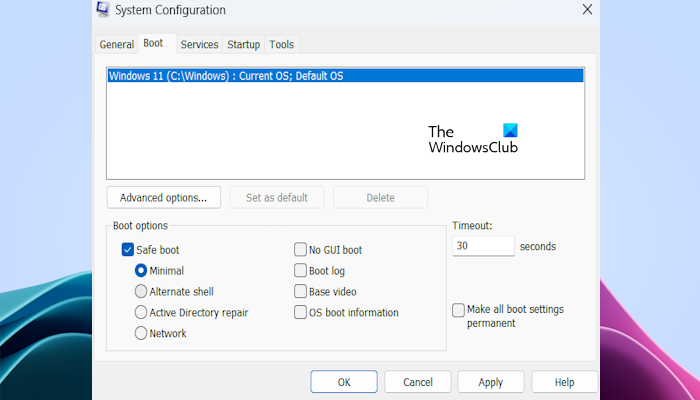
You can also uninstall programs on Windows 11/10 in Safe Mode. We suggest you boot in Safe Mode and then try to uninstall iCUE. To boot in Safe Mode, you have to use the MSConfig app.
Read: How to uninstall programs using Registry in Windows
3] Repair Corsair iCUE via the Command Prompt
Try to repair Corsair iCUE. You can do this via the Settings app. Open the Settings app on your system, then go to “Apps > Installed apps.” Now, search for Corsair iCUE. Once you find it, click on the three dots and select Modify. The software will automatically enter repair mode.
If you cannot repair Corsair iCUE via system settings, you can do so via the Command Prompt. Open the elevated Command Prompt. Type the following commands and press Enter after typing each command.
CD \

CD C:\Program Files\Corsair\Corsair iCUE5 Software

icue-uninstaller -a repair
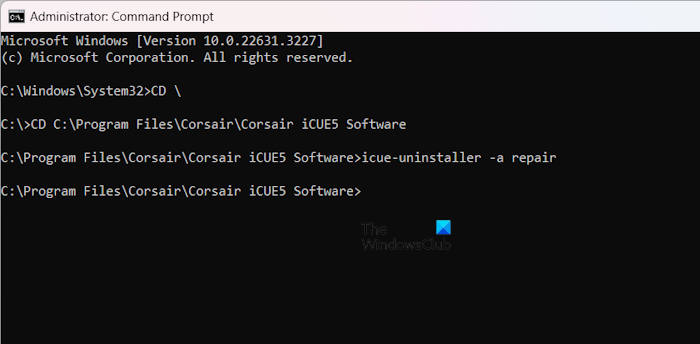
In the above command, Corsair iCUE5 Software shows its version number. You can change its version number accordingly. The above commands will repair the Corsair iCUE software and a window will open after the repair process is completed.
Now, try to uninstall Corsair iCUE.
Read: How to uninstall a program using Command Prompt
4] Use a third-party uninstaller tool
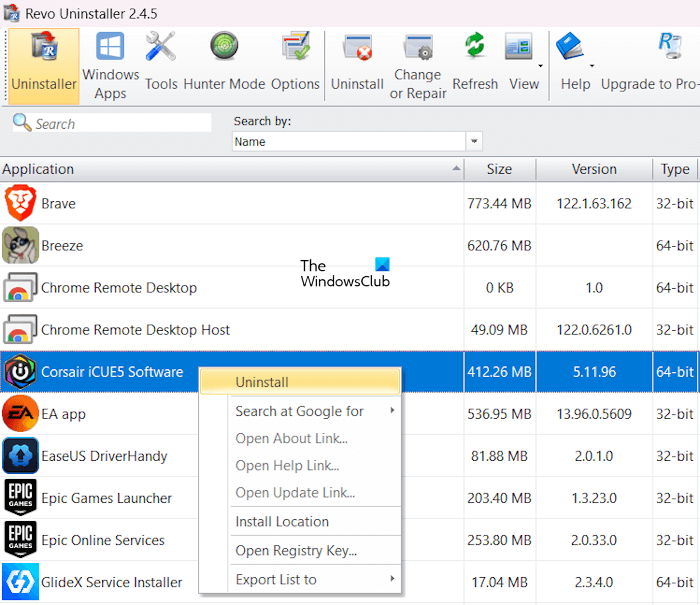
If none of the above fixes work, you can use a third-party uninstaller tool, like Revo Uninstaller to uninstall Corsair iCUE from your computer. This should work.
That’s it. I hope this helps.
How do I stop iCUE?
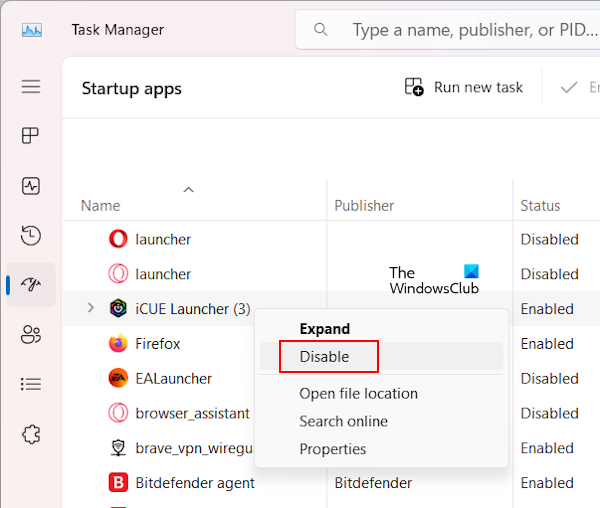
You can stop iCUE from running in the background by stopping the iCUE Launcher in the Startup apps. Open the Task Manager and go to the Startup apps section. Now, locate iCUE Launcher, right-click on it, and select Disable.
Read: Corsair iCUE component high CPU, GPU and RAM usage
Can I delete iCUE setup?
Yes, you can delete the Corsair iCUE setup. If you have installed it, you can uninstall it via the Control Panel or your system Settings. If you want to completely remove it, delete all its residues, including the Registry keys.
Read next: Corsair iCUE software not detecting RAM.
Leave a Reply