Distributed File System (DFS) is a replicated file share across multiple servers and locations to boost uptime and reduce access issues related to geography like latency and bandwidth. In this post, we will see how to configure DFS in Windows Server.
What is DFS Replication in Windows Server?
Distributed File System Replication (DFS Replication) is a feature in Windows Server that allows you to replicate folders across multiple servers and sites effectively. This includes replicating various types of folders, including those accessed through a DFS namespace path. In this post, we will discuss more about DFS Replication and DFS Namespace.
How to configure DFS in Windows Server
DFS is a role that you can add to your environment and then configure DFS Namespace and DFS Replication.
To get started with DFS in Windows Server, you need to go to the respective guides.
- Add DFS Role
- Configure DFS Namespace
- Configure DFS Replication
Let us talk about them in detail.
1] Add DFS Role
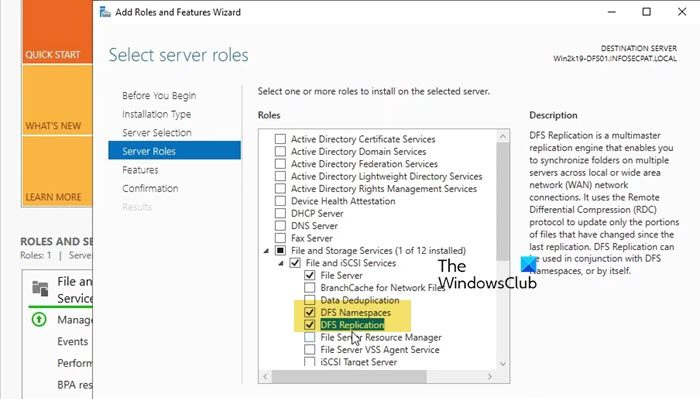
Numero Uno, we are required to add the DFS Role from Server Manager and add subsequent features to get it going. Follow the steps mentioned below to do the same.
- Login into your DFS server.
- Now, open the Server Manager.
- Click on Tools > Add Roles and Features.
- Now, you need to click on the ‘Next’ button until you reach the Server Roles tab.
- Tick File and Storage Services, expand it, and finally, tick DFS Namespace and DFS Replication.
- Click on Next.
- Finally, install both of them.
Once the roles are added, we can proceed with configuration.
2] Configure DFS Namespace
Before we configure DFS Namespace, we recommend rebooting the server so that everything falls into place. Once your server starts, you need to make sure that all the services are started. You can find their state in the Server Manager itself.
After starting all the services, follow the below steps to create a DFS Namespace.
- Open Server Manager.
- Go to Tools > DFS Management.
- First of all, we need to create a namespace, for that, right-click on Namespace, and select New Namespace.
- Enter the server you want to configure or click on Browse > Advanced > Find now, and then select the server of your choice. Click Next afterward.
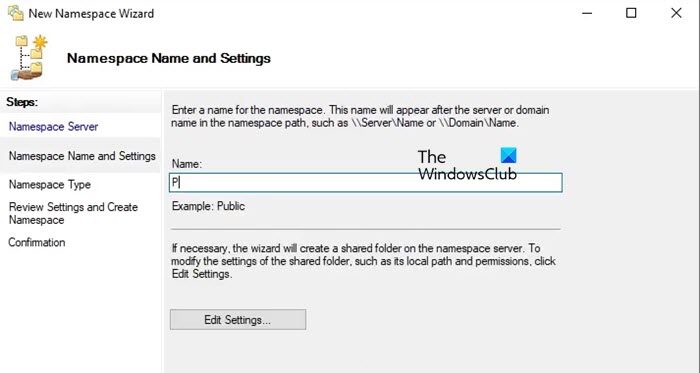
- Now, enter a name for your Namespace and click Next.
- You can use Domain-based Namespace or Stand-alone Namespace depending on your requirements, and then click on Next.
- Go through the summary and click on Create.
Once your Namespace is created, click on Close.
This way, we have created a Namespace or a shared folder that you can access using the name of the server. So, copy the actual path of the server, for example, if your server name is “Public”, and you have selected Domain-based Namespace, it would be something like \\nameSpaceServerName\\Public. If you paste this name in Run (Win + R), you will be redirected to the shared path. However, it would be empty as we have yet to create a shared folder.
For that, follow these steps.
- Open DFS Management.
- Expand Namespace, right-click on the newly created namespace, and click on New Folder.
- Give a name to the folder.
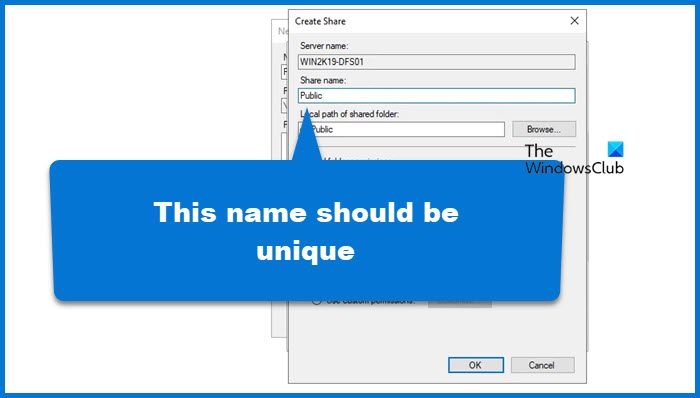
- We need to map this folder to a physical folder on our system, click on Add, browse to that folder, give permission accordingly, and click on Ok. Make sure to set a unique Share name as we don’t want to barge into an error.
- Finally, create the logical folder.
Since we now have a logical folder inside our namespace server, we should be able to get to it from Run. So, open Run, paste the actual path of the folder (that includes \\nameSpaceServerName\\Public), and hit Enter.
Finally, you can map the drive to your File Explorer for easy access.
Read: How to Map Local Folder as Drive with letter in Windows 11
3] Configure DFS Replication
DFS Replication allows you to easily copy folders across multiple servers and sites, including the DFS namespace path folders. Before we go ahead with the tutorial, we recommend you enable the DFS Replication role as instructed in the first guide. After enabling it, follow the below steps.
- Open DFS Manager.
- Now, right-click on the Replication option and click on New Replication Group.
- Select a type of replication, we are going with the Multipurpose replication group.
- Give it a name and description if needed. Click Next.
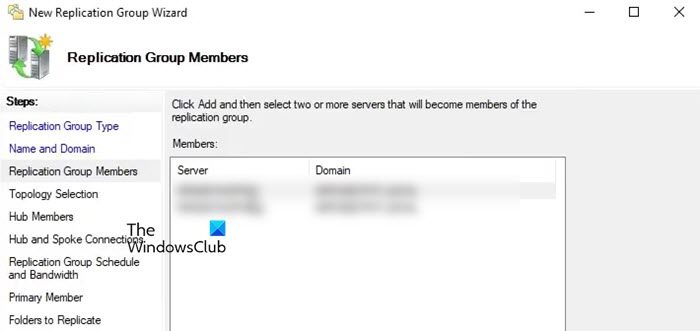
- To add a server, click on Add, enter the name of the server you want to add or browse it.
- Then, select a network topology and click on Next.
- Next up, you need to select when you need the replication. Here, you can specify a bandwidth for the replication if you want it to continue throughout the day or specify a time.
- In the Primary member option, select the server whose content you will replicate. Click Next
- We need to add folders to replicate now. Click on Browse and select the folder you want to replicate and give the permissions accordingly.
- You will now see the replication folder that we will be utilizing. Double-click on it, select Enabled, and select the local path of the folder.
- Check everything and click on Create.
The process will take some time, so, wait for the replication to be created. Once the replication process is completed, all data will be synced across both primary and secondary devices accessing the replicated folder.
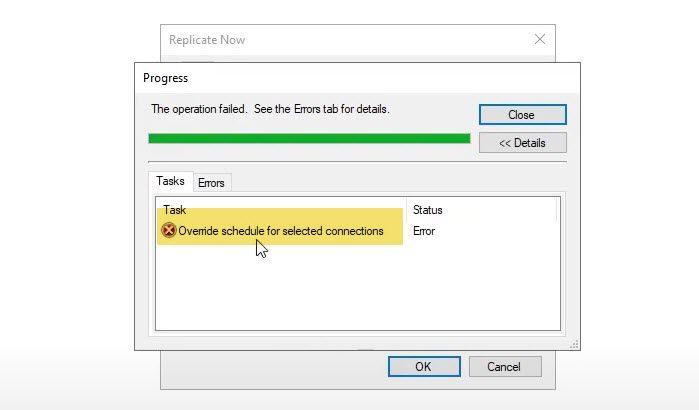
If you want to replicate, go to Replication > Newly created replication member > Connections, right-click on the member, and select Replicate now. If there is already a schedule, you will be asked to override it. If you acknowledge it, you may encounter an error, meaning the synchronization is still in progress. So, you ought to wait for some time and attempt replication.
Hopefully, with the help of this tutorial, you can get started with Distributed File System in Windows Server.
Read: How to setup Branch Cache in Windows Server?
How to setup DFS Windows Server?
To set up DFS in Windows Server, you must first install DFS Namespace and DFS Replication roles from the Storage option. After installing these roles, you need to first configure DFS Namespace and then DFS Replication. We have provided a detailed tutorial on how to configure DFS in Windows Server, so, we recommend you to go through it once.
Also Read: Group Policy not replicating between Domain Controllers.