Windows 11 is a much-awaited update to Windows users. There are some similarities as well as differences. So, in this article, we are going to see one of the differences, we will be seeing how to configure Indexing Options & Settings for Windows 11 Search using Settings.
What is Search Indexing?
Search Indexing is a feature in Windows that allows your computer to search through every folder and file and give you a result based on a word or metadata. This is a quicker alternative to searching an item manually. It works for most of the apps such as File Explorer, Groove, and even Photos. Web-based applications such as Microsoft Edge and Cortana also use the feature to their advantage.
Configure Search Indexing
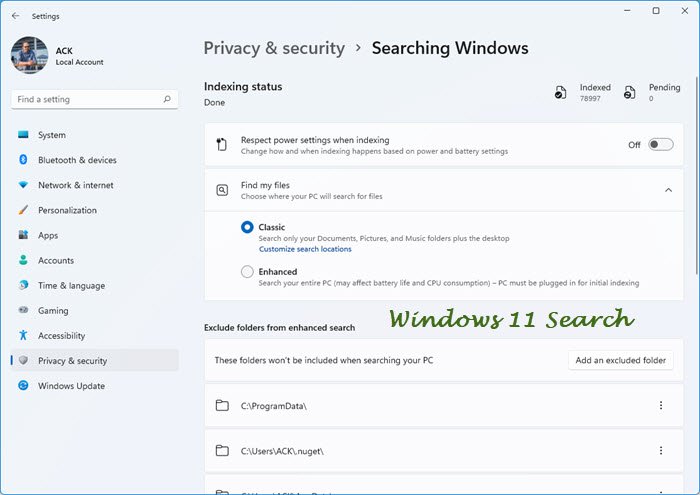
First of all, we need to choose whether you want to index some files such as libraries, or the files on the desktop or the entire PC. So, for that, follow the given steps.
- Open Settings from the Start Menu or by Win + I.
- Click Privacy & Security > Search Windows.
- Now, click Find my files.
- Finally, choose Enhanced if you want to search your entire PC or Classic, to search only Documents, Pictures, Music, and the desktop. You can even customize location by clicking Customize search locations.
Configure Indexing Options & Settings for Windows 11 Search
There are a lot of different things we will be doing to configure Indexing Options & Settings for Windows 11 Search. They are.
- Enable or Disable Search Indexing
- Change Indexing Options
- Disable Indexing for a Drive
- Rebuild Search Index
Let us talk about them in detail.
1] Enable or Disable Search Indexing
Search Indexing can be enabled on your system by default, whereas, in some cases, you have to manually enable it. In this section, we are going to see how to enable or disable Search Indexing.
Enable or Disable Search Indexing from Services
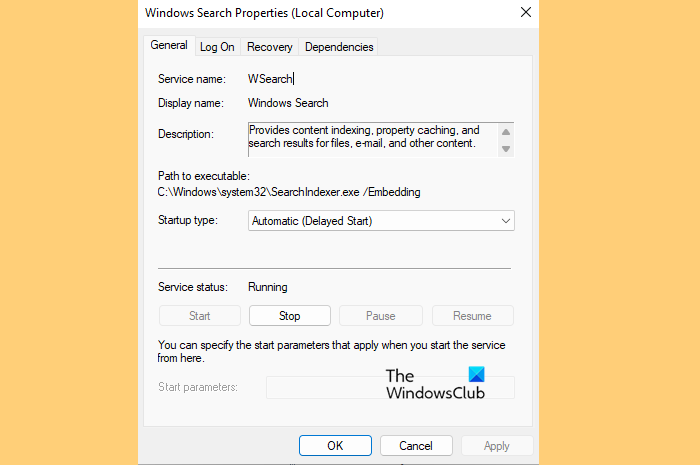
There is a service called “Windows Search”, by changing it, you can configure Search Indexing. So, follow the given steps to do the same.
- Open Run by Win + R, type “services.msc”, and click Ok.
- Double-click on Windows Search to open its properties.
- Now, you can either Start or Stop the service.
Enable or Disable Search Indexing from Command Prompt
Launch Command Prompt as an administrator.
Execute the following command to disable Search Indexing.
sc stop “wsearch” && sc config “wsearch” start=disabled
Execute the following command to enable Search Indexing
sc config “wsearch” start=delayed-auto && sc start “wsearch”
2] Change Indexing Options
If you don’t want a drive or a folder to be a part of Search Indexing, you can change the Indexing Option to do that in Windows 11. So, follow the given steps to do the same.
- Search out “Indexing Options” from the Start Menu.
- Click Modify.
- Now, you can untick the drive or the folder on which you don’t want to apply Search Indexing and click Ok.
This can be a great way to speed up your Search Indexing.
3] Disable Indexing for a Drive
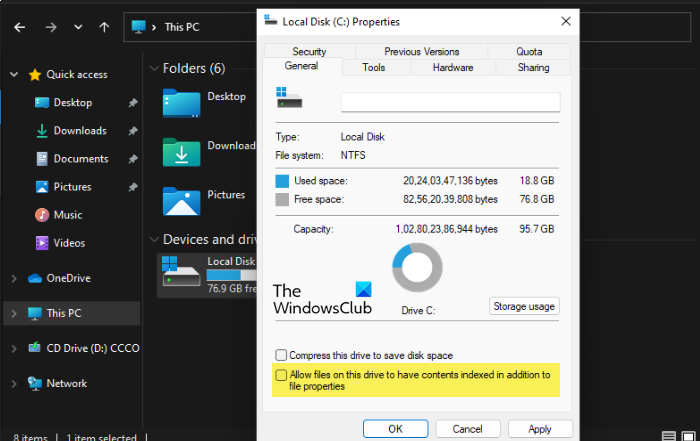
To disable Indexing for a particular drive, follow the given steps.
- Open File Explorer.
- Right-click on the drive in question, and select Properties.
- Go to the General tab, untick Allow files on this drive to have context indexed in addition to file properties, and click Ok.
- You will be asked to confirm your action, there you have to select either of the given options, do that according to your choice, and click Ok.
4] Rebuild Search Index
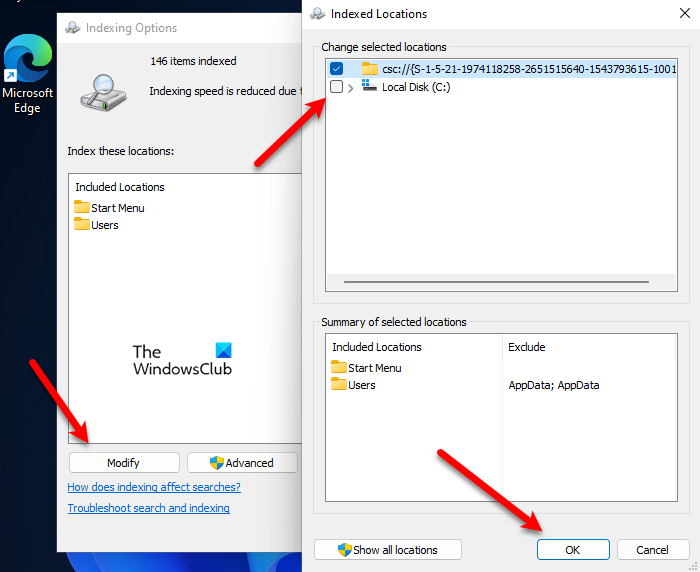
Sometimes, Search Indexing fails to respond because of some issue. That issue can be fixed by rebuilding the setting. Follow the given steps to Rebuild Search Index.
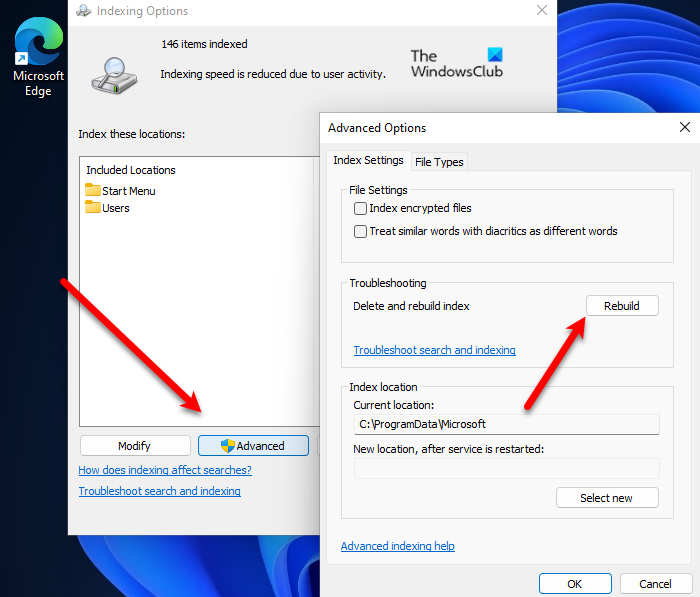
- Search out “Indexing Options” from the Start Menu.
- Click Advanced.
- Now, click Rebuild. You will be asked to confirm your action, so, click Ok.
Wait for a few minutes and your issue will be fixed.
How do I enable search indexing in Windows 11?
In order to enable Search indexing in Windows 11, you need to open the Windows Settings and go to Privacy & security first. Here you can find an option called Searching Windows. You need to head to this section and expand the Find my files option. Then, choose either the Classic or Enhanced option as per your requirements.
How do I fix search index in Windows 11?
Although there are many things you need to do, you can run the Search and Indexing Troubleshooter first. Then, you can check the indexing settings in the Windows Settings panel. On the other hand, you can open the Indexing Options panel and check all the Advanced settings minutely.
Also read: How to configure Search Settings and Permissions in Windows 11.