Narrator lets you use your PC without a display or mouse to complete common tasks if you’re visually challenged. It reads and interacts with things on the screen, like text and buttons. You can also use Narrator to read and write an email, browse the Internet, and work with documents. In this post, we will show you how to configure Narrator settings in Windows 11/10.

Configure Narrator settings in Windows 11/10
In Windows 11/10, there are a lot of options for Narrator that you can customize. You can change its keyboard shortcuts, personalize Narrator’s voice, enable Caps Lock warnings, and more. You can choose the voice for the Narrator, adjust the speaking rate, pitch, and volume.
We’ll explore this topic under the methods outlined below in this section as follows:
Enable or Disable Lower Volume of Other Apps when Narrator is Speaking
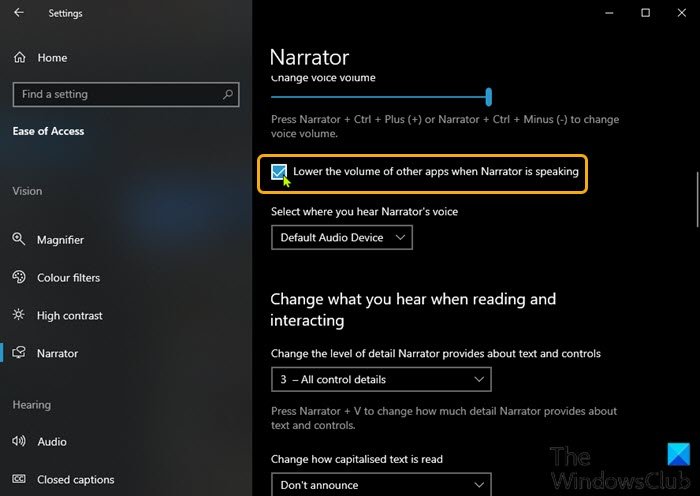
To Enable or Disable Lower Volume of Other Apps when Narrator is Speaking pn your Windows device, do the following:
- Press the Windows key + I to open Settings.
- From the Settings menu, click Ease of Access.
- Click Narrator on the left pane.
- In the Narrator window, on the right pane, toggle the button to On to enable Narrator (if required).
- Still on the right pane, scroll down to the Lower the volume of other apps when Narrator is speaking section.
- Check (enable) or Uncheck (disable) per requirement.
- Exit Settings.
Read: How to Add or Remove Natural Voices in Narrator on Windows 11
Enable or Disable Online Services for Narrator
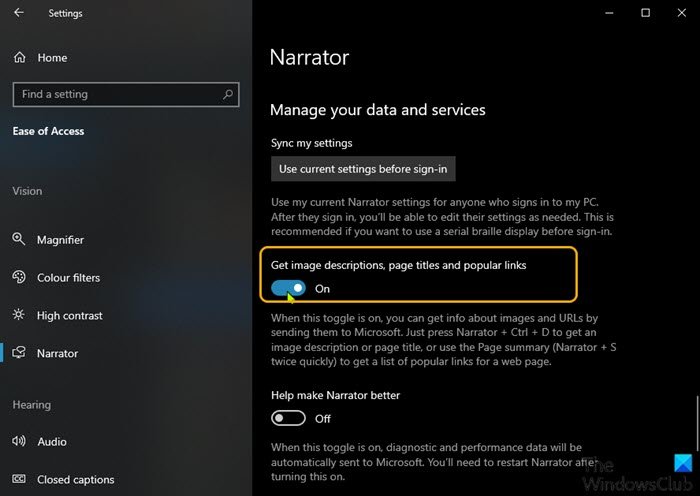
- Open Settings.
- From the Settings menu, click Ease of Access.
- Click Narrator on the left pane.
- On the right pane, scroll down to the Get image descriptions, page titles and popular links section.
- Toggle the button to On (enable) or Off (disable) per requirement.
- Exit Settings.
Enable or Disable Narrator Home
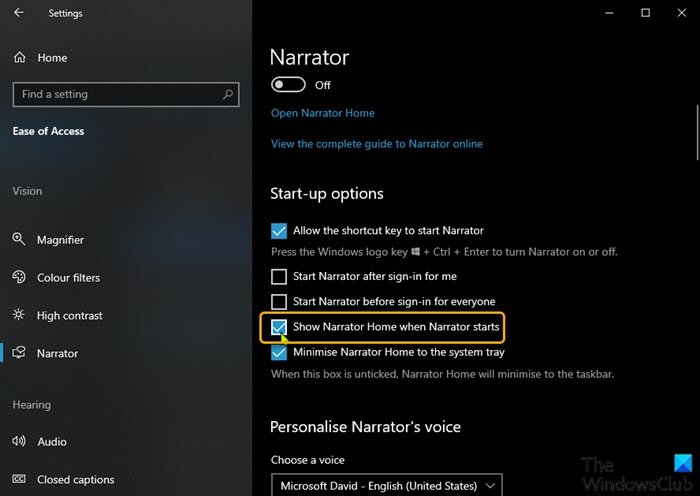
Narrator in Windows 10 introduced some new features, including a new dialog called Quick Start Guide – it is intended to teach the user the basics of using Narrator, including its keyboard shortcuts, navigation, commands you can use, and more. The Quick Start Guide is replaced with a new ‘Narrator Home’ screen.
To Enable or Disable Narrator Home on your Windows 11/10 device, do the following:
- Open Settings.
- From the Settings menu, click Ease of Access.
- Click Narrator on the left pane.
Tip: You can quickly start Narrator from any app by using the global hotkey Win + Ctrl + Enter. Also, the Win + Ctrl + N keyboard shortcut for Windows will lead you directly to Narrator settings page.
- On the right pane, scroll down to the Show Narrator Home when Narrator starts option.
- Check (enable) or Uncheck (disable) per requirement.
- Exit Settings.
Minimize Narrator Home to Taskbar or System Tray
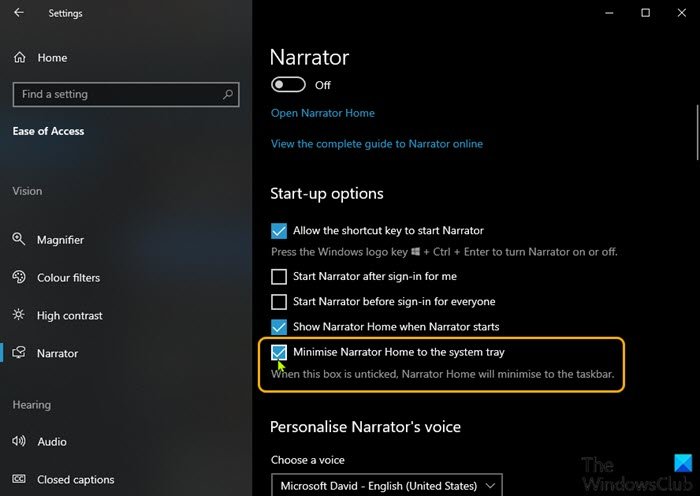
Narrator Home is a special dashboard that helps the user to quickly configure and start using the Narrator feature. It teaches the basics of using Narrator.
Starting in Windows 10 v1903, PC users can minimize ‘Narrator Home’ to the system tray and to remove it from the Alt + Tab dialog.
To minimize Narrator Home to Taskbar or System Tray on your Windows 10 PC, do the following:
- Open Settings > Ease of Access.
- Click Narrator on the left pane.
- On the right pane, scroll down to the Start-up options section.
- Check or Uncheck the Minimize Narrator Home to the system tray option per requirement.
If you uncheck the option, the Narrator Home window will minimize to the taskbar instead of the system tray.
- Exit Settings.
Customize Narrator Cursor Settings
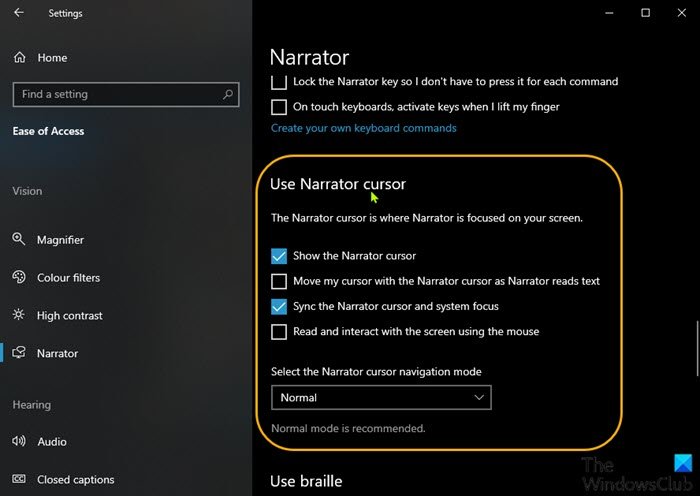
In Windows 10, Narrator comes with the following options:
- Show the Narrator cursor on the screen. The Narrator cursor is highlighted with a blue focus box.
- Have the text insertion point follow the Narrator cursor when on Editable text. When this is turned on, Narrator will move the text insertion point when navigating by views such as characters and words.
- Sync the Narrator cursor and system focus. When this is turned on, the Narrator cursor and the system cursor will be synchronized when possible.
- Read and interact with the screen using the mouse. When this is turned on, Narrator reads what is under the mouse cursor. Use the numeric keypad to move the mouse.
- Have the Narrator cursor follow the mouse. This option becomes visible when the previous option is enabled. If you enable it, the Narrator cursor will follow the mouse pointer.
- Select the Narrator cursor movement mode. Two modes are available: normal and advanced. Normal mode allows Narrator to move between various items such as links, tables, and other elements. Advanced mode lets you use the four arrow keys to move the Narrator cursor through a programmatic representation of an application.
To Customize Narrator Cursor Settings on your Windows 10 PC, do the following:
- Open Settings > Ease of Access.
- Click Narrator on the left pane.
- On the right pane, scroll down to the Use Narrator cursor section.
- Check (enable) or Uncheck (disable) the desired options per requirement.
- Exit Settings.
Change Narrator Voice
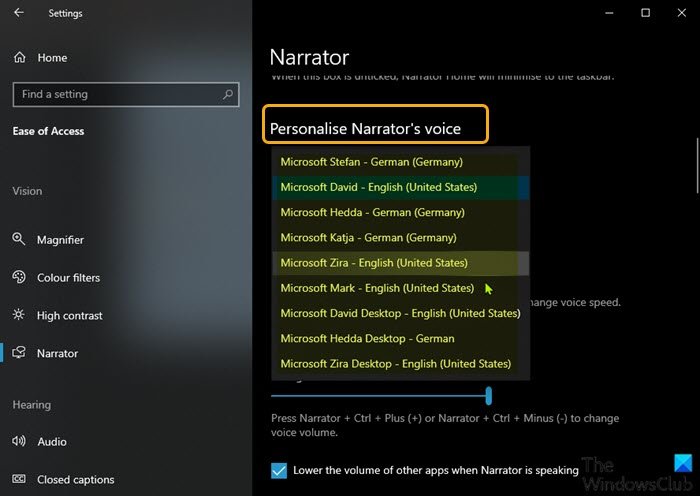
In Windows 10, you can change the voice for Narrator, adjust the speaking rate, pitch, and volume.
To change Narrator Voice on your Windows 10 device, do the following:
- Open Settings > Ease of Access.
- Click Narrator on the left pane.
- On the right pane, scroll down to the Personalize Narrator’s voice section.
- Choose one of the available voices.
- Exit Settings when done.
Change Narrator Keyboard Layout
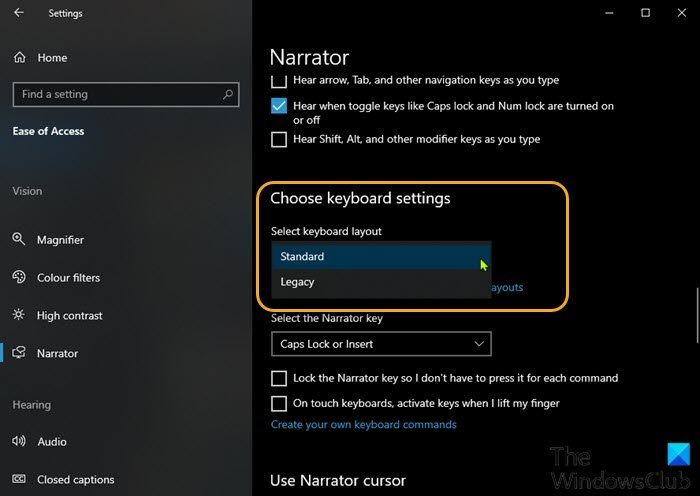
Narrator comes with two keyboard layouts: Standard and Legacy. The new Standard keyboard layout for Narrator is available starting in Windows 10 build 17692. It is designed to be more familiar to screen reader users. Learn more about the Standard Keyboard Layout for Narrator on Windows 11/10 at Office.com.
To change Narrator Keyboard Layout on your Windows 11/10 device, do the following:
Note: You will only be able to change the Narrator key if the Standard keyboard layout is enabled.
- Open Settings > Ease of Access.
- Click Narrator on the left pane.
- On the right pane, scroll down to the Choose keyboard settings section.
- Under Select keyboard layout, select Standard or Legacy per requirement.
- Exit Settings when done.
Enable or Disable Narrator Keyboard Shortcut
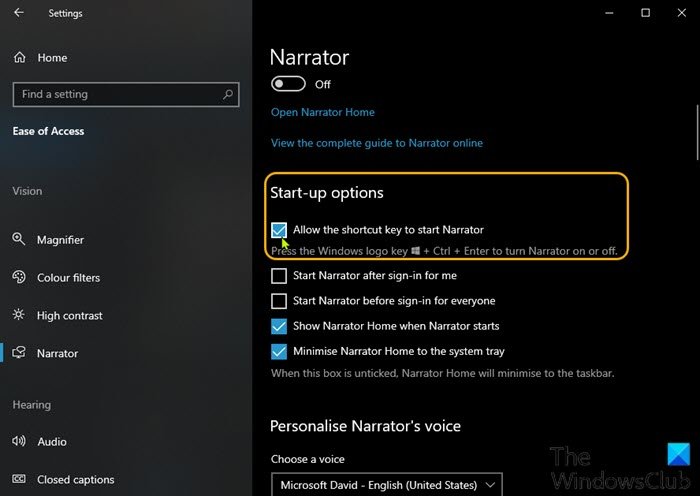
In recent Windows 11/10 versions, the Win+Ctrl+Enter keyboard shortcut is assigned to turn on the Narrator.
You can assign or release the Win+Ctrl+Enter keyboard shortcut to enable or disable Narrator for your user account in Windows 10. Here’s how:
- Open Settings > Ease of Access.
- Click Narrator on the left pane.
- On the right pane, scroll down to the Start-up options section.
- Check (enable) or Uncheck (disable) the Allow the shortcut key to start Narrator option per requirement.
- Exit Settings.
Change Narrator Keyboard Shortcuts
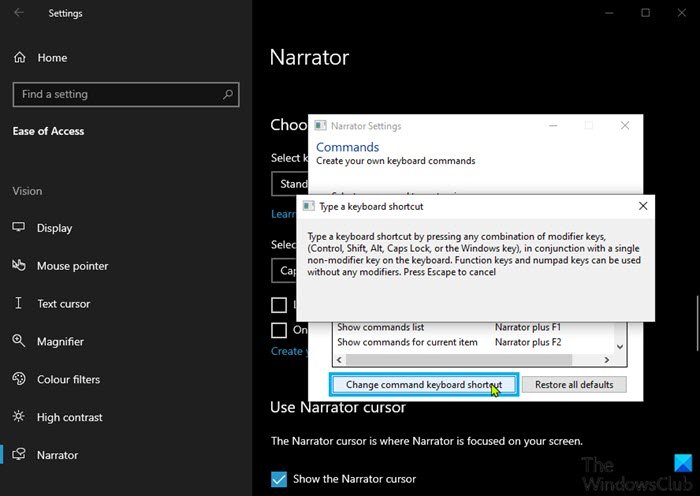
You can choose what modifier key you want to use in Narrator commands. Both the Caps lock and Insert keys serve as your Narrator key by default. You can use either of these keys in any command that uses the Narrator key. The Narrator key is referred to as simply “Narrator” in commands. You can change your Narrator key in Narrator settings. Here’s how:
- Open Settings > Ease of Access.
- Click Narrator on the left pane.
- On the right pane, scroll down to the Choose keyboard settings section.
- Click the Create your own keyboard commands link under the Select the Narrator key sub-section.
- On the pop-up, select a command you want to customize in the list of commands.
- Click on the Change command keyboard shortcut button.
- In the next dialog, press the keyboard sequence you want to use for the selected command.
Note: To restore the default keyboard shortcut for the selected command, click the Restore default button.
- Click on Save changes.
That’s it on how to configure some settings for Narrator in Windows 11/10!
Related post: How to change Default Audio Output Device for Narrator.