You can wrap an executable file around a PowerShell script (PS1) so that you can distribute the script as an .exe file rather than distributing a “raw” script file. This eliminates the need of explaining to non-technical users how to execute scripts through PowerShell or Command Prompt.
We have seen how to create self-extracting archives using IExpress. Now in this post, we will show you how to convert PowerShell script file to EXE file with IExpress on Windows 11/10.
Convert PowerShell script (PS1) file to EXE with IExpress
IExpress is an extremely useful tool for turning Visual Basic script or PowerShell script files and other non-executable scripts into one-click executables.
Let’s begin.
It’s assumed you have already created a PowerShell script. Now, continue as follows:
Press Windows key + R to invoke the Run dialog.
In the Run dialog box, type iexpress and hit Enter.
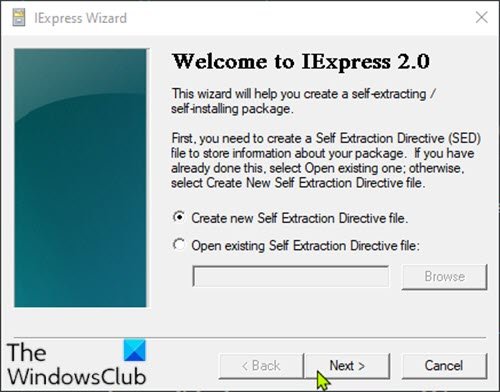
Select the radio button for Create new Self Extraction Directive file option. Click Next.
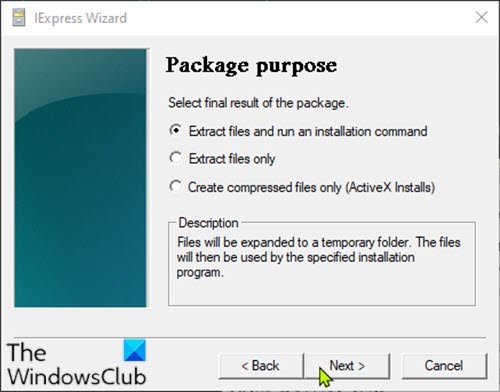
Select the radio button for Extract files and run an installation command option. Click Next.
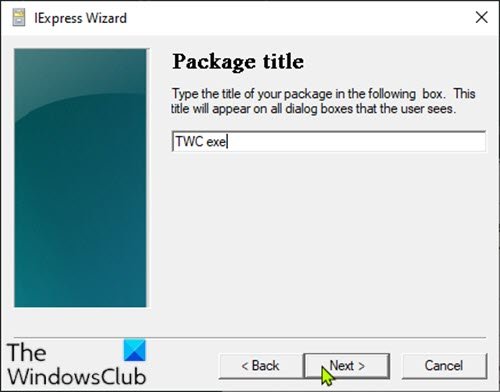
Type a name for your executable. Click Next.
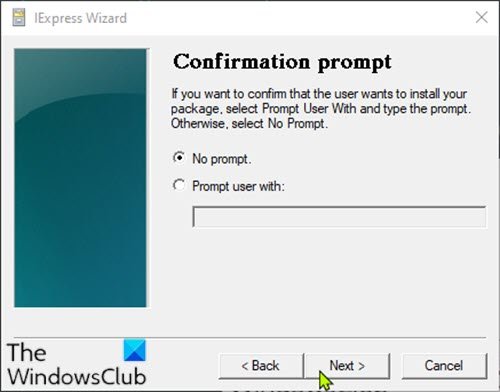
You will be asked whether you want to prompt the user to confirm the installation of their package. For the purpose of this tutorial, select No prompt and then click Next. If you want to prompt a user with a message you could choose Prompt user with and enter your message in the box below.
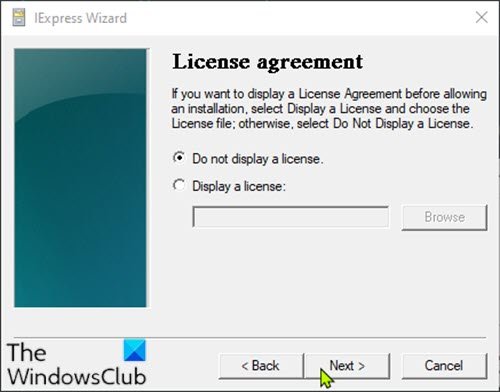
Similarly, you will be prompted whether or not you would like to display a license agreement. For the purpose of this tutorial choose Do not display a license and click Next.
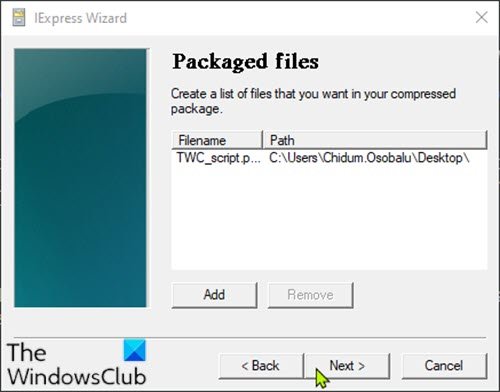
On the Packaged files screen, click the Add button and be sure to add your PowerShell script. Click Next.
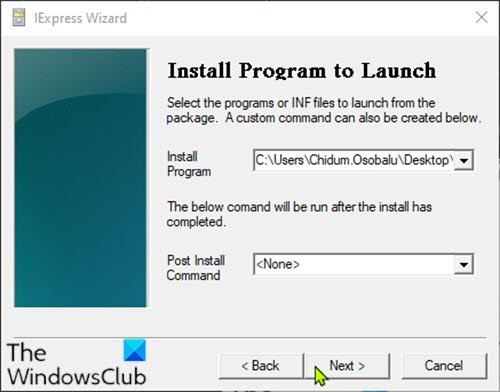
Your executable script should now be visible in the Install Program dropdown.
Select the file and leave the Post Install Command option as <None> and click Next.
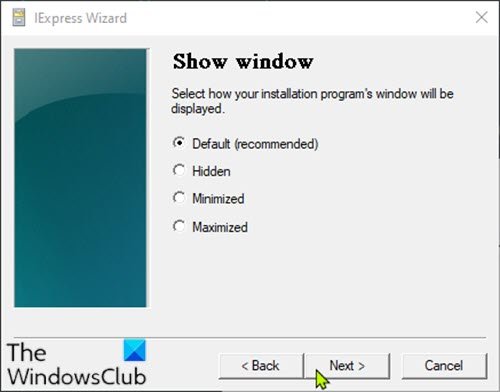
On the Show window screen, leave the original selection as Default (recommended). Click Next.
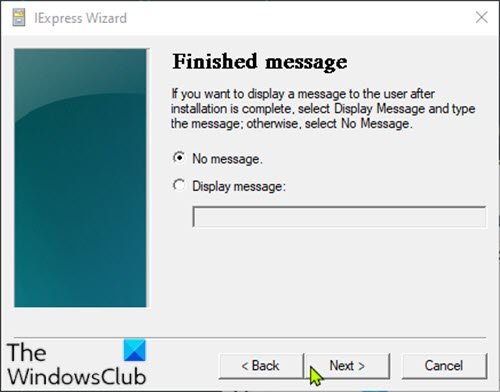
On the Finished message screen, leave the selection as No message. If you want to have a display message after your script runs, select the Display message option and enter the message into the box. Click Next.
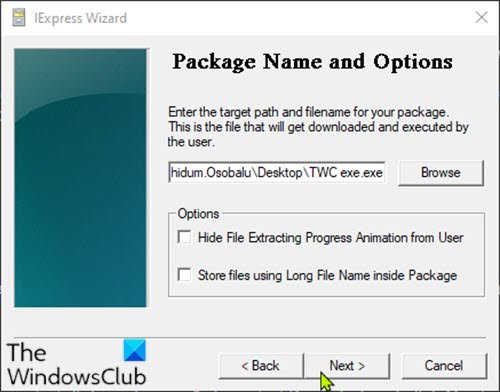
On the Package Name and Options dialog, click Browse. Choose a location and enter a file name. Click Save. You can leave the Options section as it is or check both options. Click Next.
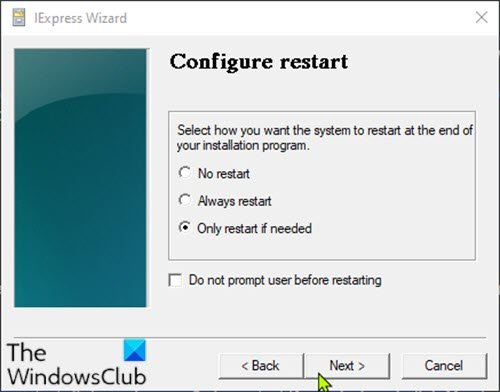
On the Configure restart dialog, choose Only restart if needed. Click Next.
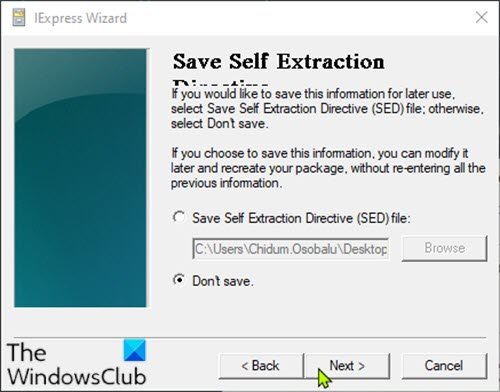
You can save your IExpress configuration in case you would like to come back and edit it later. For the purpose of this tutorial choose Don’t save. Click Next.
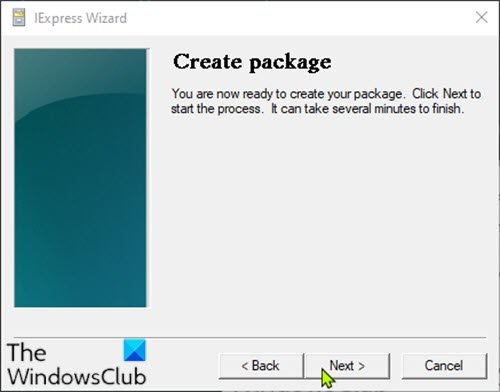
All of your configuration is complete and you are now ready to create the executable. Click Next to begin this process.
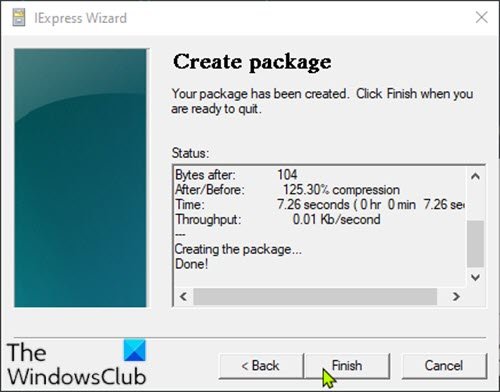
The executable will now be created. When done, click Finish to close the IExpress Wizard.
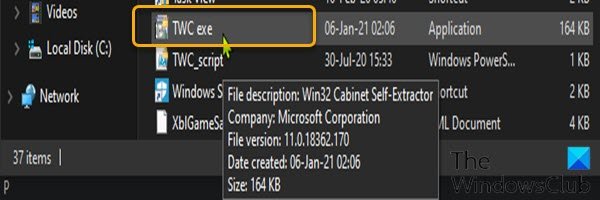
You can find the executable file in the location you chose earlier.
That’s it!
Bonus: You can also convert PowerShell (Ps1) files to .exe files using the following third-party tools:
- PS2EXE – a Microsoft PowerShell script.
- F2KO Ps1 To Exe – a free desktop application with multilingual support that can run on Windows OS.
- F2KO Online Converter – a web application is an addition to the portable standalone Ps1 to .exe converter application.
- PowerGUI Script Editor – a desktop application.
- PowerShell Studio – This software can visually create PowerShell GUI tools, carry out multi-file and file debugging, create MSI installers, monitor script performance, and many more.
- ISE Steroids 2.0 Enterprise – a desktop application. The software specifically extends the built-in ISE of a typical PowerShell editor.
These tools are fairly easy to use. For example, to use the PS2EXE tool, download it, and extract the zip file contents. After doing so, converting a PowerShell script to EXE format is simply a matter of running PS2EXE, specifying the script that you want to convert, and designate a filename for the resulting EXE file.
Leave a Reply