Photoshop is a wonderful graphic software that has a host of useful features. Converting Text to shape in Photoshop is a great feature for making great artwork. Converting text to shape allows for the text to be manipulated just like a shape. There may be challenges to finding unique texts that you like so manipulating one may be the next best option.
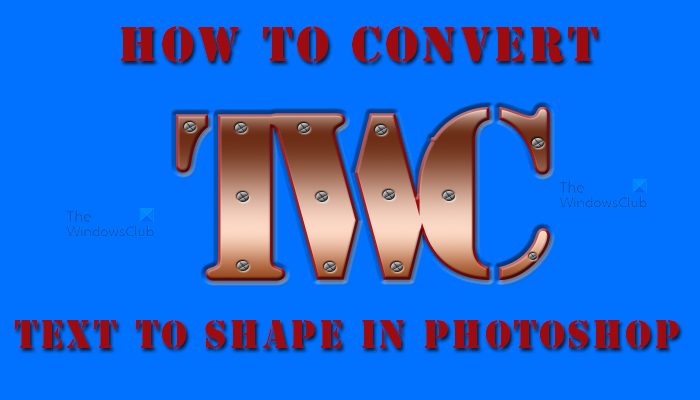
How to convert Text to Shape in Photoshop
Converting text to shape can be a great way to create logos or branding symbols. Creating logos will require some uniqueness to the artwork. Being able to turn text to shape and manipulate each letter is a great way to create unique artwork for logos and brands. Gone are the days when you had to use hand drawing to create unique writing. Photoshop allows you to create unique artwork for your projects.
- Choose Text
- Prepare Text
- Convert Text
- Save
1] Choose Text
Photoshop offers a lot of text options as default, and you can download more. When you are going to change the text to shape, choose your desired text carefully. You will not be able to make certain changes to the text after it is converted. To help make the process easier, it is best to choose a text that is as close as possible to what you want the result to be. For example, if you want a stencil look as a part of the final result, it would be easier to choose text that already has a stencil look, and not to try to make one. Therefore it is important to plan what you want and make sketches on paper of the result you expect. Make as many sketches as it will take to get you to one that you like.
2] Prepare Text
It is important to prepare the text properly as there will be changes that you will be unable to make once the text is converted to an shape. Choose the correct text, and make changes to the weight. Choose the Font Family, the Font Style, and the Anti-aliasing Method, if all of those apply to the font. Some fonts may not offer a font style option. As stated previously, choose a text that is as close as possible to what you would want the results to be. This will make the manipulation easier after you have converted the text to a shape.
Write the text on the canvas and make the changes and move on to the conversion step.
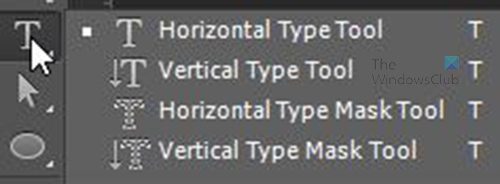
Go to the left panel and choose the Type tool that is best for your project, whether the Horizontal Type Tool or the Vertical Type Tool. Long press the T icon to make the Type Tools pop out so that you can choose the one you want.
Click on the canvas, then go to the top menu bar and choose the Font Family, the Font Style, the Font Size and the Anti-aliasing Method. You may also click on the color swatch to set the text color, or you can always change it after. However it is important to choose a text color that will be a contrast to the color of the canvas at this point. For this demonstration the Font Family is Stencil Std, the Font Size is 72 (the largest default size), the Anti-aliasing Method is Sharp. The color is a shade of red and the canvas color is blue. You can cycle through any of these to pick something that fits your project. Remember that you cannot change the Font Family, Anti-aliasing Method or Font Style after the conversion.

When you are finished choosing all that you can type the text you want to convert.
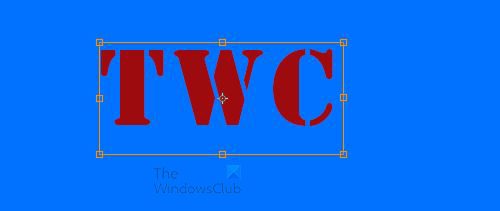
After writing you can make the text larger by pressing Ctrl + T to bring up the Transform box then holding one edge and click and drag while holding Shift + Ctrl to make the text size increase from all sides.
3] Convert Text
So you have chosen your text and you have made whatever changes you deem necessary so now it is on to the fun part. It is now time to turn the text into an shape so that you can manipulate each letter to make the design you want.

Go to the left panel and click the Direct Selection Tool, it is the pointer under the Type Tool. If the Direct Selection Tool is not the one visible, long press the Selection Tool that is visible, and a pop out menu will appear. Choose the Direct Selection Tool from that pop out.
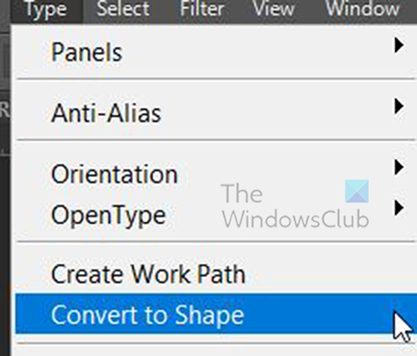
Click on the text you typed go to the top menu and click Type then choose Convert to Shape. The text is now converted to a shape and you can edit individual letters.
The Fill Color, Fill Pattern and Stroke Option can now be changed from the Fill swatch and Stroke options on the left of the top menu bar. Photoshop now sees the texts as a shape. You can make further changes according to your project’s requirements. I will make a few changes just to show what can be done with this text.

Text with a rusty looking gradient fill and a stroke.

To move the individual letters, go to the left panel where you find the Direct Selection Tool, and choose the Path Selection Tool. Click on a letter and you will see it get a transform outline around it. You may ask “why not write the letters separately then manipulate them?” Well, the answer is in a cool feature of changing the text to a shape. If you had given the shape a Gradient fill, the gradient direction will move to match the position of any of the letters. If these were individually written letters, you would have to manually fix the gradient to match the position of the individual letters. To prove this, use the Path Selection Tool to move any of the letters, you will see the gradient shift based on where the letters are positioned.
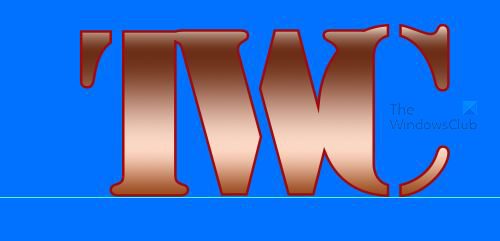
This is the text that has been changed to a shape. It is used to make a fancy logo. Notice that the W has an overhang on the top of the C.
To get rid of the extra piece you can use the Direct Selection Tool and warp the extra piece to fit behind the C. Go to the left panel and choose the Direct Selection tool. Click the shape that you want to change, and some handles will come around it. You can hold and drag to shape where you want.
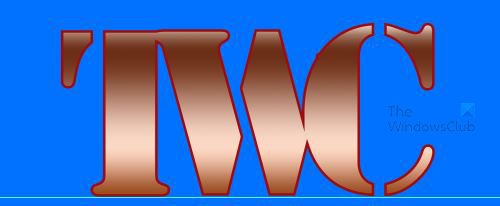
Logo with the overhang at the top of the C removed. With the text converted to shape, the Direct Selection Tool can be used to distort the different letters separately.
Another way to get rid of the extra would be to rasterize the shape then use one of the tools to cut or erase it. However, rasterizing the image will make it unable to be edited as separate letters. The whole image will become one flat shape.
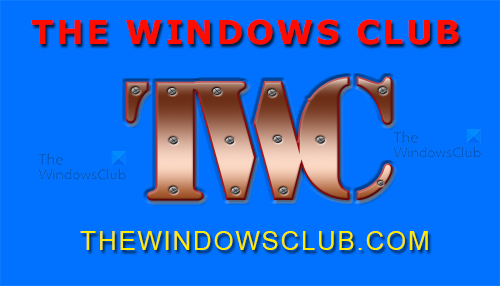
This is just one example of what you can do with the text that has been converted into a shape with Photoshop.
4] Save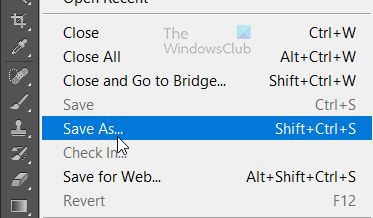
To save the finished product so that it is editable go to File then Save as then choose to save as a Photoshop PSD.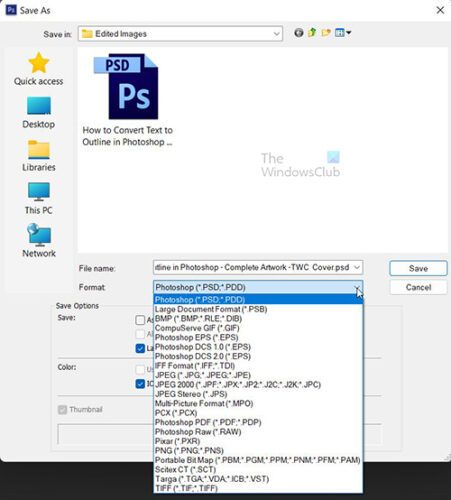
You can save an extra copy for printing, sharing, or using on the web. Go to File, Save As and then choose the File Format to be JPEG, TIFF, PNG or any of the other formats available.
Read: How to Rotate Guides in Illustrator and Photoshop
Why is learning How to Convert Text to Outline in Photoshop Important?
As a graphic designer, professional, or hobbyist, learning new design ideas, tips and tricks will take your skills to another level. These tips and tricks can save you time and give your designs a unique quality and look. Nothing that you learn will be wasted because it adds to the knowledge that you can use to do better work. You will also start to discover new tricks of your own as you learn new design principles.
Read: How to warp and convert Text to Shape in Illustrator
Why not Write Each letter Separate then Manipulate Them?
That is a way that the logo or artwork could be done, however, when lighting and color schemes like gradients are to be done, each letter will look different. There will be no cohesiveness and they will all look different. To get them to look like one work, it would take a lot of time to design them. Making them one text and then converting them to shape makes it easier to make them look like one. The gradient lighting and shadows will all match.
Is it Possible to Print from Photoshop?
It is possible to print from Photoshop. Go to File then Print. A dialogue box will appear, make whatever necessary changes there then press Print. Printing from Photoshop can be good because it will save you time. After all, you will not have to save the document as a separate file to print. You will also save space on your hard drive because you will not have to save an extra copy of the document if it is not necessary.