If you have a virtual machine installed on VMware in Windows 11/10 and you want to convert VMware to Hyper-V, or Hyper-V VM to VMware, here is how you can do it and the precautions you need to take before getting started. Instead of Windows, even if you have Linux or any other OS installed in the virtual machine, you can use StarWind V2V Converter to complete the job.
Before starting, you need to download and install StarWind V2V Converter on your Windows computer. For your information, we have tried some of the free backup software for VMware and Hyper-V virtual machines; all we can say is SatrWind V2V Converter makes the whole thing much easier.
Another important thing is to create a folder where you want to store the backup. It can be in any drive you want.
How to convert VMware to Hyper-V
To convert VMware to Hyper-V, follow these steps:
- Open the StarWind V2V Converter app on your PC.
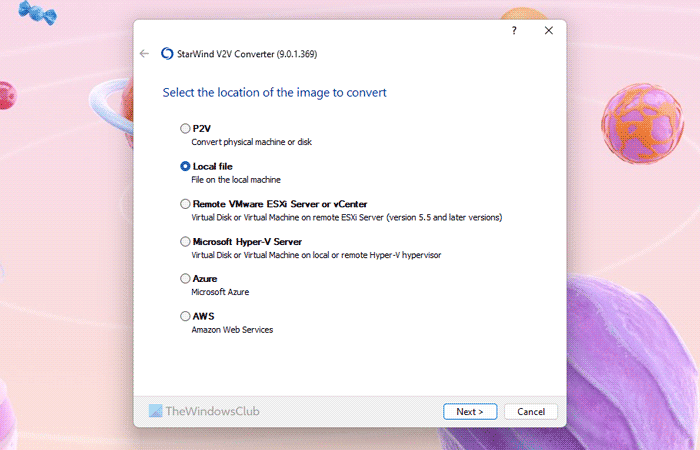
- Select the Local file option.
- Click on the three-dotted icon and select the VMware virtual disk file.
- Choose the Microsoft Hyper-V Server option.
- Keep the Hostname as localhost.
- Click on the Create a new virtual machine option.
- Enter the name, CPU count, Memory, Generation, and OS type.
- Choose the VHDX growable image option.
- Click the three-dotted button and choose a folder to store the backup.
- Click the Convert button.
First, you can head to starwindsoftware.com to download and install the program before following the actual steps.
Now open the StarWind V2V Convert app on your computer. First, you need to choose the location of the image you want to convert. For that, select the Local file option and click the Next button.
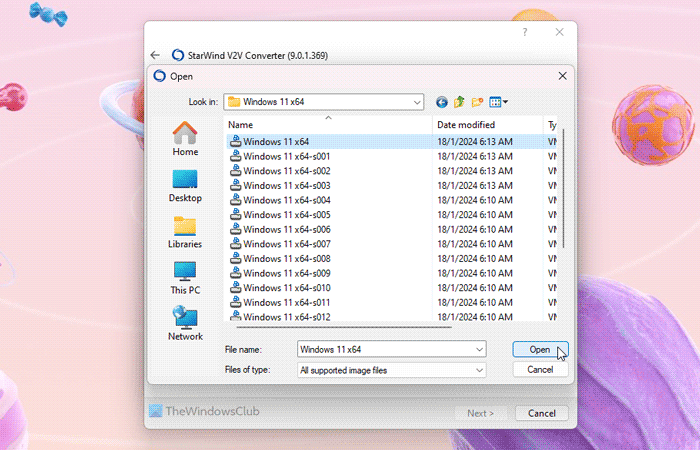
Click on the three-dotted icon and navigate to the path where you stored the VMware virtual machine’s files. If you haven’t changed the path, you should head to the Documents folder. In other words, you need to go to this path:
C:\Users\user-name\Documents\Virtual Machines\virtual-machine-name
Here, you may see several VMware virtual disk files with numbers called s001, s002, etc. You need to select the file that doesn’t have any such number. For example, if your virtual machine’s name is Windows 11 x64, you can find the same name in that folder.
Then, you need to choose the location of the destination image. Here, you should select the Microsoft Hyper-V Server option and click on the Next button.
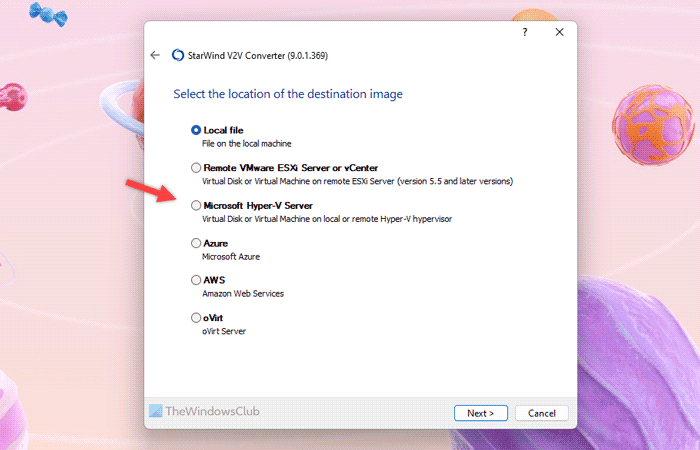
If you select the Local file option, you need to create the Hyper-V virtual machine manually to import everything. However, this program does everything automatically when you select the aforementioned option.
Now, it asks for the Hostname. You do not need to change anything. You can simply keep localhost as the Hostname and click the Next button. Then, click on the Create a new virtual machine button.
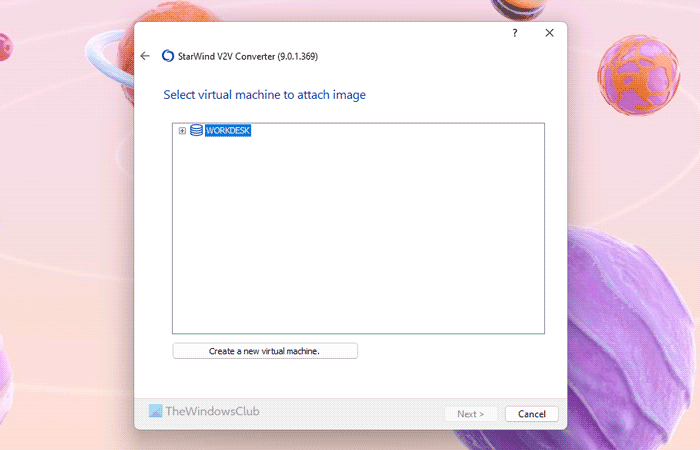
After that, enter a suitable name for the new virtual machine and choose the CPU count, Memory, Generation, and OS type. The most important thing is the Path. To select the path, you need to click on the three-dotted button and choose the folder path you created earlier.
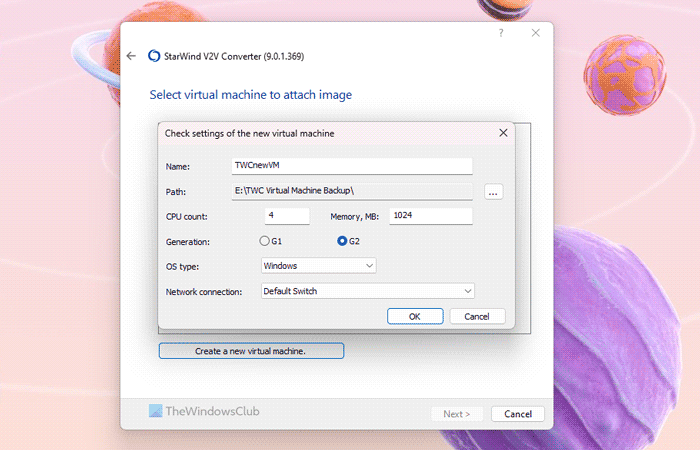
Here, you need to keep a few things in mind:
- The name of the virtual machine must not contain any space. That being said, MyVirtualMachine is suitable, whereas My Virtual Machine isn’t going to work.
- You must allocate sufficient Memory or RAM for the virtual machine.
- If you are migrating a Windows 11 virtual machine, it is mandatory to select the G2 option.
Once everything is set, click the OK button. In the next window, select the newly created virtual machine and click the Next button.
Then, you have to choose the virtual hard disk format. It is suggested to select the VHDX growable image option since it will not consume all the space at once.
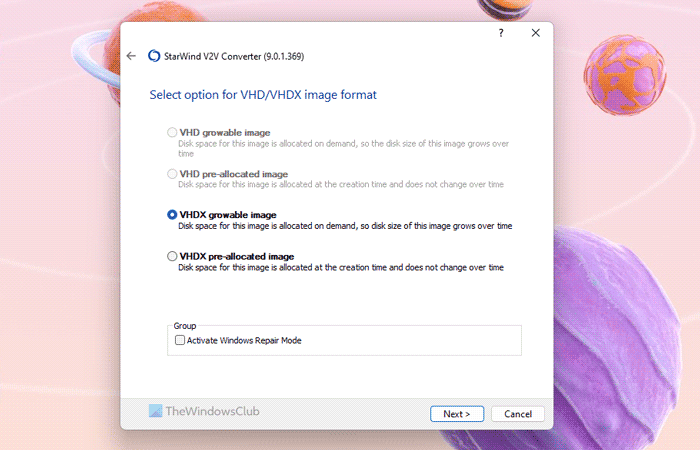
Finally, click the Convert button and give it a few minutes to get everything done.
Once done, open the Hyper-V Manager and start the virtual machine.
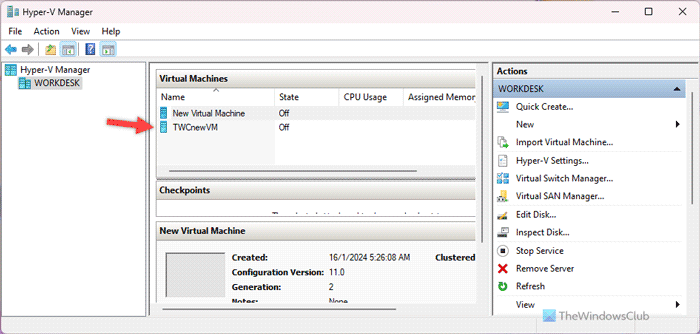
For your information, you can customize the settings of the virtual machine before starting it initially. However, it is not mandatory.
Convert VMware to Hyper-V in System Center
You can use the VMM or Virtual Machine Manager to convert a VMware virtual machine to Hyper-V. For that, you need to choose the VMs and Services option first.
From here, you need to select Home > Create > Create Virtual Machines and choose the Convert Virtual Machine option.
Following that, the options are almost identical to the aforementioned guide. Having said that, you need to select the source image that you want to convert and choose the Hyper-V host/Azure Stack HCI option as the destination.
Following that, you can customize the name of the converted virtual machine, choose the host, Network connection/Switch, etc. One of the most important things is to choose the Generation 2 option if you are converting a Windows 11 virtual machine to Hyper-V. Otherwise, it won’t work even after converting successfully.
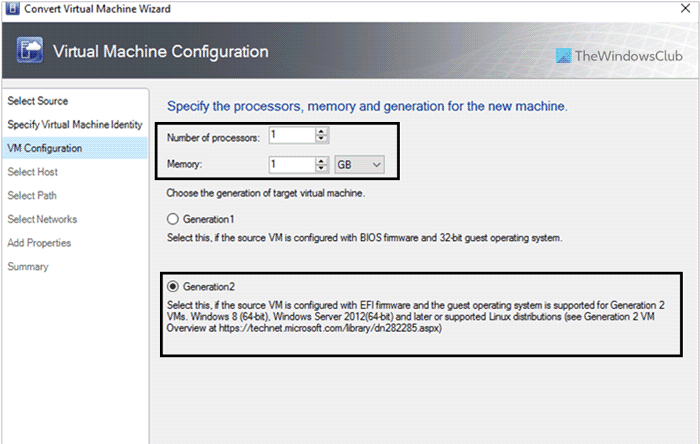
Finally, review all the settings and start the conversion. Once done, you can open Hyper-V to find the new virtual machine.
It is also possible to get the same thing done with the help of the Windows PowerShell. As several things need to be on track and countless things can go wrong even if you miss a word, we suggest you always use any of the two above-mentioned options.
That’s all! I hope these tools have helped you.
How to convert Hyper-V VM to VMware
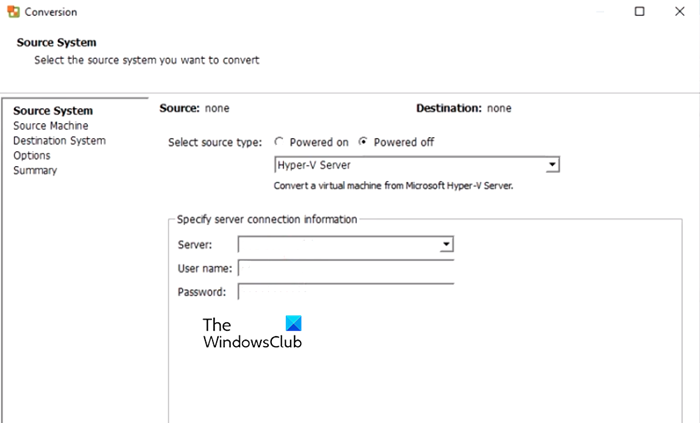
To convert a Hyper-V VM to VMware, you need to follow the steps mentioned below.
- First of all, go to customerconnect.vmware.com and install VMware vCenter Converter Standalone.
- From the toolbar, click on Convert Machine.
- On the Source System page, you need to select the source type as the Powered off option, and then choose the Hyper-V Server option.
- Mention the connection details in the given field and then click on Next.
- You will be redirected to the Source Machine page, there, you need to choose the Hyper-V VM you need to convert and then go to Next.
- You can either convert to VMware ESXi or Workstation.
- To convert to VMWare ESXi:
- Select a VMware Infrastructure virtual machine as the destination type, and go to the Destination System page.
- Enter the ESXi or vCenter Server IP Address, User name, and Password, then click Next.
- On the Destination System 5 page, provide a name for the new VM and click Next.
- On the Destination Location page, select the ESXi host, Datastore, and Virtual Machine version.
- Click Next to proceed.
- To convert to VMware Workstation, Fusion, or Player.
- Go to the Destination System page.
- From there, select the VMware virtual machine as the destination type, and choose the appropriate VMware product from the dropdown menu.
- Next, provide a name for the virtual machine and select a location.
- You can choose either a local folder or a network share, and if you choose the latter, you’ll need to provide a username and password to connect to the network share of the destination virtual machine.
- Finally, click “Next” to proceed.
- In the Options page, you need to navigate to Current Settings and Edit the parameters if required for the conversion task.
- Click on Next to continue.
- Review the information on the Summary page and click Finish to initiate conversion. You can track the progress in the Recent Tasks section.
Read: Convert VMware to VirtualBox and vice-versa
Can you convert VMware VM to Hyper-V?
Yes, you can convert VMware VM or virtual machine to Hyper-V, irrespective of the OS installed on your virtual computer. Although there are several apps available for this purpose, we have tried StarWind V2V Converter. It does the job in the fastest and simplest way possible. The best thing is that you can migrate or convert multiple virtual machines with the help of this free tool.
What is the free tool to convert VMware to Hyper-V?
StarWind V2V Converter is one of the best free tools to convert VMware to Hyper-V. You can easily download this backup software on a Windows 11/10 PC. Whether it is Windows or Linux, you can migrate from VMware to Hyper-V within moments. All you need to do is choose the VMware virtual disk file, create a new virtual machine, tweak the configuration based on the OS, and select a folder to keep the backed-up files.
Read: Backup VMware Virtual Machines with Azure Backup Server.