Microsoft Word is not only a platform that edits documents, but it can also customize pictures and text as well. In Microsoft Word, people can add artistic effects to their pictures and cool effects to their text. It might not add animations to your images or text like PowerPoint, but it creates effects that can be placed on a booklet, brochure, poster, etc. In this tutorial, we will explain how to create a 3D text effect in Microsoft Word.
How to create a 3D text effect in Word
Follow the steps below on how to create a 3D text effect in Word:
- Launch Microsoft Word.
- Insert a text box in the document.
- Edit the text box and change the font style and color.
- Click the Shape Format tab and click the Shape Fill button and select No Fill.
- Then click the Shape Outline button and select No Outline.
- Click the Shape Format tab and click the Text Effects button, hover the cursor over 3D Rotation, and select a 3D effect.
- Click the Text Effect button again, hover the cursor over 3D Rotation, and select 3D Rotations Options.
- Click the Text Effect Options tab, then click the Text Effects button.
- Change the Dept to 100 pt under the 3-D Format section, and also change the color of the Depth.
- Click the Material button and select Flat.
- Click the Lighting button and change the Lighting to flat.
- Click the Shape Format tab and click the Text Fill button to select a color without changing the color of the Depth.
Launch Microsoft Word.
Change the background color (Optional)
Now insert a text box into the document.
To insert a text box into the document, go to the insert tab, click the Text box button, and select Draw text box from the menu. Now draw the text box onto the document.
Now edit the text box by choosing a text font and enlarging the size of the text font.
Now we want to remove the fill and the outline of the text box.
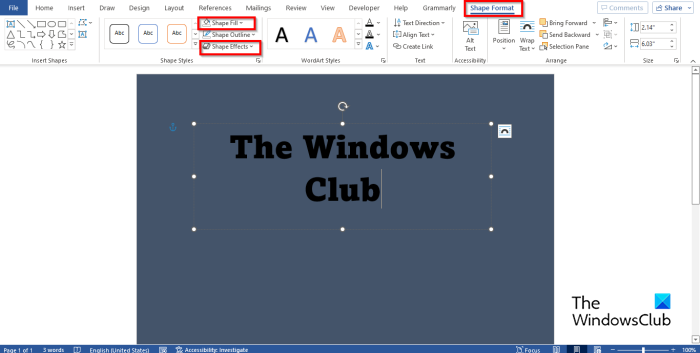
Click the Shape Format tab (ensure that the text box is selected.) Click the Shape Fill button and select No Fill, then click the Shape Outline button and select No Outline from the menu. You will notice that the text will blend in with the page background, and the outline of the text box is gone.
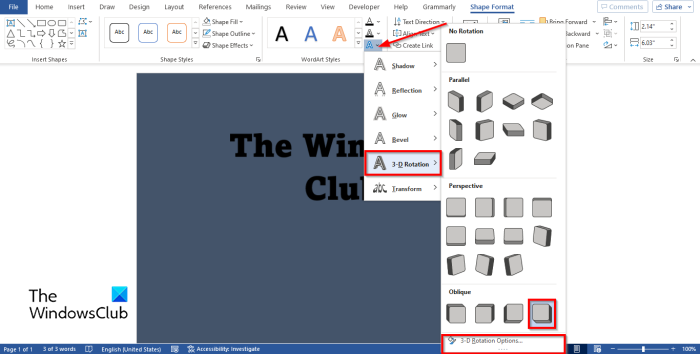
Go to the Shape Format tab and click the Text Effects button, hover the cursor over 3-D Rotation and select a 3D effect. In this tutorial, we choose the Oblique button right.
Click the button again, hover the cursor over 3-D Rotation, and select 3-D Rotations Options.
A Format Shape pane will open.
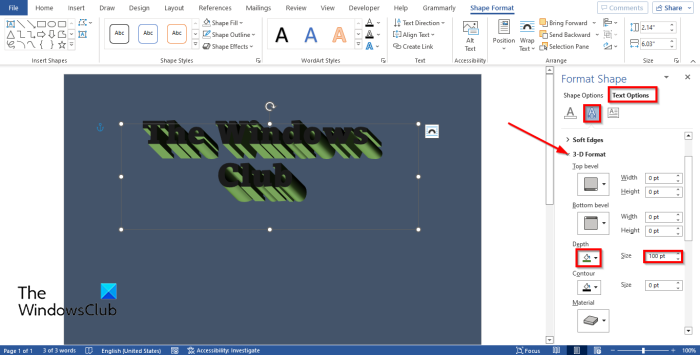
Click the Text Effect Options tab, then click the Text Effects button.
Click the 3-D Format section and change the Depth to 100 pt.
You can also change the color of the Depth by clicking the color button and selecting a color.
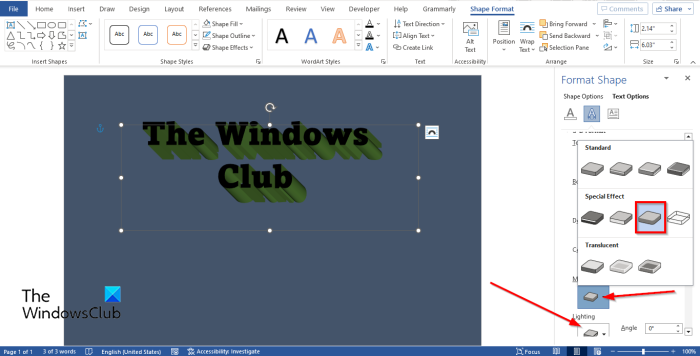
Still, under the 3-D Format section, click the Material button and select Flat.
Also, click the Lighting button and change the Lighting to Flat.
Close the Format Shape tab.
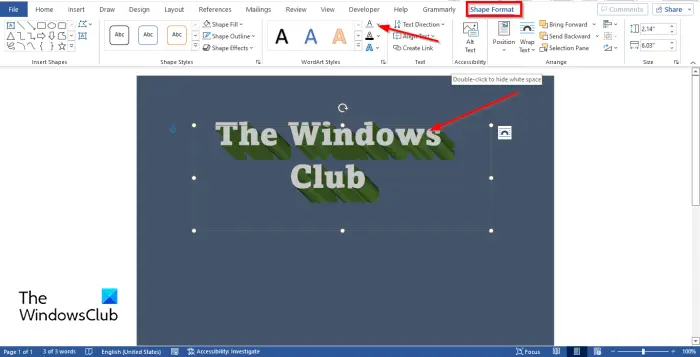
If you want to change the color of the font without changing the Depth color on the bottom. Click the Shape Format tab and click the Text Fill button in the WordArt Styles group to select a color.
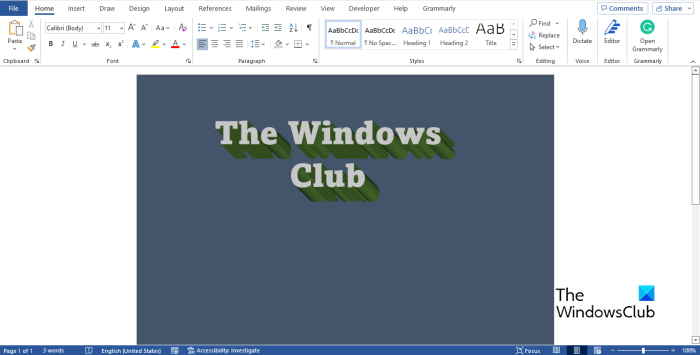
Now we have created a 3D Text Effect in PowerPoint.
What is 3D text?
3D refers to three spatial dimensions, namely, width, height, and depth. 3D is also known as 3 dimensional. A 3D text is a text in a 3D effect. People will use the 3D effect on their text to give it a unique or artistic look so it will not look plain.
READ: How to split a Page in 4 parts in Microsoft Word
How do you get 3D effect on text
In Microsoft Word, you can put a simple 3D effect on your text by:
- On the Insert tab, click the WordArt button and select a WordArt style.
- Edit WordArt.
- Click the Shape Format tab and click the Text effects button in the WordArt Styles group.
- Hover the cursor over 3-D Rotation and select a 3D text effect from the menu.
READ: How to mirror an Image in Microsoft Word
We hope you understand how to create a 3D text effect in Microsoft Word.
Leave a Reply