A Book is a set of paper sheets; typically, it is fastened together at one edge and enclosed in a cover with printing and writing on them. Microsoft PowerPoint is a software used for presentation. What if a user wants to present their presentation using a book in his or her PowerPoint.
In this tutorial, we will explain how to create a book design in PowerPoint by following these steps:
- Create a Cover for a Book by Inserting Picture
- Add the Spiral Effect
- Set the Title
- Creating the inside of the Book
- Creating Another Page
- Transition the Book
- Creating the Back of the Book
How to make a Book in PowerPoint
1] Create a Cover for Booklet by Inserting Picture
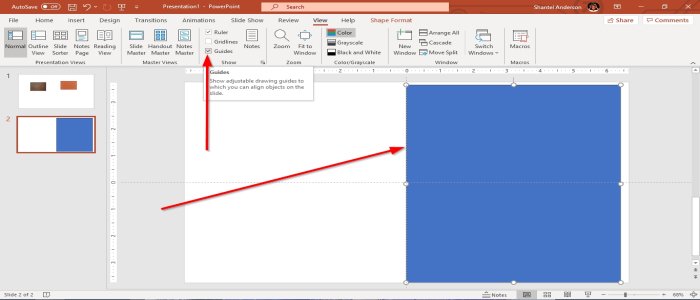
First, we will download a realistic-looking cover or texture or copy and paste an image to the PowerPoint slide. Go to New Slides on the Home tab in the Slides group and create a new slide; in this article, we are using a Blank Slide.
Click the View tab and click the checkbox of the Guides Tool in the show group. A grid line will appear across the slide.
We want to make a rectangle; on the Insert tab, select Shapes in the illustration group. Select a Rectangle and drag it on the left of the slide’s guild line, leaving some little space at the edge.
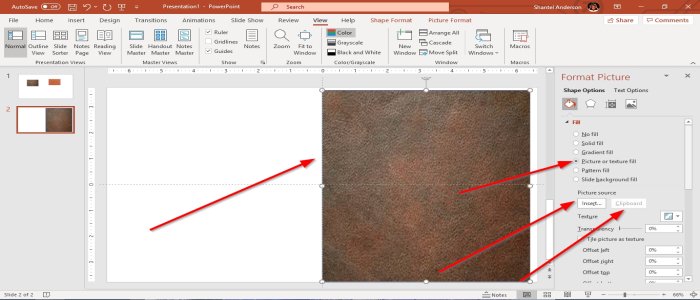
Right-click the rectangle and then select Format Shape. A Format Picture window pane will pop up on the side. I
n the fill section, select Picture or Texture Fill. You can insert the picture from a source, for instance, from your PC Files or Online, or you can copy the image and click the rectangle and select Clipboard; the image that you have copied will be paste on the rectangle in the slide.
2] Adding the Spiral Effect
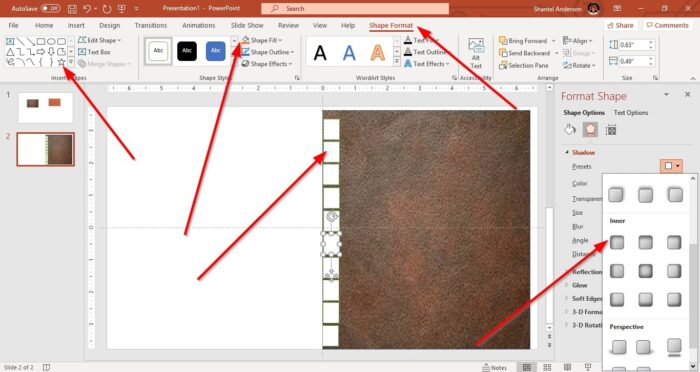
We are going to add a small square shape. On the Shape Format tab, above select Shapes in the Insert Shape Group; select a Rectangle and draw the rectangle on the cover of the image on the section that will be the spine of the book.
Go to Shape Fill on the Format Shape tab in the Drawing Group and select White. The rectangle will become white.
On the Format Shape window pane, select Effects or go to the Shape Format tab above. In the effect section, select Shadow, then choose a Preset. We are selecting the Preset top left located in the Inner section, this will add a little shadow.
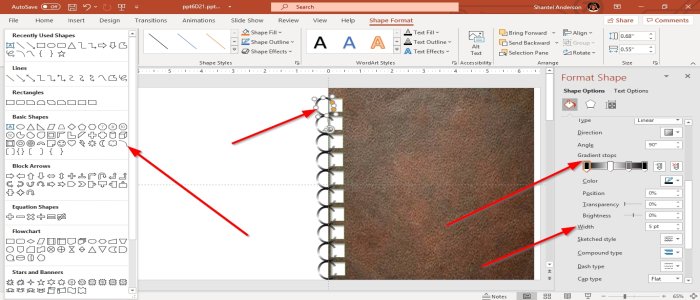
Now we are going to add the spiral binding. Go to Shapes and select arc in the Basic Shapes category in the Shape Tool; bring it over the Book and place it on the small rectangle on the book and drag it around, making it seems like you are enclosing the spiral within the small rectangle.
You can edit the Color and Width in the Format Shape window pane. In the Format Shape window pane at the line section, select Gradient. At Gradient Stop in the same box select the First Stop and choose the Black color, then select the Second Stop, put it in the middle and select White, select the Third Stop let it be Dark Grey and let the Fourth Stop be Black.
Highlight both the small rectangle and arc, then press Ctrl D to Duplicate them. Organize them properly. Now we have a spiral binding for our book. You can also increase and decrease the size by selecting the Width in the Format Shape window pane.
3 Set the Title
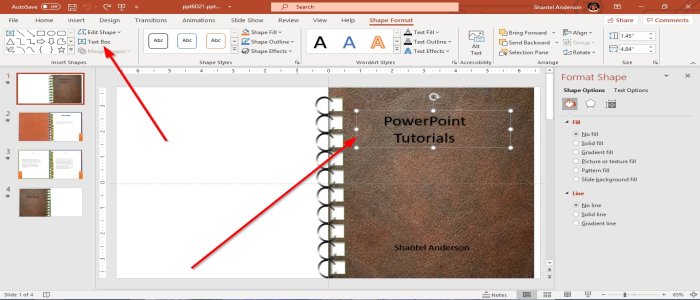
Now we are going to place a title on the font of the book. Click Insert and select Text Box, write your title, and format your text by changing the color and font.
4] Creating the inside of the Book
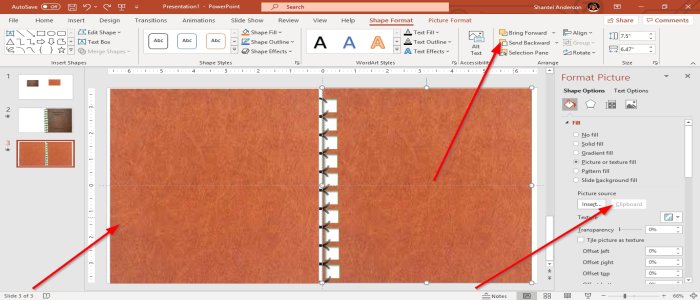
Copy and paste the slide of the book title as the next slide; now, we will work on the book cover’s inner layer. We are going to replace the first cover with a new photo. Copy the image you will use, then go to the Format Picture window pane and select Clipboard or Insert pictures.
After changing the image, delete the text from it. Now use Ctrl D to duplicate the image and bring it over the other side. Leave a small gap in the center.
On the Shape Format tab in the Arrange group, select Send Backward; this sends the image to the back. Press Ctrl G to group the rectangle.
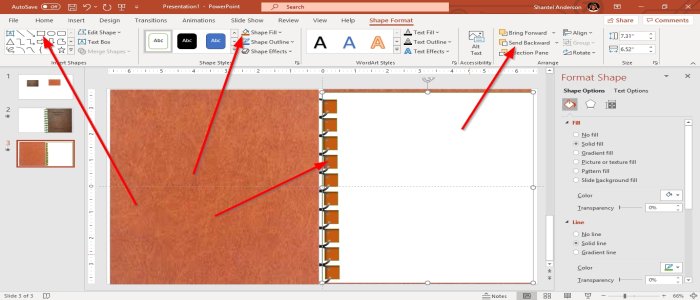
To create a Page inside of the book. Select a rectangle and place it in the book cover, select Shape Fill, and choose White the rectangle will turn white
Select Send Backward in the arrange group multiple times, to send the paper backward. It depends on how many small rectangles you have.
Fill the white space where the book spiral is, with brown close to the color of the inner layer of the book, to give it a realistic look.
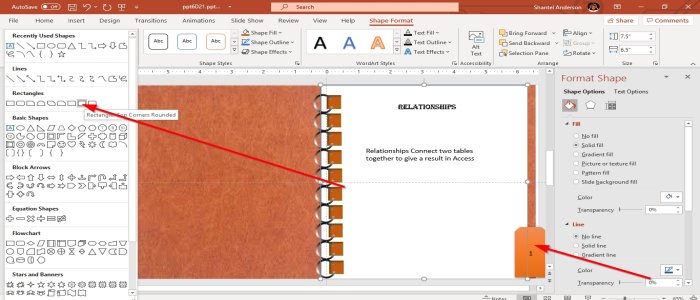
You can edit the pages with a Textbox. You can also create a Bookmark by going to Insert Shapes on the Shape Format Tab, a Tab that is open when you open the Format Shape window pane; the Shapes are also located in the Home and Insert tab. Select a Rectangle shape and add it to the end of your book page that you have created. You can add text to the shape and color.
5] Creating Another Page
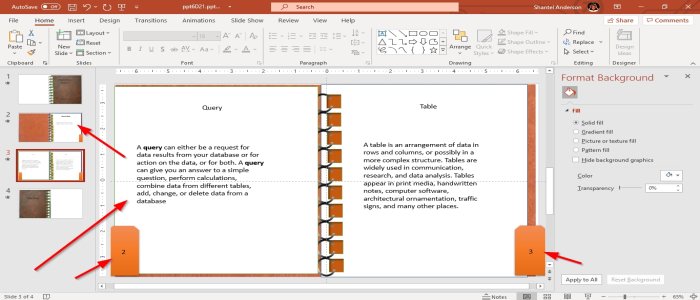
Copy the second slide you created of the inside of the book and paste it below. Change the text and the Bookmark number and change it to whatever you like. Also, create another Page on the left by inserting another rectangle shape and color it white, select a Textbox, and enter your data.
6] To Transition the Book
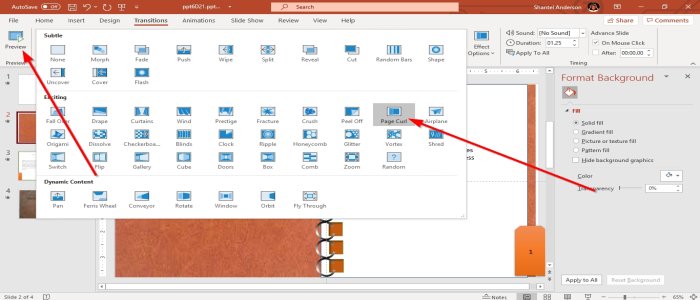
Select the second slide, go to the Transition tab. In the transition to this slide group select Page Curl. Then go to the top left of the transition window and click Preview. You will see your book flip open.
7] Creating The back of the Book
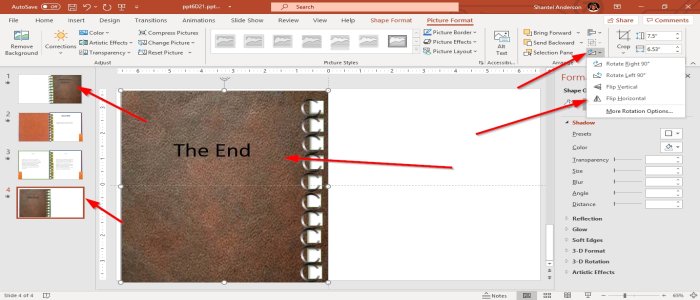
Copy the book from the first slide and paste it below the third slide, remove the text and write something else. Now place the copied cover on the grid’s left on the slide to make it look like the book is closed. Then organize the Rectangle and Arc on the book, which is the spiral binding. Then highlight the Arc and Rectangle, then press Ctrl G to group them.
On the Picture Format Tab, in the arrange group, select Rotate and click Flip Horizontal the Rectangle and the Arc will flip horizontally. Now we have a simple book presentation in PowerPoint. To showcase the book as a presentation, click the Slide Show Tool on the window’s bottom right.