Creating a Failover Cluster in the Windows server ensures high availability and reliability for apps and services. In this article, we will explain how to create a failover cluster in Windows Server, from installing the necessary features to configuring quorum settings. Do keep in mind that this tutorial is valid for Windows Server 2022, 2019, 2016, 2012 R2, and 2012.
What is a failover cluster in Windows Server?
A Failover Cluster is a group of connected servers that work together to ensure that important apps and services are working even if one of the servers fails. If one server in the cluster goes down, another server will automatically take over, minimizing downtime and running everything smoothly. This setup helps maintain high availability and reliability for the system, ensuring no interruption in user services.
Create a Failover Cluster in Windows Server
If you want to create a failover cluster in Windows Server, check out the whole procedure mentioned below:
- Meet the prerequisites
- Install the Failover Clustering Feature
- Validate the Configuration
- Create the Failover Cluster
- Configure Cluster Quorum Settings
Let’s get started with this guide.
1] Meet the Prerequisites
Before proceeding to create a failover cluster, it is necessary to verify that the systems are meeting the prerequisites mentioned below:
- Devices with the latest Windows Operating System
- Two network interfaces, one for production traffic, and the other for cluster traffic
- An Additional network interface for iSCSI traffic
- Both servers joined to a Microsoft Active Directory domain
- Both servers must see the shared storage device in the disk management
Once verified, we will start the next process.
2] Install the Failover Clustering Feature

After checking the prerequisites, the next step includes installing the Failover Clustering Feature. To install the Failover Clustering Feature, follow the steps mentioned below:
- Start the Server Manager, and then go to the Manage Menu.
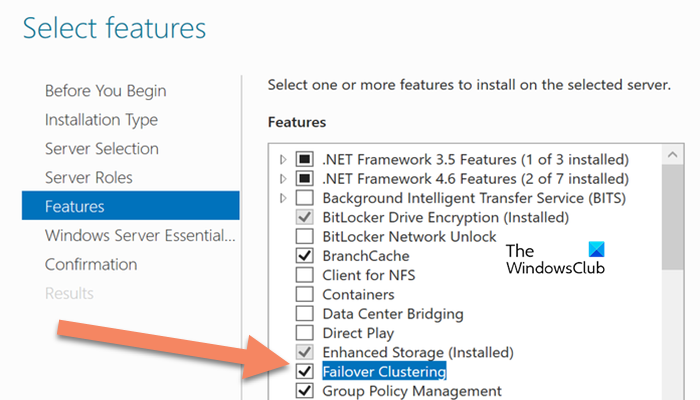
- Navigate to Tools > Add Roles and Features, and click on Next to reach the Features tab.
- Select the destination server, and server roles, followed by clicking the box of Failover Clustering box.
- Lastly, click on the Install and follow the on-screen instructions to complete the installation process.
Alternatively, users can also utilize PowerShell to install the Failover Clustering Feature, and here’s how to do it.
- Open PowerShell as an administrator.
- Type the command mentioned below, and hit the Enter button:
Install-WindowsFeature-Name Failover Clustering -Include Management tool
- Once done, reboot the device to finish the installation process.
3] Validate the Configuration
Once installed, we will ensure that everything is installed correctly by validating the configuration. For that,
- Launch the Server Manager, go to the Tools menu, and click on Failover Cluster Manager.
- Go to the Management tab, and select Validate Configuration from the Failover Cluster Manager.
- Click on the Next button, choose the servers for validations, and then follow the onscreen prompts to complete validating the configuration.
- If the result is clear, users can click the Create the Cluster now using the Validated nodes box, followed by selecting the Finish button.
4] Create the Failover Cluster

If one decides not to choose the option in the validation process, they can follow the steps mentioned below:
- Launch the Server Manager, navigate to the Tools menu, and click on Failover Cluster Manager.
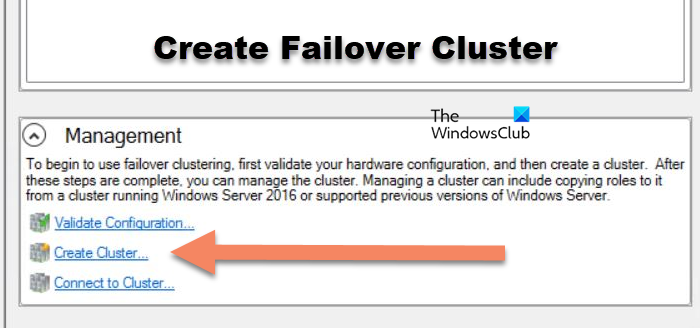
- In the Management tab, click on CreateCluster, and follow the prompts. This will lead to the validation process once again.
- Once done with the validation process, create the Access Point for Administering the Cluster, and type in all the information.
- In the Cluster Name Box, enter the name to administer the Cluster carefully, and configure the network adapter.
- Click the Next and Finish button to complete the process.
Alternatively, users can also use the command mentioned below in PowerShell to create the cluster, as this command will automatically add all storage:
New-Cluster -Name WFC2019 -Node SRV2019-WFC1, SRV2019-WFC2 -StaticAddress 172.21.237.3
In the Failover Cluster Manager, users can see the new cluster in the Nodes and Storage> Disk Sections.
Read: How to check SMB version on Windows 11?
5] Configure Cluster Quorum Settings

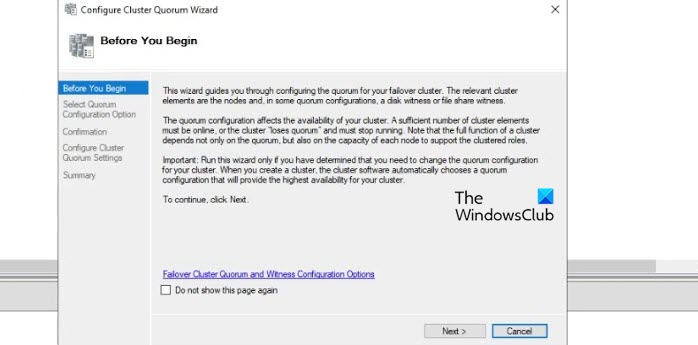
After the cluster is created, it’s time to configure the quorum manually. To do so, access the cluster context menu, click on More Actions, and then click on Configure Cluster Quorum Settings. For proper cluster operation, it is recommended that you configure a quorum witness. Lastly, point to the path of the file share witness and finish the Wizard. Once done, the shared disk will be available for use as data storage.
Hopefully, you now know how to create and configure the Failover Cluster in the Windows Server.
Read: Best Windows Server 2022 Tutorial and Tips
What is the difference between a load balancer and a failover cluster?
A load balancer and a failover Cluster both help improve app availability and reliability. The former distributes incoming network traffic across multiple servers to provide optimized performance, whereas the latter consists of multiplier servers working together to provide backup in case one server fails. This ensures continuous operation in case of a server failure.
Read: Fix Error 1460, Cluster Shared Volume is no longer accessible.