Want to magnify part of an image using a magnifying glass icon in your Slide? This post will show you how to create a Magnifying Glass effect in PowerPoint. While creating a pitch deck or a presentation, you may have to highlight specific areas of your presentation. For that purpose, you can use the Magnifying glass Feature, which can be used on some of the most popular tools of the MS Office suite, like PowerPoint.
A magnifier is easily the best way of attracting the viewer’s attention in a lowkey way. Let us see how you can use this zoom functionality in Word and PowerPoint.
How to create a Magnifying Glass effect in PowerPoint
While there isn’t a native, explicit magnifying effect feature on PowerPoint, you can use workarounds to create magnifying glass effects from simple PowerPoint shapes. Here’s how you can do so:

- Firstly, we need to create a gimmick magnifying glass using objects that can be inserted into a PPT slide. Before that, enter the picture you want to zoom into. You can do so by clicking on Insert > Pictures, and then selecting one from either your computer’s memory or a stock image.
- Now, onto creating a magnifying glass. Click on Insert > Shapes and select a shape resembling a magnifying glass, preferably an oval shape. Also, insert a line shape and conjoin them to give the appearance of a magnifying glass
- You can further customize the body to make it look more like a magnifying glass. Select both the objects, right-click, and select the Format Shape… option
- In the Fill section, select No Fill, and in the Line section, select Solid Line. You can also customize the width size, transparency, and internal colors for these objects
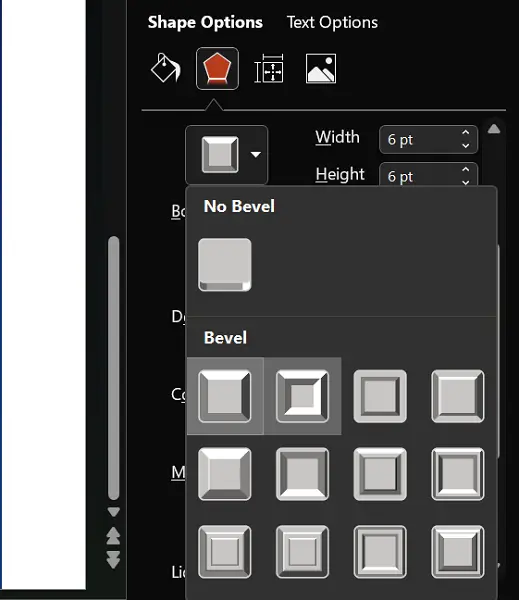
- You can make the magnifying glass look even more realistic by editing the settings vis-a-vis its 3D effects
Now that you have constructed a magnifying glass, it is time to see how you can make it work like one. Below are the steps you need to follow for the same:

- Select the Oval shape and open the Format Shape settings again
- In the Shape Options tab, open the Fill group
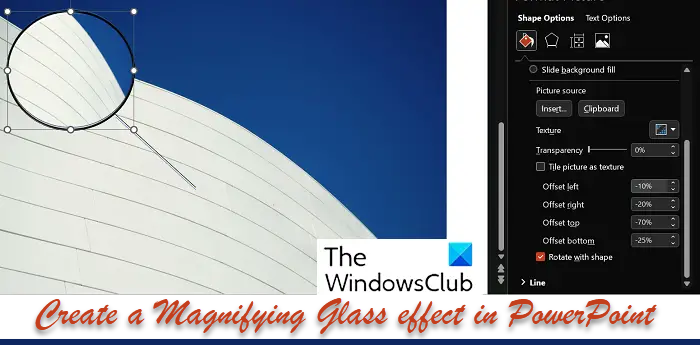
- Select the ‘Picture or Texture fill’ option and insert a picture
- Insert the same image as you had to make the background of the slide
- Now, you can adjust the Offset settings for different sides to give the magnifying glass effect as you desire
The result of these modifications would be a magnifying effect on this picture. Alternatively, there is a native option if you want to zoom into a particular section of a pre-existing slideshow. For that:

- Open the PowerPoint file
- On the bottom-right area of the slide, click on Slide Show view
- Once it has started, click on the Zoom icon visible at the bottom-left corner of the screen
We hope that you find this article helpful.
Read: Give presentations over the Internet with PowerPoint Broadcast Slide Show feature
How to zoom or magnify a Word document?
Creating a zooming/magnifying effect is way simpler on Word than on PowerPoint. Not only does it have a built-in feature, but it is also very easily accessible. Here’s what you need to do:
- Open the Word document on which you want to zoom in on the text
- You’ll find the zoom level dialog box on the bottom-right corner of the screen
- Click on the ‘+’ sign to magnify the text in the document
- Adjust the levels accordingly
In just these few simple steps, you can magnify or zoom into text in a document on MS Word.
How to magnify using Magnifier on Windows?

If you’re looking for a solution that would work for not only PowerPoint or MS Word but every Windows app, then you can use the Windows Magnifier. It’s a built-in feature in Windows Settings that allows you to zoom in and out of any app, and to the extent of your choosing. Here’s how it can be enabled and used:
- Open Windows Settings with the ‘Win + I’ key combination
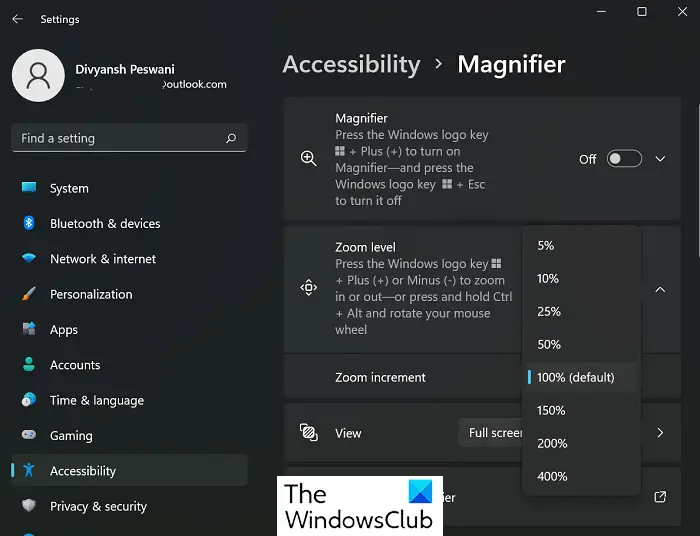
- Search for Magnifier from the Search bar or go to Accessibility > Magnifier
- Toggle the Magnifier option on with the options present, or press the ‘Win’ and ‘+’ keys together to do so
- This would immediately zoom into the screen that is open at the time
You can use the Settings page to calibrate whether or not you want to zoom in (or use the Magnifier toolbar) or even adjust the zoom increment intervals, where 100% is the default.
How do you magnify an image on Android?
Zooming into or magnifying an image is also possible to do in Android, with, in fact, several ways to do so. The primary way is via the Camera app. You can zoom in to click a picture or zoom into a clicked picture using your finger. Besides that, there are several free magnifier apps available on Android.
Leave a Reply