Creating Pages for your site in SharePoint is a great way to share ideas using Microsoft documents such as PowerPoint, Excel, and Word; share images and videos to persons within your organization or group. The user can publish pages easily and promptly. A Page in SharePoint is used to showcase and organize the contents of the SharePoint Site.
How to create a Page in SharePoint
On SharePoint Online.
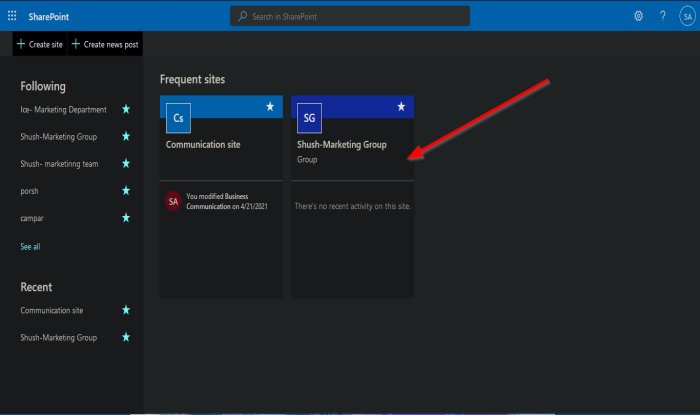
Click on any of the sites you created, whether it is a Communication Site or Team Site.
Once you click The SharePoint site you want to create the page for, the Home page for the site you have selected will appear.
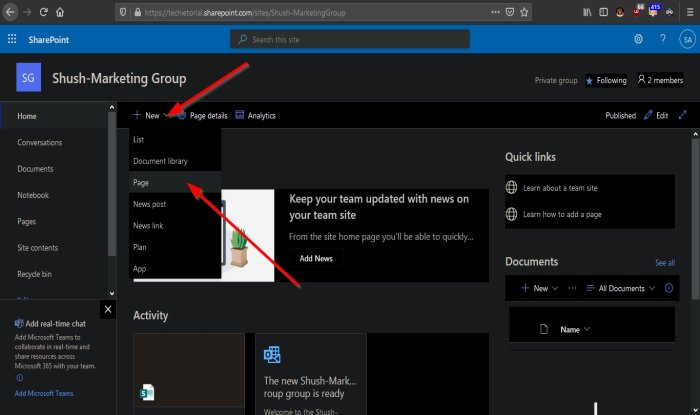
On the Home page, click the New button and select Page from its list.
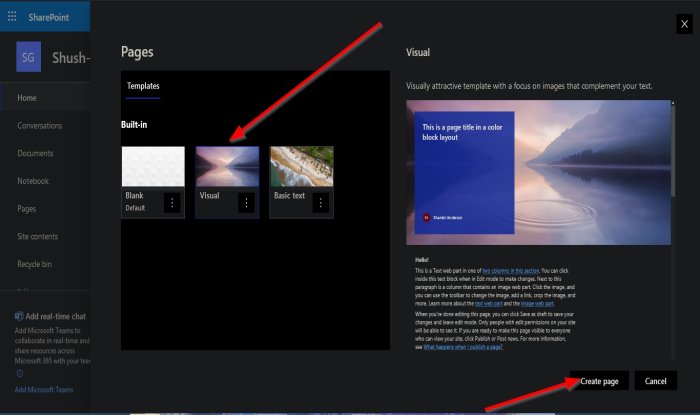
A Page panel will appear to display three types of templates. These templates are:
- Blank: The blank template allows the user to start from scratch and to add columns, text, images, links, and more.
- Visual: The visual template is an attractive template that focuses on images that complement your text.
- Basic Text: The basic text template is a template that emphasis on text and example of text formatting.
In this tutorial, we choose to select the Visual template.
Then click the Create Page button on the bottom right of the Page panel.
Now we are on the Visual template.
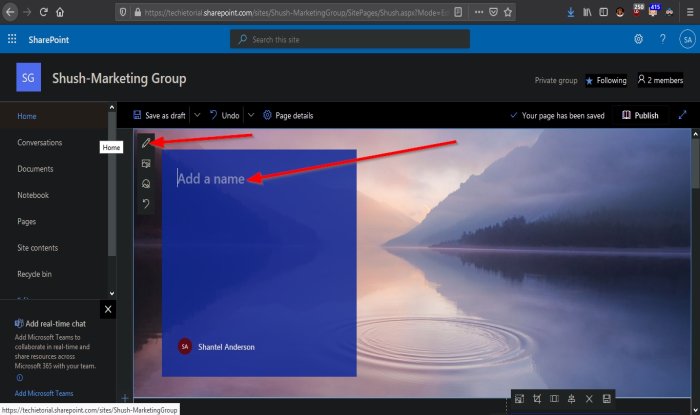
On the header of the page where you see Add Name, please enter the name of your page.
Then we are going to click the Edit Web Part button on the left.
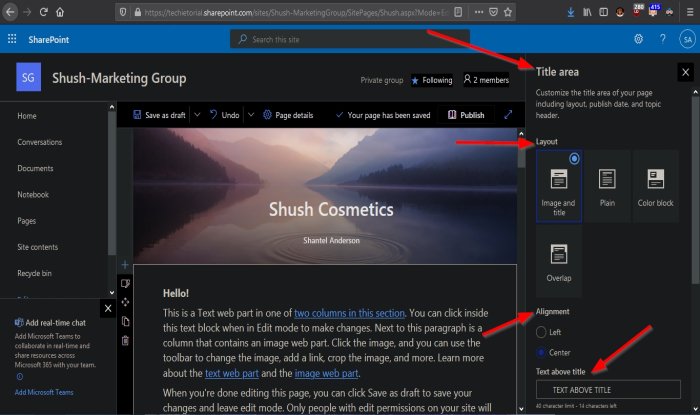
A Title Area panel will pop up on the right.
The Title Area panel allows the user to customize the title area of the page, including Layout, Publish Date, and Topic Header.
There are four options to layout your title area in the Title Area panel in the Layout section; These options are Image and Title, Plain, Color Block, and Overlap.
In this tutorial, we choose to select Image and Title.
You can align your title area by clicking either clicking Left or Center.
We chose to center the title area on the header will be centered on the image.
In the Text Above Title section, you can enter text above the title; it is optional.
You can turn the Show text above the title button On.
You can also turn the Show Publish Date button On.
You can even enter alternative text into the Alternative Text box.
After you are finished with the Text Area panel, close the Text Area panel.
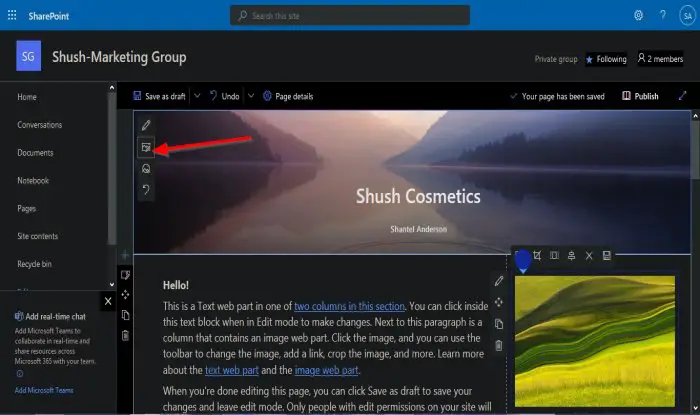
You can choose to change the image in your header’s header by clicking the Change Image button on the left of the page’s header.
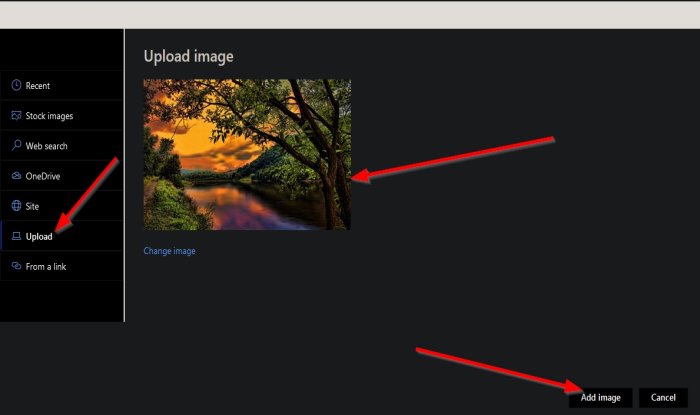
Now we are in the Change Image panel.
On the left pane of the panel, you can choose where you want the image to come from; these options are Recent, Stock Images, Web Search, One Drive, Site, Upload, and From a link.
We chose to Upload the file.
To upload the file, click Upload.
A File Upload dialog box will appear.
Inside the dialog box, click the file you want, then click Open.
The file will appear on the Change Image panel.
Then, click Add Image.
The image will appear in the header of the page.
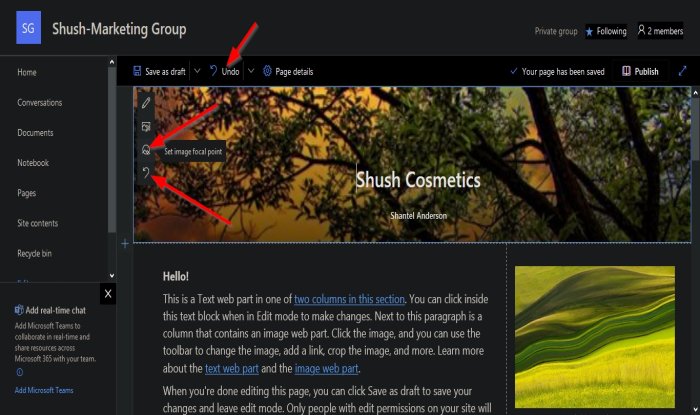
If you want to display your image above or below, click Set image focal point; a small circle will appear on the image where you can move the image up and down and side to side.
You can even reset the image back to its default image by clicking The Reset to default image button on the left of the header.
Read: SharePoint search not returning results for some users
If you want to undo what you have done, click the Undo button above and click the drop-down arrow to display the Redo button.
If you click on the sections below, you can will some options.
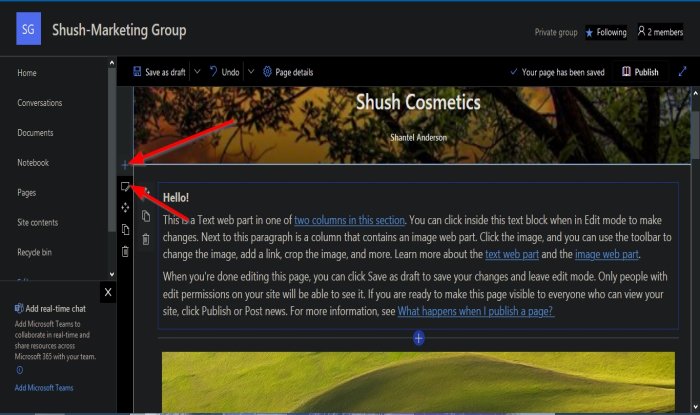
The Plus sign is to add more section to your page
If you choose to click Edit Section, a Section panel will pop up.
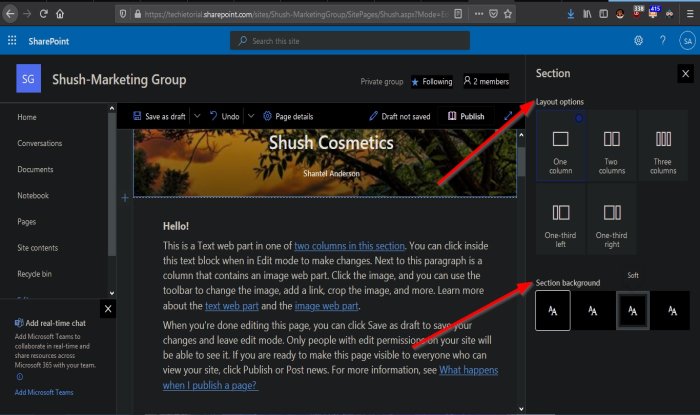
There are several Layout options such as One Column, Two Column, Three Columns, One-third Left, and One-Third Right.
We select the One Column option.
There are also options for the Section Background. These options are Neutral, Soft, Strong, and if you do not want any background, select None.
We choose Soft.
Then close the panel.
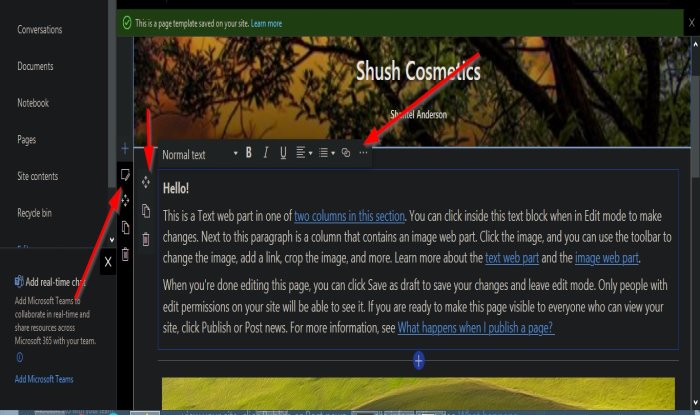
If I chose to edit inside the section, click the area with text.
You will see some formatting tools above the text box, such as Text Font, Bold, Italic, Underline, Align, Bulleted list, Hyperlink, and the dots represent More.
On the section text box left, you will see some buttons such as Move Web Part, which allows you to move the web part; Duplicate Web Part enables you to create a copy of the web part; Delete Web Part deletes the web part.
The buttons are identical to the ones we mention on the further left of the section.
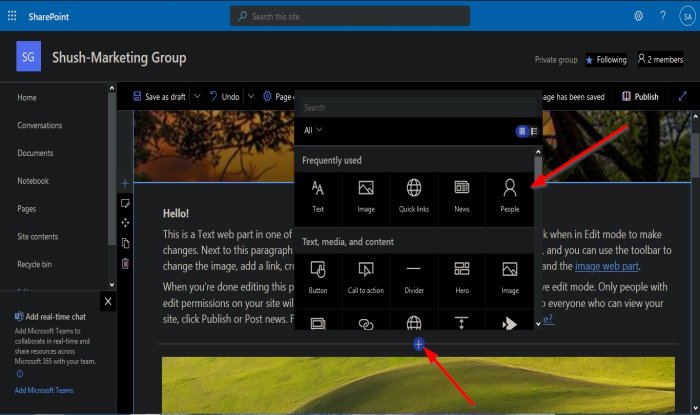
The Plus button under your Web Part Section enables you to add some features to your web part.
If you click the Plus button, a small box will pop up displaying various options you can select from.
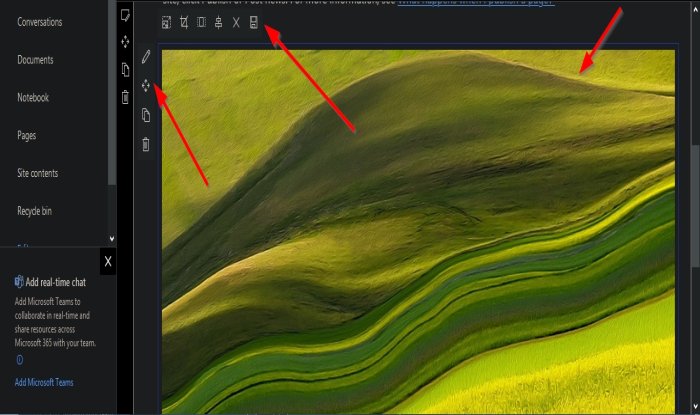
If you select an image on the page, there are options above the image to Resize, Crop with free ratio, Aspect ratio, Alignment, Reset, and Save.
There are options to Edit Web Part, Move Web Part, Duplicate Web Part and Delete Web Part on the left side.
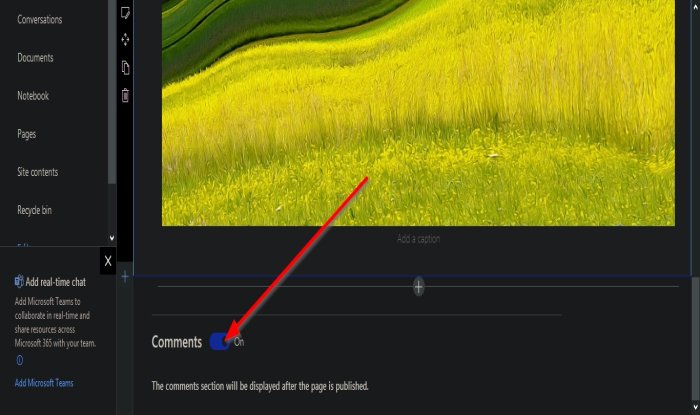
You can turn on the Comments of your page; it will be displayed after your page is published.
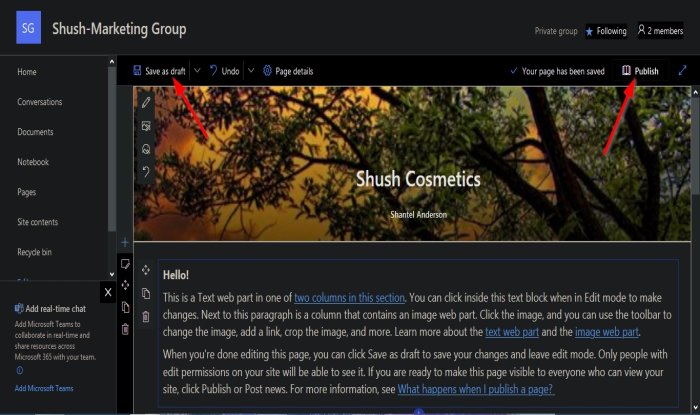
You can save your page as a draft by clicking the Save as a draft button above.
If you are finished customizing your page, click Publish above.
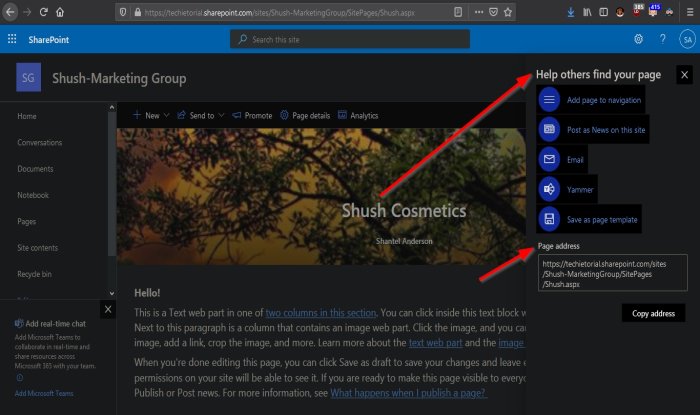
After publishing your page, a panel will appear on the right. You can help others find your page by Add page to navigation, Post as news on this site, Email, Yammer, or Save as page template.
You can even copy the URL for the page.
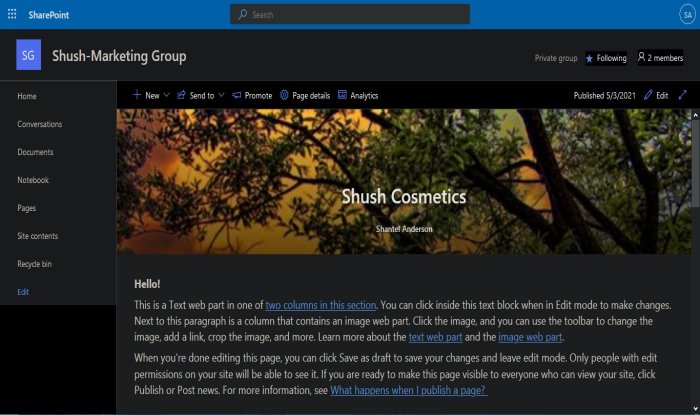
We have created a SharePoint page.
We hope this tutorial helps you understand how to create a page for your SharePoint site.
Related: SharePoint Tutorial for Beginners to get started.