Microsoft PowerPoint is a program that is mainly used for presentations, but you can use it to edit pictures and text to make them look unique and appealing. In this tutorial, we will discuss the steps to create a Split Letter Design in Microsoft PowerPoint. Split letters are large initials or monograms with a space in the middle to write a text.

How to create a Split Letter Design in PowerPoint
Follow the steps below on how to create a Split Letter Designn in PowerPoint.
- Launch PowerPoint, then change the slide to a blank layout.
- Draw a textbox on your slide and input a letter inside it.
- Choose a font and a font size.
- Align the letter to the center.
- Draw a rectangle in the middle of the text.
- Now change the color and remove the outline of the rectangle.
- Enter text in the textbox. Then change the font and the font size.
- Go to the Home tab and select a rectangle shape from the gallery and draw it between the split of the letter.
- Remove the outline from the shape.
- Change the shape color.
- Press Ctrl + D to copy the rectangle and place it between the split below.
- Now we have a split letter.
Launch PowerPoint.
Change the slide to a blank layout.
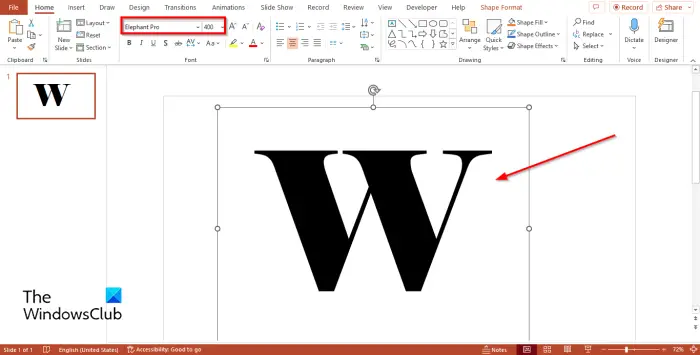
Now draw a textbox on your slide and input a letter, for instance, the letter W.
Then choose a different font and font size. In this tutorial, we use the font Elephant Pro and the font size 400.
Align the letter to the center.
Now we are going to put a split in the middle of the text.
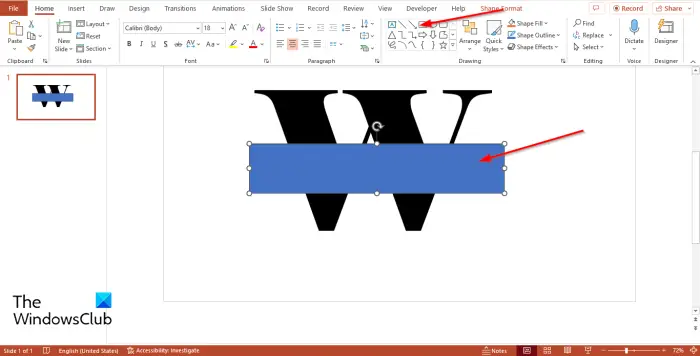
On the Home tab, click the Rectangle in the Shape gallery and draw it in the middle of the text.
Now change the color and remove the outline of the rectangle.
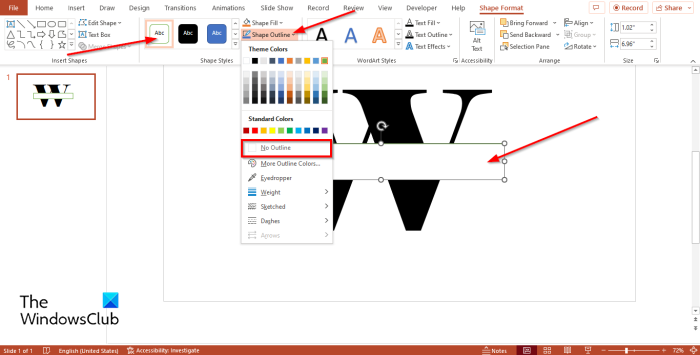
On the Shape Format tab, click the White button in the Shapes styles gallery or click the Shape Fill button and select White.
Click the Shape Outline button and select No Outline from the menu.
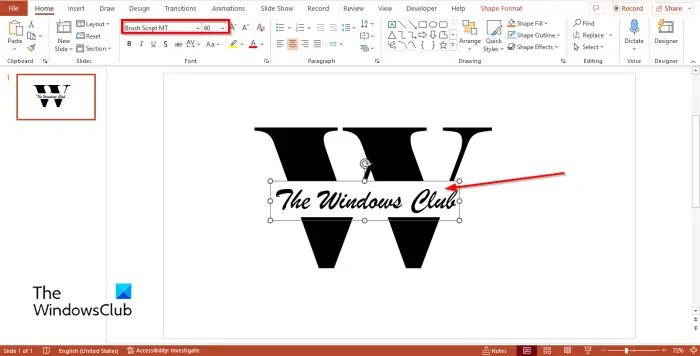
Now we are going to enter some text into the textbox. Change the font and the font size. In this tutorial, we must change the font to Brush Script MT and the font size to 60.
Now we are going to input some horizontal bars in the split letter.
Go to the Home tab and select a rectangle shape from the gallery and draw it between the split of the letter.
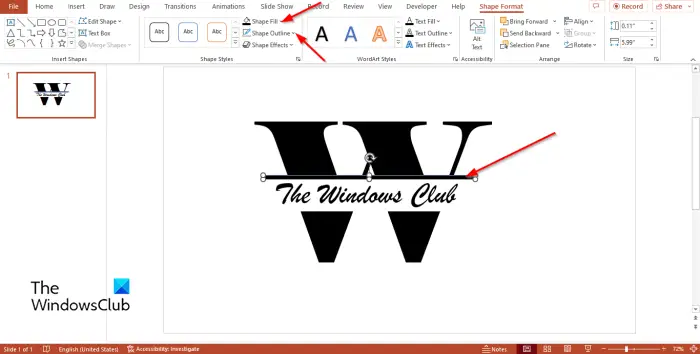
Click the Shape Format tab and click the Shape Outline button and select No Outline.
Click the Shape Fill button and change the color of the rectangle to black.
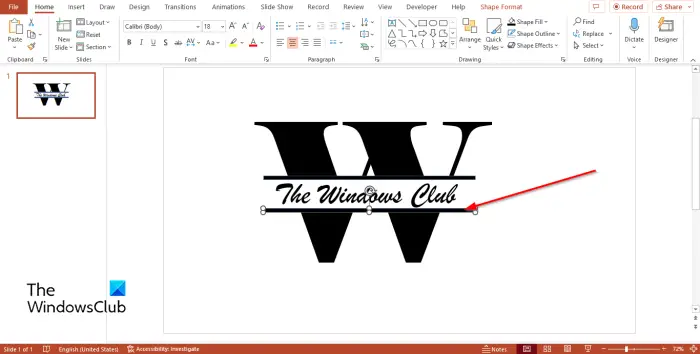
Now press Ctrl + D to copy the rectangle and place it between the split below.
Now we have a split letter design.
If you want to save the design as a picture. Insert a new blank slide.
Click Outside of the split letter.
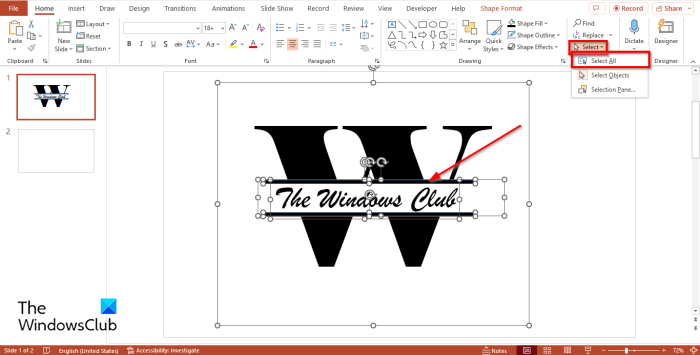
On the Home tab, click the Select button and choose the Select All option from the menu.
All textboxes of the split image will be selected.
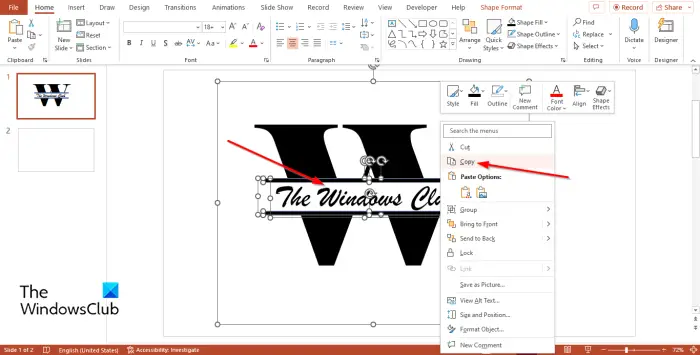
Then right-click and select Copy from the context menu.
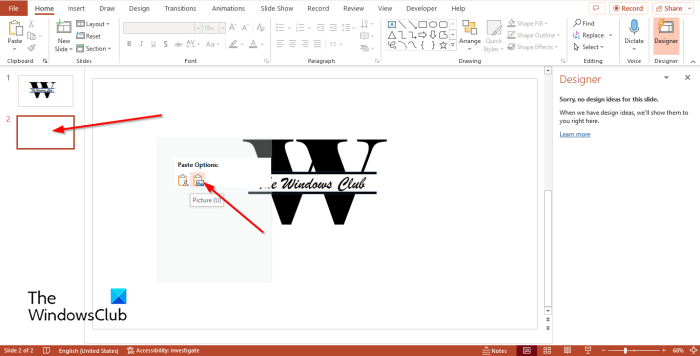
Now go to the blank slide, right-click and select the Picture paste. The split text is converted into a picture.
You can change the way you want the split letter to look by clicking any of the options on the Designer pane.
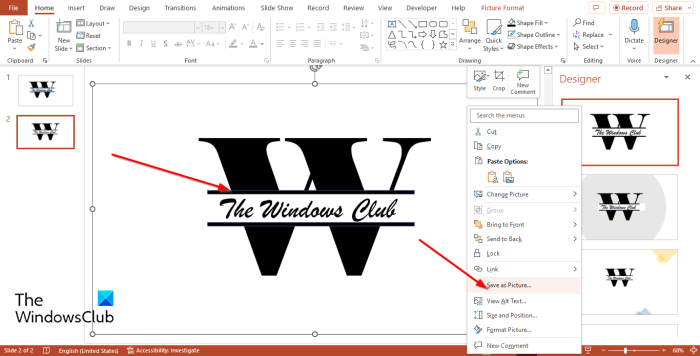
Then right-click the picture and select Save as Picture from the context menu.
A Save as picture dialog box will open. Name the picture and then click Save.
How do you split letters in PowerPoint?
To split letters in PowerPoint, you need to follow this article. First, you need to create the letter. Then, you can create the shape as per your requirements and write another text if you like.
Can you split shapes in PowerPoint?
Although it is not possible to split shapes in PowerPoint directly, you can make use of another shape to make the split happen. For that, you must use the same color for the second shape and the background.
READ: How to make a Glint or Sparkle Text animation in PowerPoint.
Leave a Reply