Photoshop is used by professionals and hobbyists all over the world. Photoshop can be used to do so many tasks, it is not a surprise why it is so popular. You can learn how to make a watercolor splash in Photoshop by reading this article. All this is quite easy to understand and follow, even if you are just a beginner.
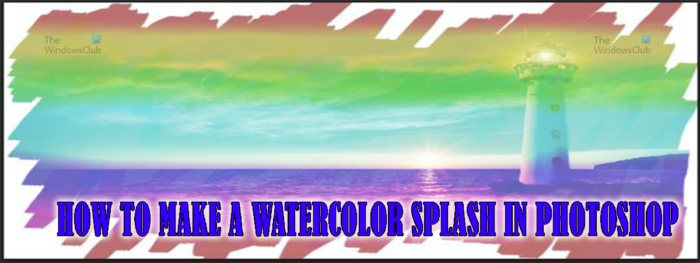
How to make a Watercolor Splash in Photoshop
Making a watercolor splash in Photoshop is quite simple and will use up a lot of the things you would have learned. You can add your own variations to the process to add your own personal touch. After learning this you will find a valuable skill you can use to create personalized gift items. These items could be printed cups, t-shirts, calendars, logos, and even email signatures. Let us go through these easy-to-follow steps on how to create a watercolor splash in Photoshop.
- Create new Photoshop document
- Place the image in Photoshop
- Add gradient fill
- Add new layer
- Brush layer using paint splash brush
- Add levels adjustment layer
- Apply dry brush effect
- Save
1] Create New Photoshop Document
The first step in making the watercolor splash is to create a new Photoshop document. You can open Photoshop then go to File then New and a New document options window will appear. ideally, you want to make the dimensions of the document large so that the watercolor splash fit many applications, big or small. Remember that Photoshop is raster graphics so it will eventually get pixelated when stretched too much. To make it get reasonably large without getting pixelated quickly, make the dimensions and the resolution large enough. On the other hand, if the watercolor splash is for screen only, then it would be best to keep the resolution small since it will not be printed.

Use these dimensions to set up your new document. This artwork will be for screen only so you can keep the resolution at 72.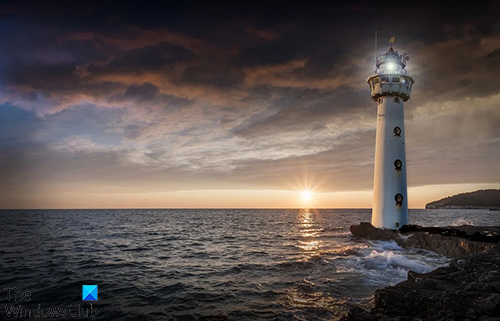
Here is the image that will be used for this project.
2] Place the image in Photoshop
It is now time to place the image that you will be using in Photoshop. Go to File then Place then choose the image and click Place. Use the image to fill the entire canvas. This means that the image should be of high quality so that it can fill the canvas without getting pixelated. Choose an image that is of the same orientation as the canvas so that when it is stretched the image won’t look distorted.
3] Add Gradient fill
A Gradient fill will be used to add basic color to the image. There are two ways to add the Gradient fill. You can go to the bottom of the Layers panel and choose the icon that says Create new fill or adjustment layer. It is the fourth icon after the chain (Link layers) icon on the left. Hover over them and see the names.
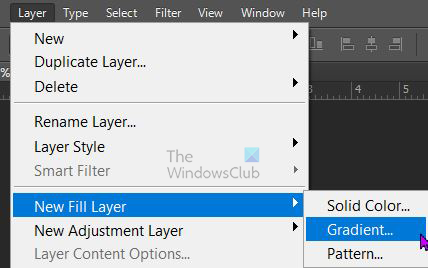
You can also go to the top menu and choose Layer then New fill layer then Gradient.
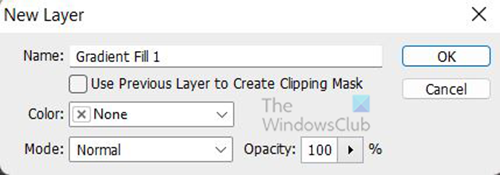
A New Layer window will appear where you can name the new fill layer and choose the Color mode.
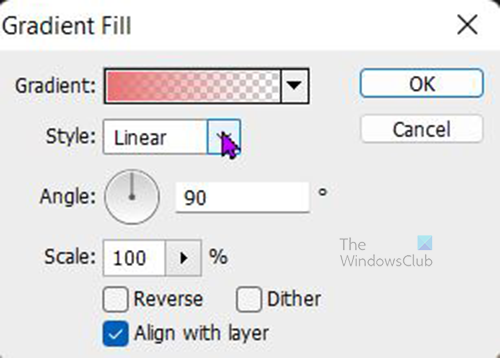
The Gradient fill option window will appear and you get to choose the gradient, the Style, the Angle and other options. When you are finished. Press Ok to confirm your choice. Depending on the gradient you choose, it will hide the image.

If you do not want the gradient to hide the image, you can choose the color mode to be Multiply or Linear dodge in the Previous step which is when you had the New Fill layer option. The color mode chosen is Linear dodge. If the gradient is too bright, you can turn down the Opacity of the Gradient fill to a comfortable level.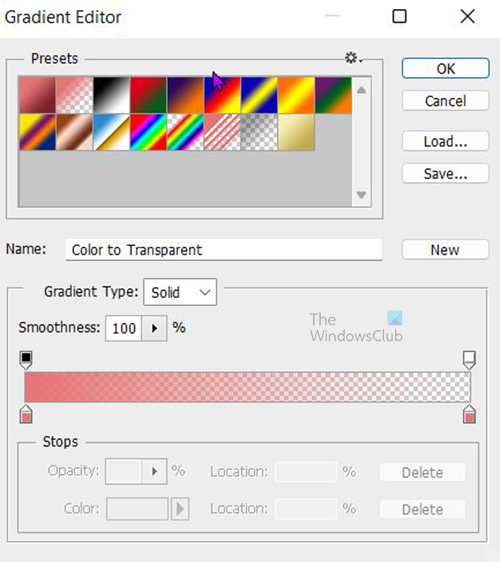
On the Gradient fill option window press the down arrow beside the gradient color to see the available default gradients. The Gradient Editor will appear and you can choose the Preset ones or make your own gradient. For this one, the Spectrum gradient is selected. If you want to see the names, just hover over the gradients and you see the names. When you are done choosing the gradient, click Ok to confirm your choice.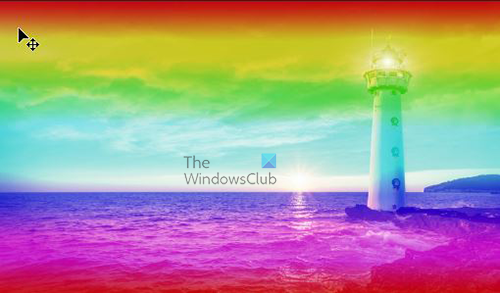
The gradient fill opacity is turned down to 75%.
4] Add a new layer
Create a new layer by going to the top menu bar and clicking Layer then New then Layer. A new layer will appear in the layers panel above the other layers. Color the layer white by going to the top menu bar then click Edit then Fill.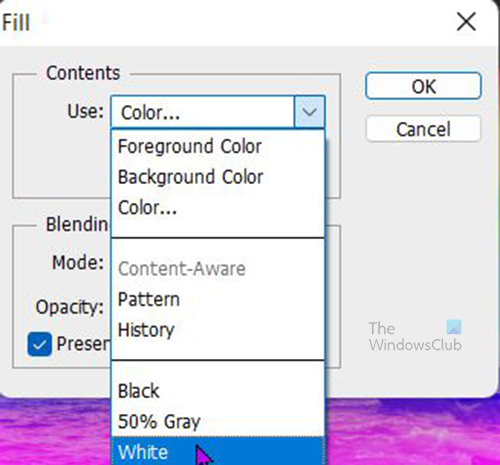
A Fill window will appear. Click the drop-down arrow in the Use box and choose White. You can choose another color or choose a pattern if you like. To make the new layer change color you have to uncheck Preserve transparency.
Add Layer mask to the new layer that was created. Click on it and go to the bottom of the layer mask and choose the Add layer mask icon beside the Fx icon.
5] Brush layer using paint splash brush
To use the splash brush go to the left tools panel and select the Brush tool. Change the foreground color on the left tool panel to black and the background color to white. You then right-click on the canvas and look for the Paint splash brush and click it. If it is not there you can download it from a trusted website. You can also use another brush type, experiment with ones that are there until you find one that gives the effect you need.
Paint the canvas and you will see the image starting to appear. you can change sizes as you paint to give your unique effect.
6] Add Levels adjustment layer
The contrast of the image can be increased using the Levels adjustment layer. To add a Levels adjustment layer go to the top menu bar and select Layers then New Adjustment Layers then Levels.
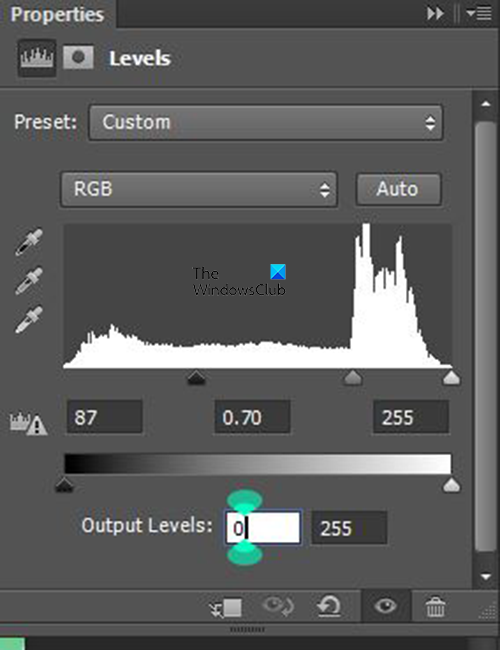
The Levels adjustment window will appear. use the settings shown. However, adjust manually and watch how it affects your images and adjust to your liking.
7] Apply Dry Brush effect
The final step is to apply the Dry brush effect to the artwork. Before applying the effect you need to combine all the layers into a single layer and give it a name. you can call this combined layer Dry brush so that you know what it is for.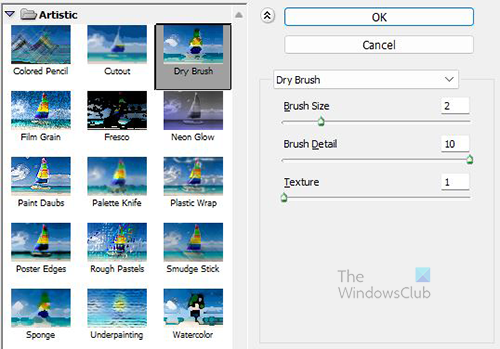
Select the layer called Dry brush and go to the top menu bar and click Filter then Filter gallery and then look for Dry brush. Reduce the opacity of the Dry brush layer, the opacity on the one in the article is 50%. Reduce the opacity to a level that makes the picture look satisfactory to you.
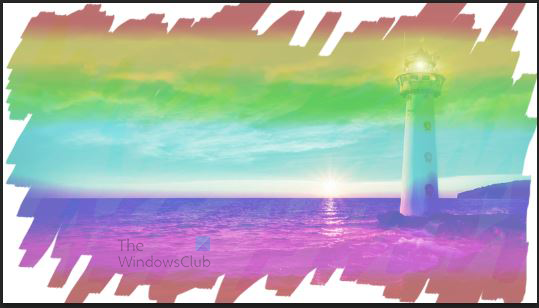
Completed image
8] Save
To save the image go to File then Save as and choose a File name and Format. Be sure to save the image as a Photoshop PSD so that adjustments can be made later. The file can then be saved in another file format. For use online, the file format to use would be JPEG since it is smaller and easier to transfer online. If you want a copy to use but do not want a saved background, you can save a copy in the PNG file format.
Read: How to make a Color Photo look like a Sketch in Photoshop CS6
How do you make a paint splash in Photoshop?
It is quite easy to make a paint splash in Photoshop and this article shows the steps and gives the details. Here are the steps to make a watercolor splash using your favorite image.
- Create a new Photoshop document
- Place the image in Photoshop
- Add gradient fill
- Add new layer
- Brush layer using paint splash brush
- Add a levels adjustment layer
- Apply dry brush effect
- Save
How do I create a splash effect in Photoshop?
The easiest way to create s splash effect in photoshop is using a brush. Choose the Brush tool from the left tools panel, right-click on the canvas and look for a splash brush. If one is not available in Photoshop you can download it from a trusted source online and load it into Photoshop brushes. You can also add the watercolor splash to images using the steps below.
- Pick Your Photo.
- Launch Photoshop.
- Set Your Foreground and Background to Their Default Colors.
- Add a Gradient Map Adjustment Layer.
- Grab the Brush Tool and Unlock Your Background.
- Reset your Foreground and Background Colors.
- Adjust Your Brush Settings.
- Paint with the splash brush.
I hope you find this tutorial helpful.
Leave a Reply