As a user, when creating a lengthy document in Microsoft Word, an index is a convenient tool for your potential readers. Normally, we get to see indexes in the backs of books. They allow readers to look up a word or phrase to find the page referencing that topic.
In the same way, in a table of contents in Microsoft Word, users can insert an index and then update it automatically. This takes much of the manual work out of creating these great reference sources. Here, users will be shown how to create the index and also update it in Word.

How to create an Index in Word
Listed below are steps to create an index in Microsoft Word.
- Mark Your Entries.
- Edit or Remove Index Entries.
- Update the Index.
- Create an Index Automatically in Microsoft Word
Now we will have a look at each step as we proceed below-
1] Mark Your Index Entries
Word can build your index automatically, but it’s smart enough to know which items you want in it. So for users to create an index, they will need to mark the entries. This is the bulk of the work you will do for the index. But once you start marking entries, you will be able to zip through them quickly.
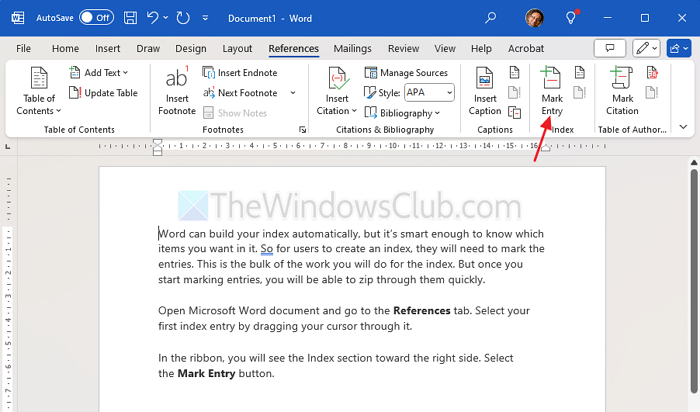
Open Microsoft Word document and go to the References tab. Select your first index entry by dragging your cursor through it.
In the ribbon, you will see the Index section toward the right side. Select the Mark Entry button.
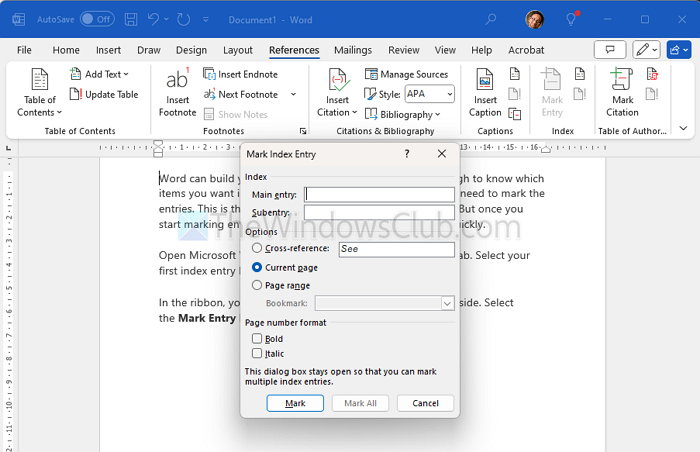
A pop-up window will appear for you to describe your entry. This window can remain open while you select your remaining entries. Enter the Main entry at the top and optionally a Subentry.
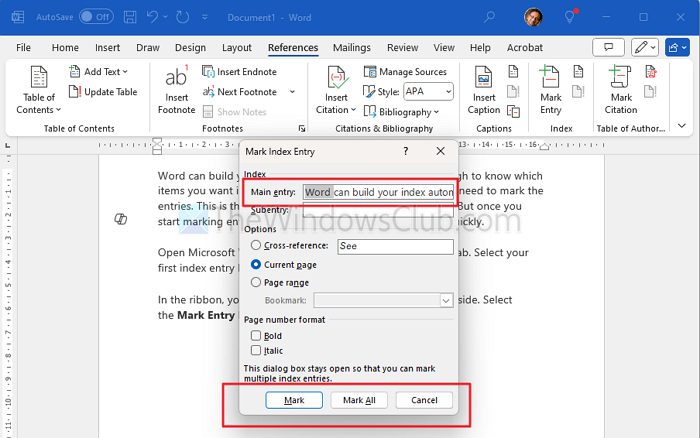
Then choose from Options for a cross-reference, the current page, or a page range.
Or you can format the page number that displays in bold and/or italic.
Click on Mark for a single entry or Mark All to mark that same text everywhere in your document.
When you are done with the Mark Index Entry window, click on Close.
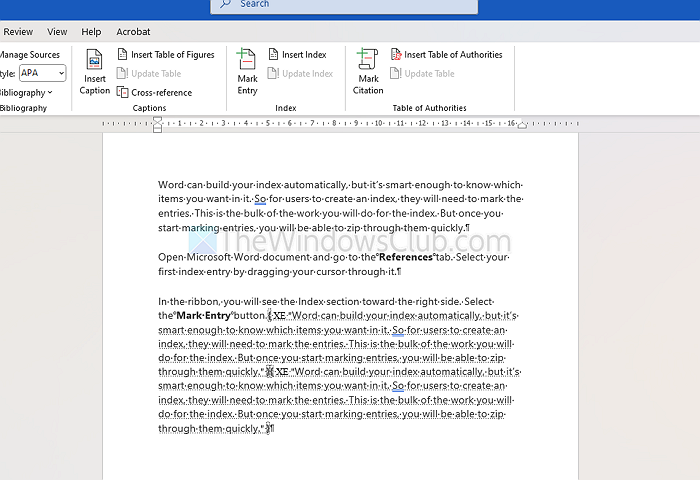
On the document, index entries are labeled with XE. If you add a Subentry or cross-reference, you will notice that within the XE tag as well.
If you do not see your XE tags but would like to, go to the Home tab and click the Show/Hide Paragraph button.
2] Edit or Remove Index Entries
If users need to make a change to an entry, for instance, remove a cross-reference, they will do so within that XE field. Make the changes inside the quotation marks. Another option is to remove the marked entry and then mark it again.
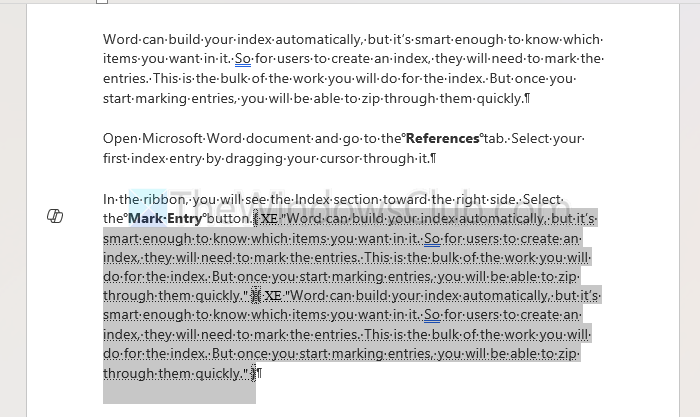
Also, to remove an index entry, select all text within and including the braces { } and hit Delete. You can then follow the steps above to mark the entry again with the changes you want.
3] Create the Index in Word
When about to insert your index, move the cursor to the spot you want it in the document. Then, select the References tab and click Insert Index.
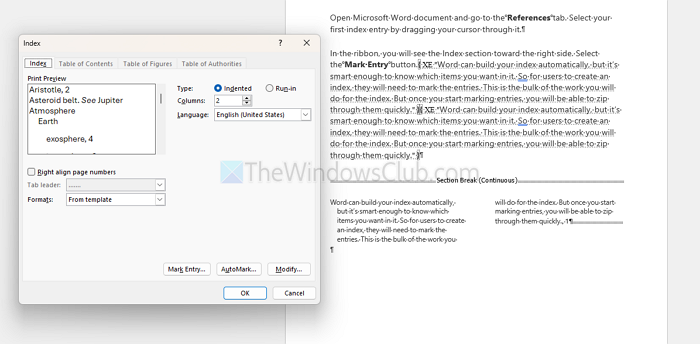
Before the index is created, you have a few settings you can adjust if you like. These are Print Preview, Tab Leader, Formats Type and Columns.
After you make your index adjustments, click OK. Your index will pop into your document with your entries. You’ll see everything nice and neat and in alphabetical order.
4] Update the Index
Users can continue to mark additional entries after creating the index and simply updating it. And if you edit or remove entries, you will need to update the index as well.
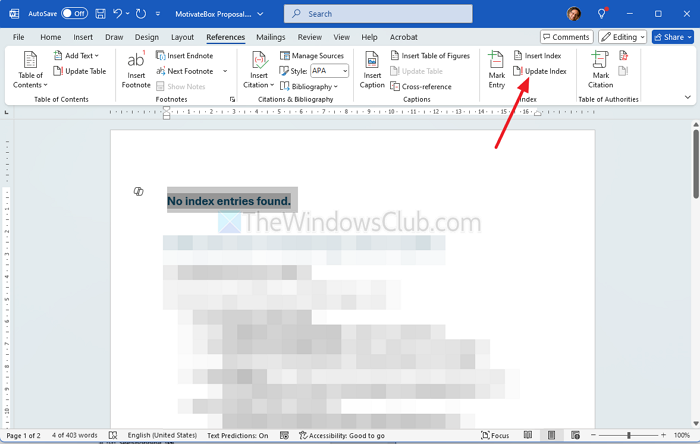
Click inside the index area in your document, the Update Index button in the ribbon on the References tab will come alive. If the button is still grayed out as shown in the image above, make sure your cursor is within the index.
If you want to remove the index completely, select all of its text and tap the Delete key. You will then likely want to delete the index entries (as seen above) if you don’t plan to use an index at all.
5] Create an Index Automatically in Word
It may take some time to mark all the entries you want in your Word index. But an index can be a valuable tool for your readers. So consider adding one if your audience can benefit from it for your next Word document, book, or other lengthy material.
If this was helpful, you might also like – How to use linked text in Microsoft Word.
Leave a Reply