A script is just a collection of commands saved into a text file (using the special .ps1 extension) that PowerShell understands and executes in sequence to perform different actions. In this post, we will outline the process involved in how to create and run a PowerShell script file on Windows 11/10.
PowerShell is a command-line tool designed by Microsoft to run commands and scripts to change settings and automate tasks. In a way, it’s similar to Command Prompt. However, PowerShell is a more capable command-line interface (CLI) that offers an extensive set of tools and more flexibility and control. Also, unlike Command Prompt, PowerShell is available on Windows, macOS, and Linux.
To see how to create and run the PowerShell script file on Windows 11/10, follow the instructions for each of the tasks as shown in the respective sections.
How to create a PowerShell script file

On Windows 11/10, you can create PowerShell script files using virtually any text editor or the ISE (Integrated Scripting Environment) console. However, the preferred option to build scripts moving forward is to use the Visual Studio Code editor with the PowerShell extension.
Visual Studio Code — also known as VS Code — is a free and extensible cross-platform code editor that provides an environment to edit virtually any kind of programming language. And when adding the PowerShell extension, you get a fully interactive scripting editing experience, even with IntelliSense (code-completion) support.
Here’s how to create PowerShell script file on Windows 11/10 using VS Code:
- Head to Visual Studio Download page.
- Click the Windows button to download the installer.
- Double-click the downloaded file to start the installation process of VS Code.
- Confirm the agreement terms.
- Click the Next button.
- Click the Next button again.
- Click the Next button one more time.
- Confirm additional tasks as necessary.
- Click the Next button.
- Click the Install button.
- Click the Finish button.
Once you complete the steps, you can proceed to install the PowerShell extension. Here’s how:
- Open VS Code.
- Click the Extensions tab from the left pane or press the CTRL + SHIFT + X key combo.
- Search for PowerShell and select the top result.
- Click the Install button.
After you complete the installation steps, you can start writing PowerShell scripts using Visual Studio Code. Here’s how:
- Open VS Code.
- Click the File menu and select the New File option.
- Click the File menu and select the Save as an option.
- In the File name field specify a name for the file with the .ps1 extension — for example, TWC_script.ps1.
- Click the Save button.
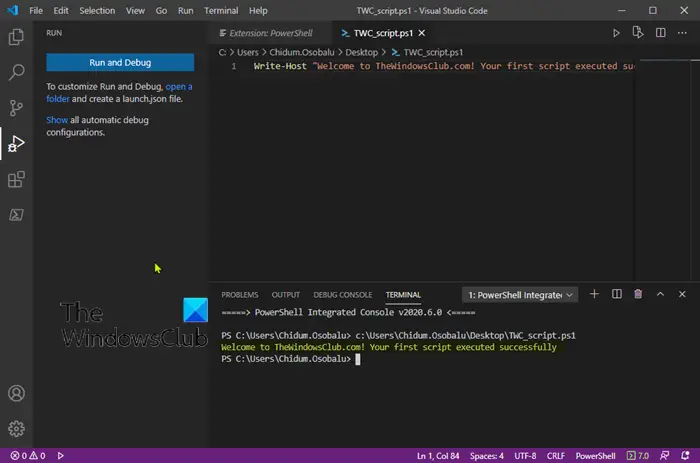
Write a new, or paste the script you want to run — for example:
Write-Host "Welcome to TheWindowsClub.com! Your first script executed successfully"
The above script will output the phrase below on the screen.
Welcome to TheWindowsClub.com! Your first script executed successfully
You can click the Run button from the top-right side (or press the F5 key) to run the script.
- Click the File menu.
- Click the Save option.
Once you complete the steps using Visual Studio Code, the script will be ready to run, but it will fail by default. This is because the default PowerShell settings are always set to block the execution of any script. (The only exception is if you run the contents of the script within Visual Studio Code or PowerShell ISE.)
How to run PowerShell script file on Windows 11/10
To run a script file with PowerShell, you have to change the execution policy on Windows 11/10.
On Windows 11/10, PowerShell includes four execution policies, including:
- Restricted — Stops any script from running.
- RemoteSigned — Allows scripts created on the device, but scripts created on another computer won’t run unless they include a trusted publisher’s signature.
- AllSigned — All the scripts will run, but only if a trusted publisher has signed them.
- Unrestricted — Runs any script without any restrictions.
Here’s how to run PowerShell script file on Windows 11/10:
- Press Windows key + X to open Power User Menu.
- Press A on the keyboard to launch PowerShell in admin/elevated mode.
- In the PowerShell console, type in the command below and hit Enter.
Set-ExecutionPolicy RemoteSigned
- Type A and hit Enter (if applicable).
Next, type the command below and hit Enter to run the script. Make sure to change “PATH\TO\SCRIPT” placeholder to the location of your script.
& "C:\PATH\TO\SCRIPT\TWC_script.ps1"
After you complete the steps, the script will run, and if it was written correctly, you should see its output without issues.
That’s it on how to create and run the PowerShell script file on Windows 11/10!
Related: How to run local PowerShell Scripts without Signing.
Leave a Reply