Want to create a birthday calendar in Outlook? This guide will show you how exactly you can add a birthday calendar in Microsoft Outlook on your Windows PC.
How to create a Birthday Calendar in Outlook?
To create a birthday calendar in Microsoft Outlook, you can follow the below steps:
- Launch Outlook.
- Go to People.
- Add birthdays to your contacts.
- Go to Calendar.
- Click on the Add calendar option.
- Enable the Turn on the birthday calendar option.
- Select the Birthdays calendar from My calendars.
- Customize the birthday calendar.
- Print or share the birthday calendar.
First, launch the Outlook app on your PC or open Outlook’s web app in a browser. Here, we will use Outlook online to create a birthday calendar. You can use similar steps in Outlook’s desktop app to do the same.
Now, we must have the birthdates of people to create a birthday calendar. So, you can manually add birthdays of contacts that you have on your Outlook or import contacts with birthdate information. Let us check out how:
Go to the People tab and select the All contacts option.
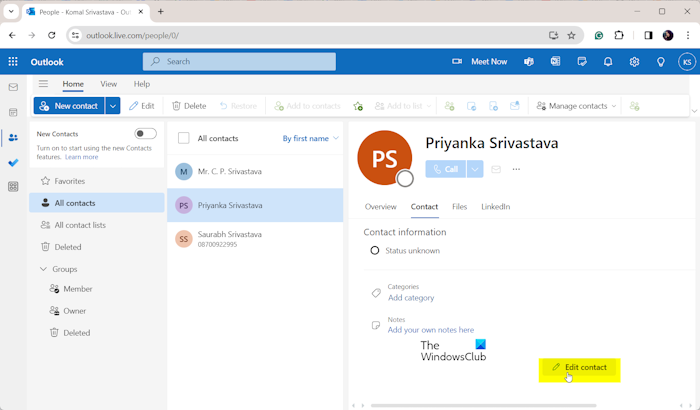
Next, select the contact that doesn’t contain birthday information and press the Edit contact button.
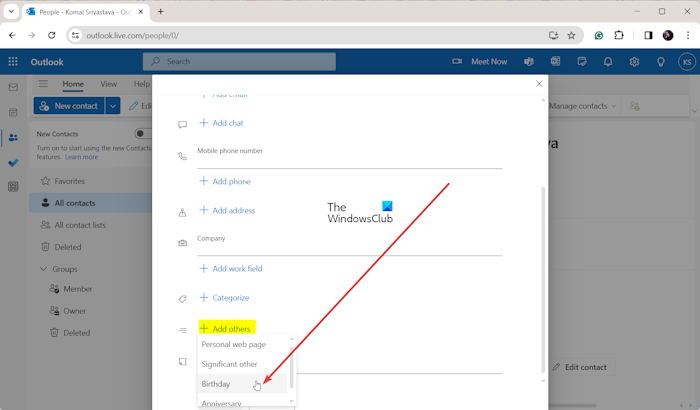
In the prompted dialog, scroll down and click on the Add others option. Then, choose the Birthday option.
After that, enter the birthdate of your contact and click on the Save button.
Similarly, add the birthdates of the remaining contacts.
If you don’t want to do all the work manually, simply import contacts from CSV files by clicking on the Manage contacts > Import contacts option.
Once you have added birthdates to your contacts, move to the Calendar tab.
Next, press the Add Calendar button.
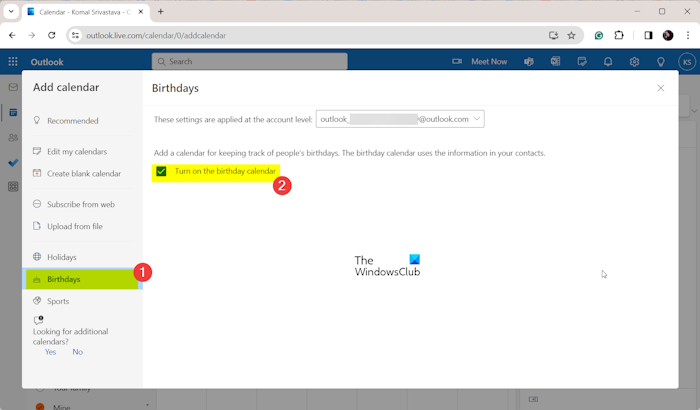
Now, navigate to the Birthdays option in the left-side pane in the appeared window.
After that, tick the checkbox named Turn on the birthday calendar and close the dialog window.
See: How to merge two Outlook Calendars?
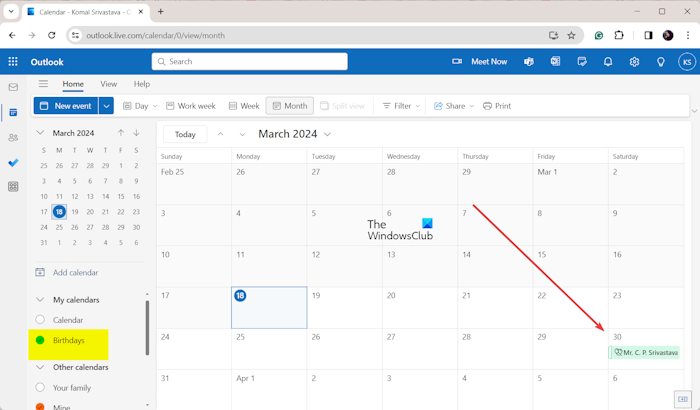
Next, expand the My calendars category and you will see a Birthdays calendar option. Simply select this option and you will be able to see all birthdays highlighted on the calendar.
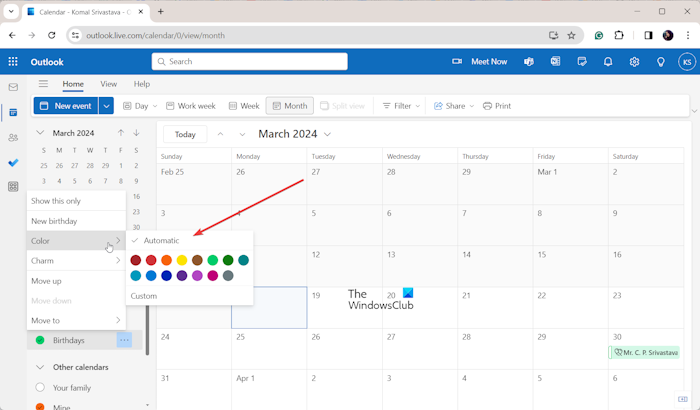
Furthermore, you can also customize the birthday calendar. To do that, simply right-click on the Birthday calendar and go to the Color option. Choose whichever color you want to highlight birthdays with. Apart from that, you can also change the icon displayed with the birthdates. Right-click on the Birthday calendar, move to the Charm option, and choose the suitable icon.
Read: How to stop Outlook Calendar email notifications?
You can also move the Birthday calendar to other customized groups as per your preference.
The good thing is that you can directly add new birthdays from the Birthday calendar. Right-click on the Birthday calendar and select the New birthday option. You can now add the contact details and save the contact.
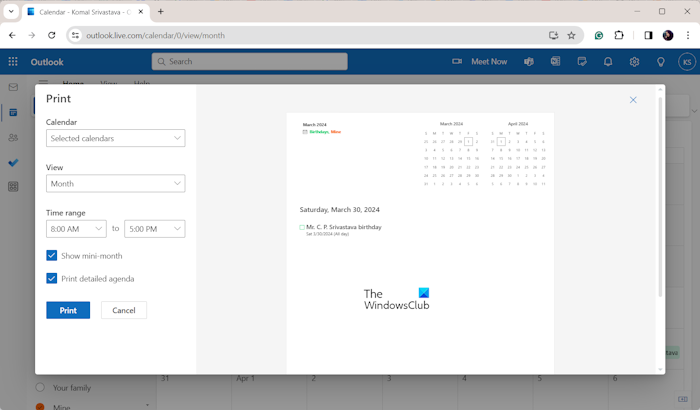
Lastly, you can print or share the birthday calendar. To print the calendar, select the Birthday calendar from the left-side pane and press the Print button from the ribbon.
In the Print window, select the Print detailed agenda checkbox to print the list of birthdays in the selected month. If you want to include full monthly calendar, you can tick the Show mini-month checkbox too. Besides that, you can customize time range and view too.
Once done, click on the Print button, set up print options like printer, layout, color, etc., and click on the Print button.
You can also share the birthday calendar with other contacts and email addresses.
This is how you can easily add birthdays to Outlook and create a birthday calendar.
Read: How to turn off Outlook Calendar reminders and popup notifications?
How do I create a custom calendar in Outlook?
Its pretty easy to create a customized calendar in Outlook. Simply navigate to the Calendar tab, click on the Add Calendar button, and choose the Create blank calendar option. After that, name the calendar, select its color and icon, choose the category to which you want to add this new calendar, and press the Save button. You can now add events, appointments, etc. to this calendar and customize it as per your requirements.
How do I add birthdays to Outlook calendar from Excel?
To add birthdays to the calendar in Outlook from Excel, follow the below steps:
- First, open the Excel app and create a worksheet with contact fields including First Name, Last Name, Birthday, Email, Phone, etc.
- Once you’ve done this, save the created contact file in CSV format.
- Click on the File > Save as option and select CSV as the output file type.
- Now, open Outlook and go to the People tab.
- Next, select the Manage contacts > Import contacts option.
- After that, browse and import the created CSV file with birthday and other contact information.
- Then, move to the Calendar tab and select the Birthday calendar under My calendars to view birthdays of your contacts.
Read next: Microsoft Calendar Tips and Tricks to manage schedules.