Animations are a feature in PowerPoint that can bring your objects to life. PowerPoint has various Animation effects such as Morph, Appear, Fade, Fly in, Float in, etc. In PowerPoint, people can create illusions with the Animation effects offered within their presentations. In this post we will show you how to create a Door Opening animation in PowerPoint.
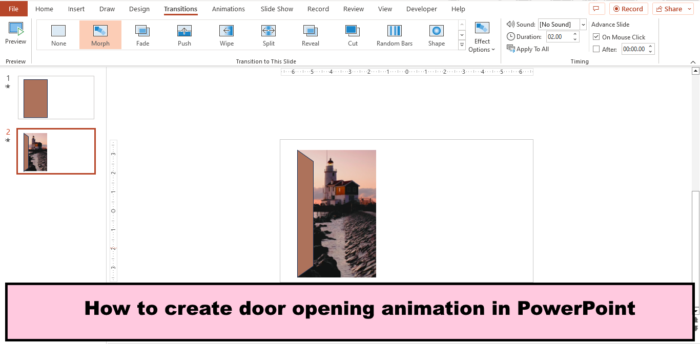
How to create Door Opening animation in PowerPoint
Follow the steps below to create a door opening animation in PowerPoint:
- Launch PowerPoint.
- Change the slide to blank.
- On the Insert tab, click the Shapes button and choose the Trapezoid shape.
- Draw the Trapezoid on the slide.
- On the Shape Format tab, click the Rotate button in the Arrange group, then select Rotate Right 90 degrees.
- Click the yellow point on the shape and drag it up to form the door.
- Press Ctrl D to create a duplicate of the door.
- Select the video, Hold the Shift key, and drag it over the video to select the shape behind it.
- Place a Merge Shapes button on your Quick Access Toolbar.
- Click the Merge Shape button and select Intersect.
- Select the Original door, click the Shape Fill button on the Home tab, and choose a color.
- Right-click the video and select Send to Back from the context menu. Then move the video behind the original door.
- Duplicate the slide.
- On the Duplicate slide, select the door shape; you will see a yellow pointer, drag the door, and push it to the side to create an illusion of an open door.
- Click the Transitions tab and select Morph.
- Select the Preview button to display the animation.
- Select the video and click the Playback tab.
- In the Video Options group, click the Start list box, select Automatically, then check the check box for Loop until Stopped.
- Now select the first slide and add the Morph transition to it.
- Then click the Slide Show button.
Launch PowerPoint.
Change the slide layout to blank.
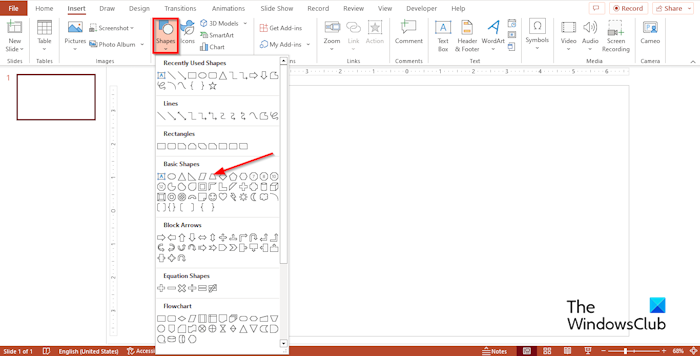
On the Insert tab, click the Shapes button, and choose the Trapezoid shape from the Basic Shape section.
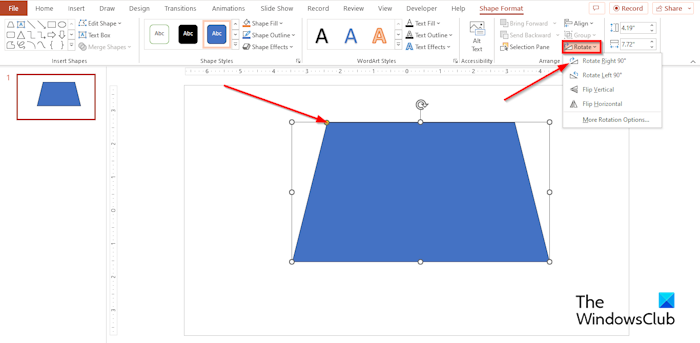
Draw the Trapezoid on the slide.
Now we are going to rotate the Trapezoid to 90 degrees.
On the Shape Format tab, click the Rotate button in the Arrange group, then select Rotate Right 90 degrees.
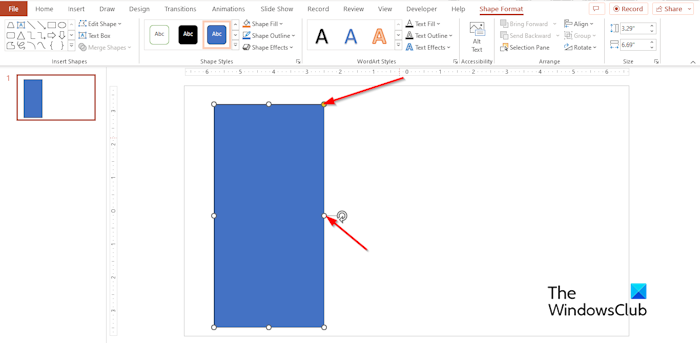
Now place the shape to the left of the slide or any location on the slide you want the animated door to be located.
Click the yellow point on the shape and drag it up to form the door.
Press Ctrl D to create a duplicate of the door.
Now we are going to put a video behind the door.
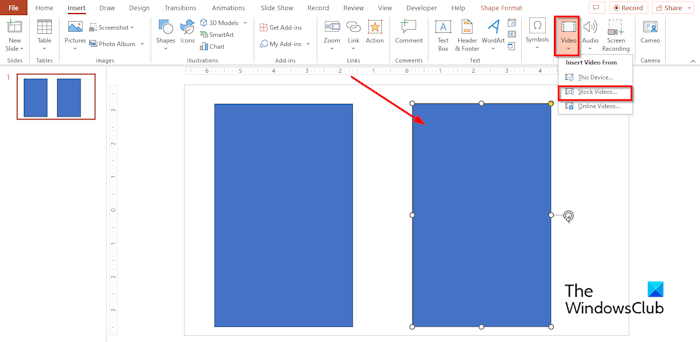
On the Insert tab, click the Video button, then select Stock Videos from the menu.
A Stock Videos dialog box will open.

In the search engine, type the video you want, then click Insert.
The video is inserted into the slide.
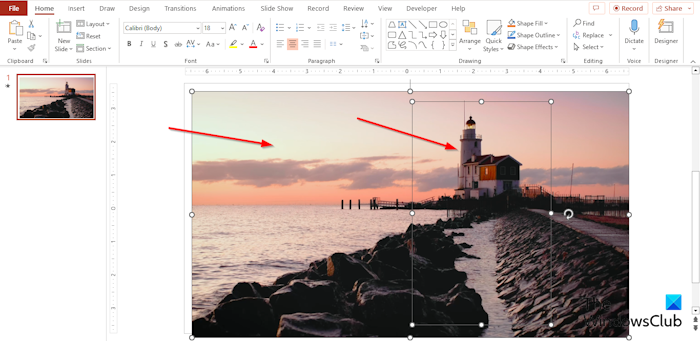
Align the area of the video that you want to show onto the duplicate door.
Select the video, hold the Shift key, then drag the cursor over the video to select the shape behind it.
We want to merge both the video and the shape, but we cannot do so because the video is not a shape. The Shape Format tab will not be displayed, which would show the Merge Shape tool. The Merge Shape tool merged the selected shapes into one.
To gain access to the Merge Shape tool, we must place the command on the Quick Access Toolbar or on the Ribbon.
Right-click the Ribbon, then select Customize the Ribbon from the menu or click the File tab and select Options on the backstage view.
The PowerPoint Options dialog box will open.
We are going to add the command on the Quick Access Toolbar.
On the left of the PowerPoint Options dialog box, click Quick Access Toolbar.
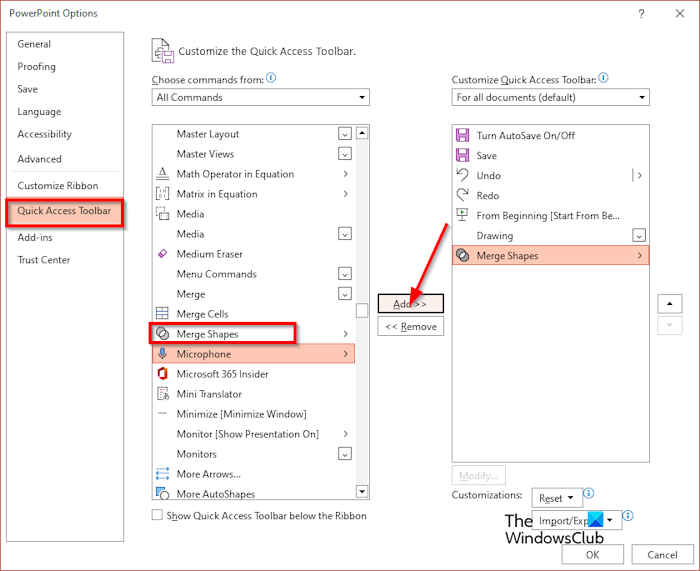
In the Choose Command From list box, select All Commands.
Scroll down to Merge Shapes and select it, click Add, then click OK.
The Merge Shapes command will appear on the Quick Access Toolbar.
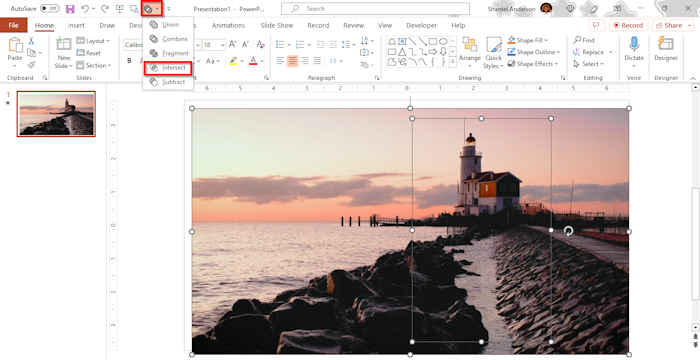
Click the Merge Shape button and select Intersect.
The Duplicate door is merged with the video.
Now we are going to change the original door color.
Select the Original door, click the Shape Fill button on the Home tab, and choose a color.
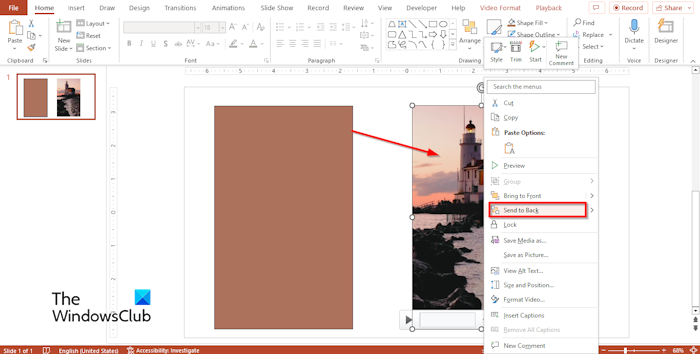
Right-click the video and select Send to Back from the context menu.
Now move the video behind the original door.
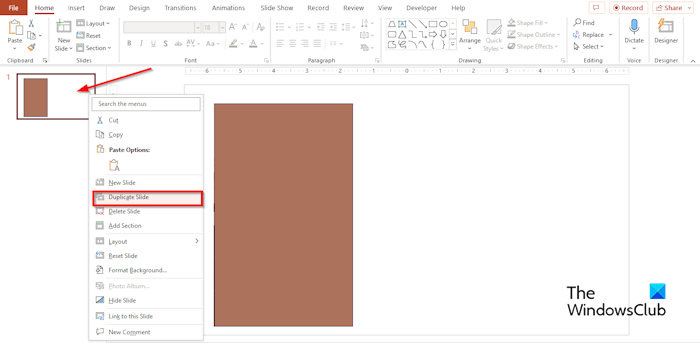
Right-click the slide and select Duplicate slide from the context menu.
On the Duplicate slide, select the door shape; you will see a yellow pointer. Drag the door and push it to the side to create an illusion of an open door.
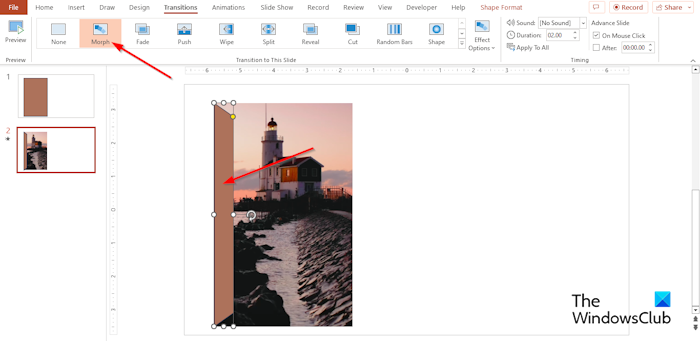
Click the Transitions tab and select Morph.
Select the Preview button to display the animation.
If you notice that the video is not playing, it means we did not set the video to automatically nor loop the video.
Follow the step to loop the video below.
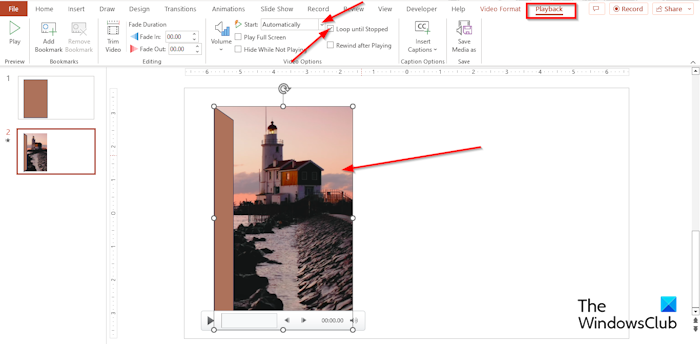
Select the video and click the Playback tab.
In the Video Options group, click the Start list box, select Automatically, then check the check box for ‘Loop until Stopped.’
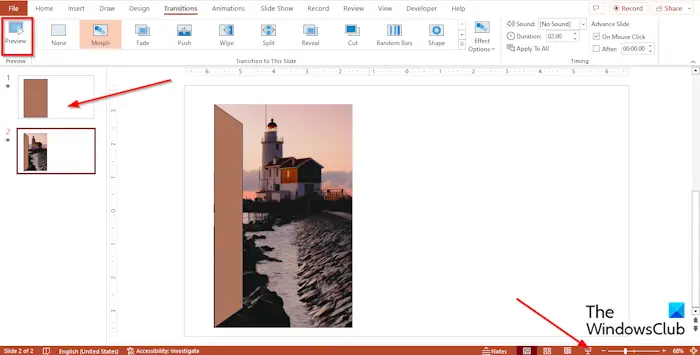
Now select the first slide and add the Morph transition to it.
Then click the Slide Show button.
On the Slide Show Presenter View, click the door to run the animation.
Press the Esc button to close the Slide Show Presenter View.
What is the entrance animation effect in PowerPoint?
In PowerPoint, the Entrance animation allows objects to appear on your slide. An example of an Entrance animation is Appear. The Exit animation makes objects disappear on your slide, such as Disappear.
READ: How to make Typewriter animation in PowerPoint
How do you apply wipe entrance animation?
Follow the steps below on how to apply Wipe animation to an object in PowerPoint:
- Select the object.
- On the Animations tab, select Wipe from the Animation gallery.
- Click the Preview button to run the animation.
- You can also change the direction of the Wipe animation. Select the animated object.
- On the Animations tab, click the Effect Options button and choose any of the following options, namely, From Bottom, From Right, From Top, and From Left.
READ: How to make a Photo Slideshow in PowerPoint
Follow the steps below on how to create door opening animation in PowerPoint.
Leave a Reply