Microsoft Excel is capable of many things, and that includes the ability to create histograms with relative ease. Not everyone knows how to create a Histogram, but there might come a time when the skill is needed. The big question is, then, what are the procedures of creating a histogram? Luckily, we’re going to discuss this today. Now, we can say that it is not difficult to accomplish. But first, we must explain what a histogram is for those who have never heard of it before.
How to create Histogram in Excel
OK, so a histogram is a special type of graph primarily used in mathematics and statistics. Note that the histogram tends to represent the frequency of occurrence of certain phenomena in a specific range of values.
While Microsoft Excel is the main tool used to create histograms, users can take advantage of the R programming language for more advanced methods of creating graphs should they so wish.
1] Add your data to Excel
Before you attempt to create a histogram, you must first add the required data to Excel. We will assume the data is saved to your hard drive, so just fire up Excel then navigate to Open, seek out the document and open it right away.
Once the document is opened, check if the data is accurate, edit where needed, then jump to the next step.
2] Click on the Insert tab to create a histogram

You must select the Insert tab at the top of your Excel document. This section is quite popular among Excel users since it contains so many features that are used daily.
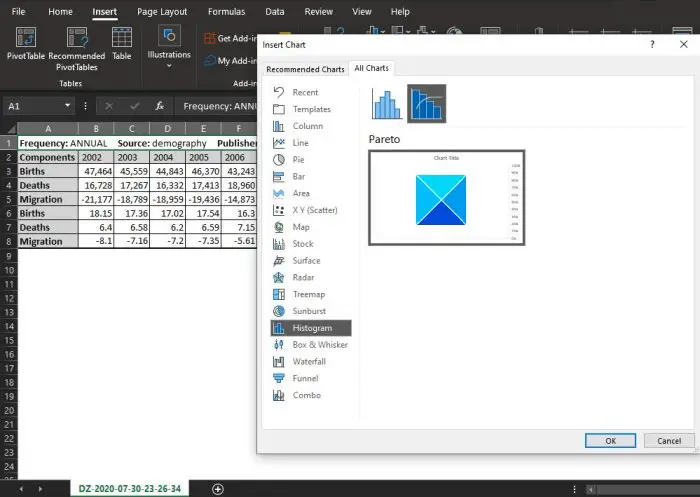
To create the histogram for your file after selecting Insert, please click go the Charts section, and from there, click on See All Charts.

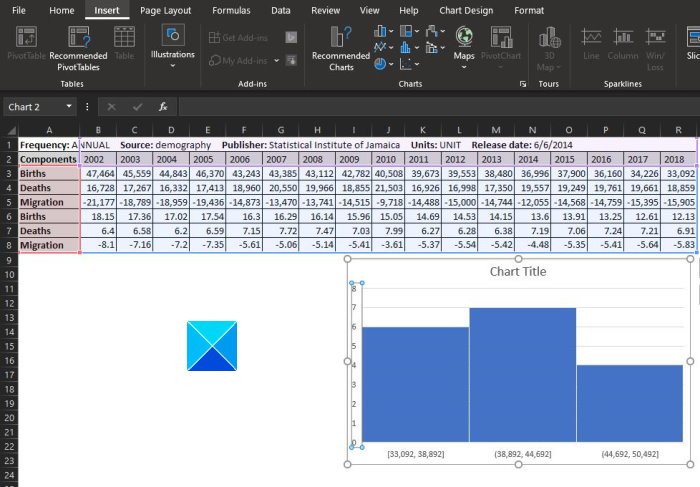
A window should appear after that is done. From there, you will want to scroll down from the left until you come across Histogram. Click on it, then select the type of histogram chart needed. Finally, hit the OK button and watch as the chart appears on your document.
3] Format the histogram chart

Depending on your needs, it is possible to leave the histogram chart as is, but in some cases, changes are required. This is where formatting comes into play.
You will be required to select the Format Axis option, from which Excel will attempt to determine the groupings to use for your histogram chart. However, you may need to make changes at this section or yourself, so keep that in mind.

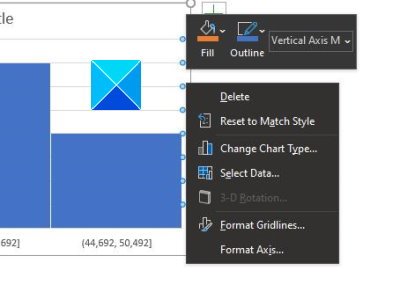
OK, so when it comes to formatting a chart, you must right-click on it and select Format Axis from the menu.
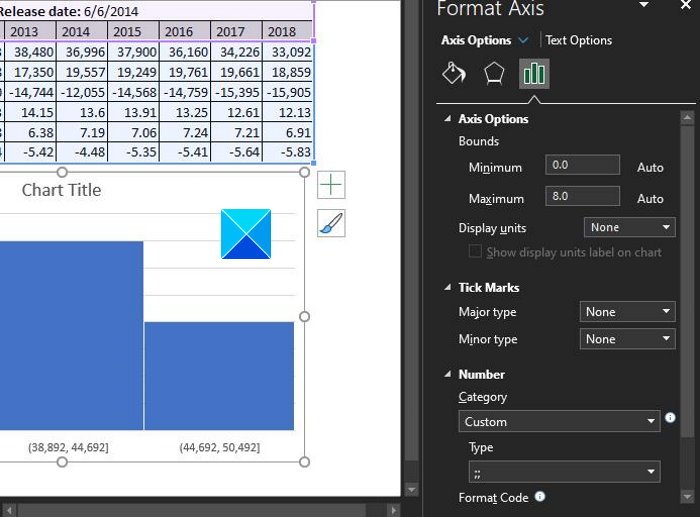
A new set of options should appear on the right, allowing the user to change the histogram.
Read: How to insert an Excel Spreadsheet in Word Document.
The changes you make will happen in real time, so when you’re comfortable with your work, just hit the X button on the Format Axis section. If you’re not using OneDrive, make sure to save your work.