InDesign allows designers to make their designs interactive and usable online. You can create digital interactive, books, magazines, cards and so much more for use online. It is therefore good to learn how to create interactive video slides in InDesign for use on digital devices. Interactive video slides can be used in digital magazines, books, catalogs, pages on your website, and much more.
How to create Interactive Video Slides in InDesign
Interactive content allows the user to have a more exciting experience with your content. With all the possibilities afforded by technology. Digital content should be interesting and not flat like printed content.
Here are the steps to create interactive video slides in InDesign.
- Open and prepare InDesign
- Make a mockup of the page (Optional)
- Add videos to InDesign
- Layout videos
- Create thumbnail images from videos
- Layout thumbnail images
- Create or insert a play button
- Add the play button to the thumbnails
- Add captions (optional)
- Convert videos to multi-state objects
- Convert caption to multi-state objects
- Make the buttons interactive
- Add animation to captions
- Make the captions change when the button is pressed
- Preview and publish online
1] Open and prepare InDesign
This first step is where you open and prepare InDesign. Click on the InDesign icon to open it then click New Document. you will see the New Document option window open, this is where you chose the options that you want for your document. depending on where you want to use your document, you can choose to use Landscape or Portrait layout. The default layout is portrait. For this article, the video slides will be placed on a portrait sheet.
2] Make a mockup of the page (Optional)
Note that your interactive video slide may be part of a page or pages with more content. This means you will have to place the buttons, thumbnails, and videos in places where they will fit in perfectly with the other content. A good rule would be to label the work area/page. You can do this on paper or digitally or both. You can make a mockup of the page showing where each part will fit. The mockup makes it easier to place the content in the correct place.
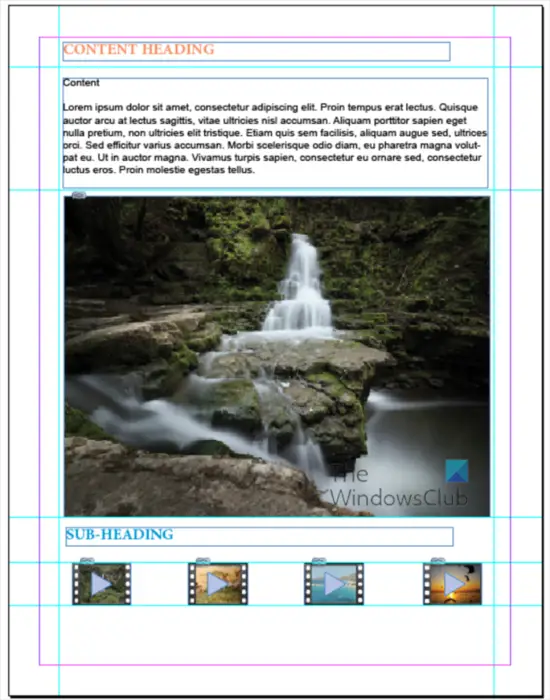
This is a mockup of the page showing the guides placed there to show where each element will fit.
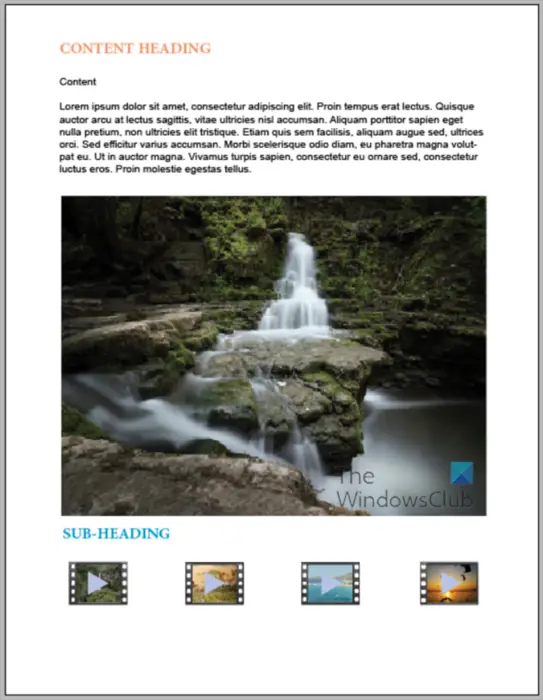
This is a mockup of the page the guides are not shown. To make the page clear showing only the content, press W, to turn back on the guides and lines press W.
3] Add videos to InDesign
In this step, you will add the videos to InDesign. Since videos are larger, it is best to add them one by one. There are a few ways that you can add videos to InDesign but in this article, they will be dragged into InDesign one by one. The steps to adding the videos are similar to adding images in InDesign.
4] Layout videos
To create the videos as a one-page interactive slide, you will make them the same size and place them one on top of another. You will place each one in the order that you want them to appear on the interactive video slide. You can use the guides to place the videos in the right place and then resize them to fit between the guides.
5] Create thumbnail images from videos
You want the thumbnails that represent each video to look like the video. You can get images that look like the video or take a screenshot of the video.
You can get the thumbnail of the video by placing it in InDesign and resizing it to what you want. You can then use the Microsoft Snipping tool to capture an image of the video. You would then save it and place it in InDesign. You can then resize it to the size that you want to use as the thumbnail. You would do this for each video. you can also take a screenshot with the Snipping tool when the video is displayed as a large icon in the folder.
6] Layout thumbnail images
With the thumbnails now created, it is time to lay them out according to the way that you want the videos to appear. Based on the mockup, that is the way that the thumbnails will be laid out on the slide. The thumbnail and button on the extreme right will control the video at the bottom of the pile (the video places first in the work area). If you want to change the layout you can do so.
7] Create or insert a play button
This step is where you will create or insert the play buttons that will represent the buttons that you will press to play each video. You can find buttons to be the play buttons or you can create the play buttons. In this article, the Polygon Tool will be used to create the play buttons.
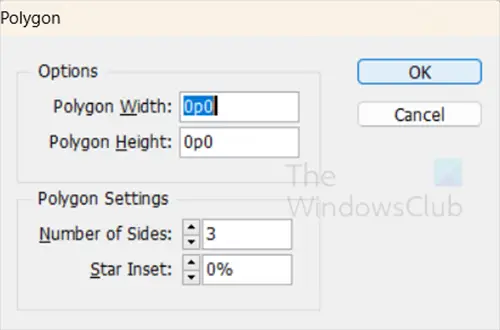
Select the Polygon Tool then click on the work area, and the Polygon tool options box will appear. in the Number of sides box write 3 then click OK. This will create a triangle, however, you need to rotate it so it can look like a play button.
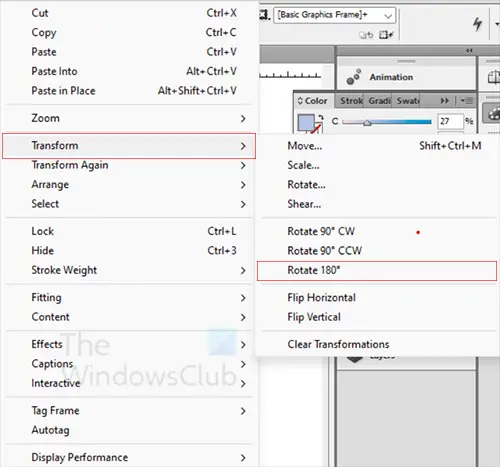
To rotate the triangle, right-click it, and from the menu that appears click Transform then choose 180.
You will then give the triangle a color (white was used). You can also turn down the opacity so that it will not overpower the color of the thumbnail.
8] Add the play button to the thumbnails

When you have edited the play button to where you are satisfied with the look it is time to place it on the thumbnails that you created. You will make copies of the button to place on each thumbnail that you will have to represent videos.
9] Add caption (optional)
You may want to add some text to your videos that will explain the videos. If you are going to add the text, make it short so that the viewer does not have to read too much information. You can place the text at the bottom section of the video.
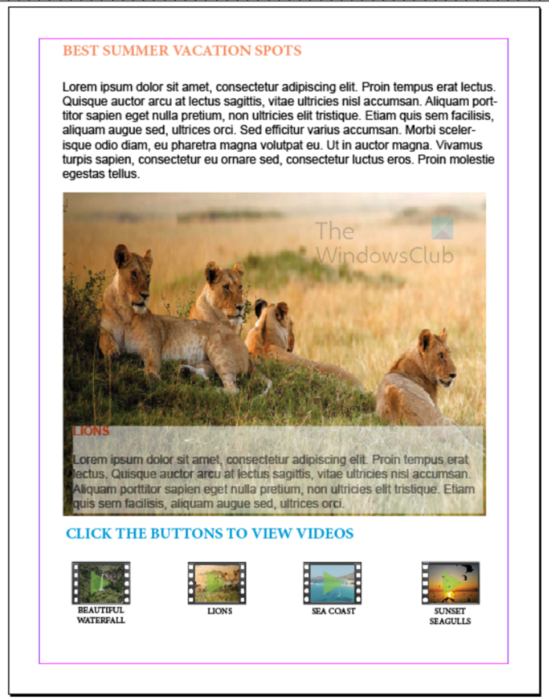
You can add a background behind the text but make it a bit transparent so that the video can still be seen through it.
10] Convert videos to multi-state objects
This is the step where you will convert the videos to multi-state objects. This will allow you to move from one to the other using the InDesign slide feature. To make the videos into multi-state objects select all of the videos.
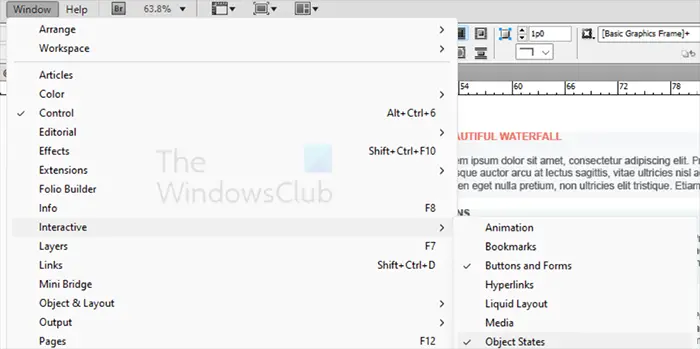
You will then go to the top menu bar and click Window then Interactive then Object states.
The Object states window will appear. Click the Convert selection to multi-state object icon at the bottom left of the window.
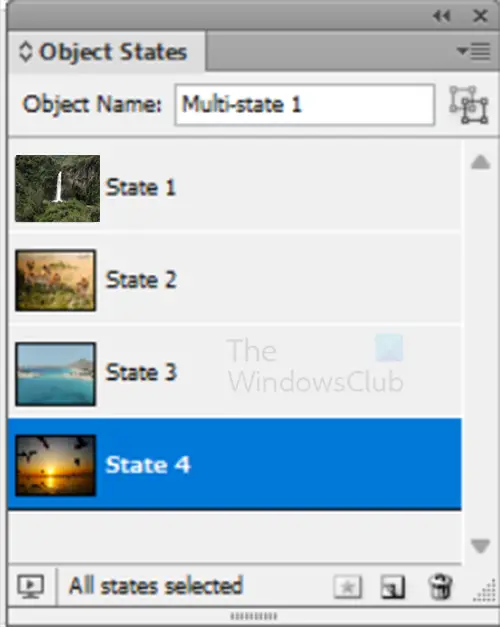
You will see the videos added to the Object states window, given name State 1, and so on.
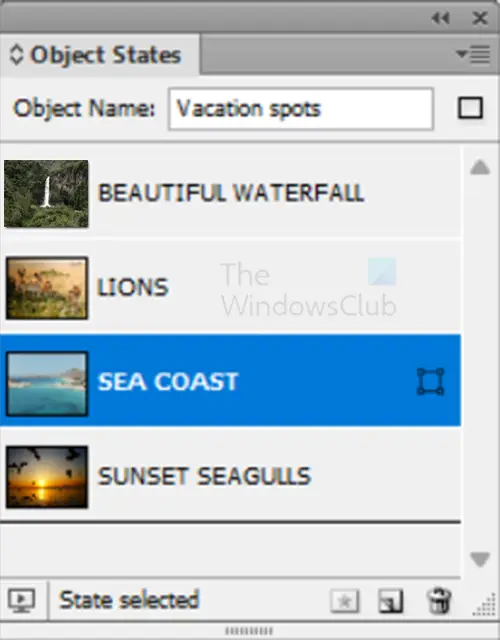
Change the names to reflect the names of the thumbnails that you created. This will make them easier to link to the buttons that you created at each thumbnail. You will also name the Object name group t a descriptive name. This is added at the top of the Object States window.
11] Convert captions to multi-state objects
You will also want to convert the caption to multi-state objects. This will allow them to be added to the slides and pop up when the buttons are activated. The steps are the same as above when making the videos multi-state objects.
Remember that you will stack the captions in the order that you want them to appear corresponding to the buttons and videos. When they are in order you would select all of them then go to the top menu and click Align Vertical Centre and Align Horizontal Centre. If the captions are not in order, you can always drag them in order in the Object states window. You should also name the states so that they are easy to identify.
Make the caption Hidden until triggered
The difference that you will have when making the caption a multi-state object is that you will make the caption load only when triggered.
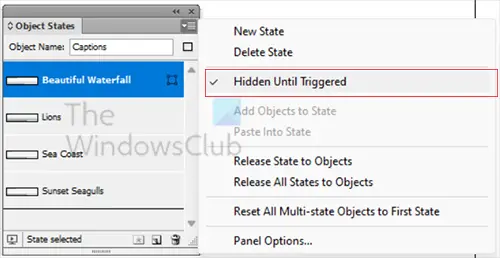
To do this click the menu button on the Object states window and click Hidden until triggered. You will click each state and do this.
12] Make the buttons interactive
Read: How to make an interactive Slideshow Presentation in InDesign
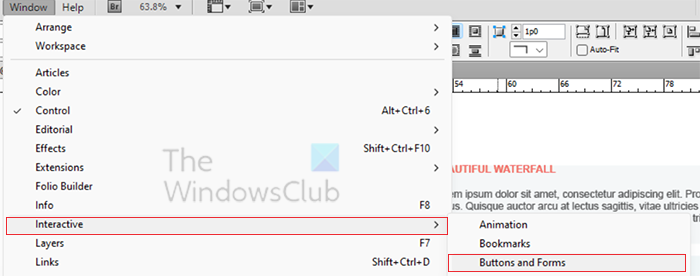
To make the buttons interactive so that they skip to the corresponding video go to the top menu and press Window then Interactive then Buttons and forms.
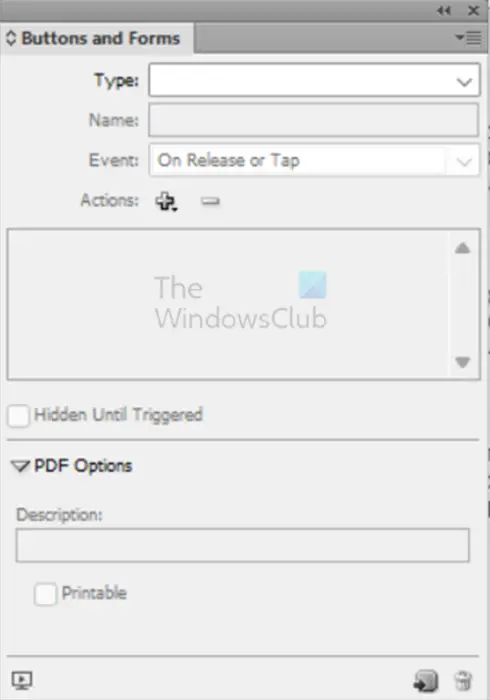
The Buttons and forms options window will appear. Click on each button and change the type to Button. You will give the button a descriptive name. Leave the Event as on Release or Tap. Click Plus (+) icon at Actions and when the drop-down menu appears click Video. in the Videos box look for the video that corresponds with that button and select it.
Add animation to the buttons
You can add an interactive animation to the button by changing the appearance when it is rolled over or clicked. Go to Appearance and click Roll over then double-click on the button. You can then right-click on the button and choose Effect then Transparency and increase the transparency to make the button brighter when it is rolled over. You can also choose to change the color of the button when it is rolled over.
Follow the steps above to make all the buttons interactive and link to their respective videos. You can follow the same step to create a button that pause or stop the videos. Just create the button then link them to the respective videos and change the action to Stop or Pause instead of Play.
13] Add animation to captions
You can add animation to the captions to make them do various things when they are loaded. In this article, a simple fade-in will be added when the caption is loaded.
To do this go to Window the Animation then Animation.
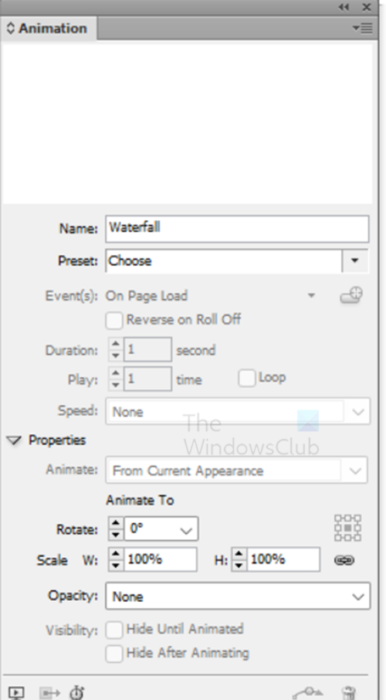
The Animation panel will appear if it was not already loaded.
Go to the Object states for the captions and click on each. You will double-click on each caption and in the Animation panel click Preset and choose Fade in or whatever animation you want. Make sure that the Event(s) is set to On state load and not on Page load. Change the duration of the animation to 0.5. do this for each state of the caption in the Object states panel.
14] Make the captions change when the button is pressed
The captions should correspond with each video that they represent. With the captions in order and aligned, select all of them and place them at the bottom of the video. You will just need to place them on one video and they will be triggered on their respective video when the button is pressed.
Add captions to previously created buttons
You will need to go to the buttons created previously then go to the Forms and buttons panel and add the captions to the buttons. You will just add them to the corresponding buttons. This will allow them to show when you press the buttons to play the corresponding video.
To do this go to the Buttons and forms panel. Click each button that you want to add the corresponding caption to. will see that an action is there already assigned to each button. Click the Plus (+) icon and from the menu click Go to state. You will change the object to Caption or whatever you named the group with the captions. You will then choose the corresponding caption under State.
Important note
In the Buttons and forms panel make the action for the captain above the action for the video. Since you created the action for the caption last, it will automatically be added to the bottom. Just click the action for the caption and drag it to the top above the action for the video.
15] Preview and publish
As you work on the file you can preview it to see if it works, when you make the images and captions multi-state objects you can click the play button at the bottom of the Buttons and forms, Object states, or Animations panel, and you will be able to preview and see the buttons work. To publish online, you can click the Share button at the top of the window in newer versions of InDesign. This will load the document in your browser so you can view it online.
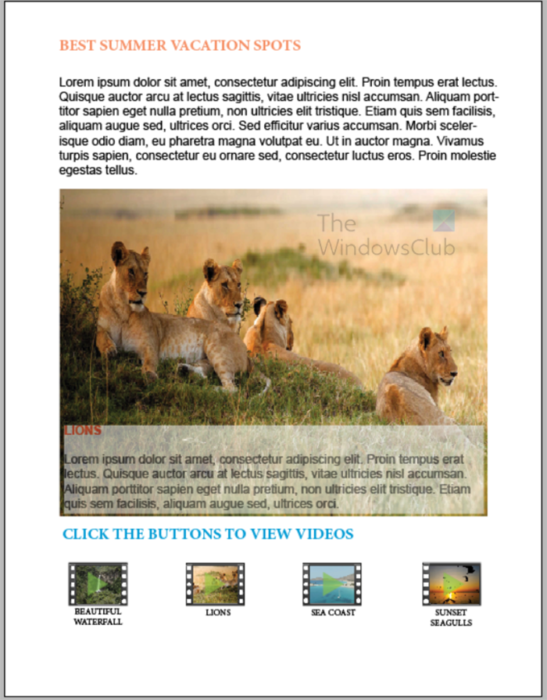
Complete Video slide showing one of the 4 slides created.
Read: How to Package and Zip InDesign files
How do I animate in InDesign?
You can animate objects in InDesign and it is quite simple. Go to the top menu and click Window then Interactive then Animate. The animation panel will open. Click on the object that you want to animate and go to the panel and choose the preset action that you want, you then choose the duration that you want for the animation. You would also choose at what point you want the animation to load. If you want you can create buttons that would control when the animation start.
How do you go into presentation mode in InDesign?
When you create in InDesign you normally have guides and lines in the document. these are normally there to help you with the layout. These guides and lines are not suitable if you want to present. If you want to make the document look clean if you want to present straight from InDesign you can simply press W. This will remove everything from the screen except your work. You can then press W to bring back all the guides and lines.
Leave a Reply